I like mountains that can be approached by car up to the peak. However, there aren't that many mountains that can be reached by car. However, I tried out the ultra-wide-angle lens "Tokina atx-m 11-18mm F2.8 E" on Mt. Kamui, where you can drive to the peak and enjoy the sea of clouds, so I'd like to share my experience
table of contents
What is the Tokina atx-m 11-18mm F2.8 E?

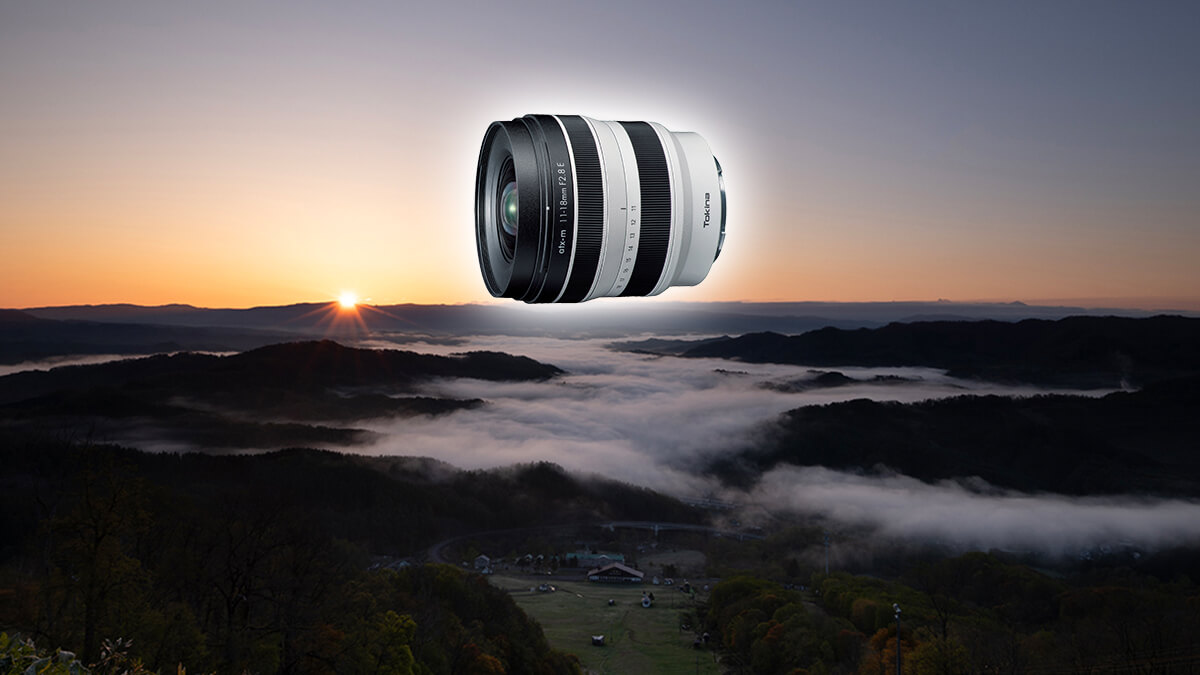
The Tokina atx-m 11-18mm F2.8 E is a wide-angle zoom lens equivalent to 16.5mm, with a maximum diameter of approximately 74.4mm, a total length of approximately 74.1mm, and a weight of approximately 335g, making it small and lightweight
A bright APS-C lens covering the equivalent of 16.5mm to 27mm
Do you have a wide-angle zoom lens? Many people buy a standard zoom lens when they get a camera, but it seems that many people don't actually have a wide-angle zoom lens
When taking photos in outdoor fields, wide-angle zooms are a standard lens category, as they excel at capturing expansive landscapes. However, the insides of camper vans, tents, and mountain huts are quite small, so a standard zoom lens can be difficult to use due to the narrow angle of view
This is where you want a wide-angle zoom starting from around 16mm at the wide-angle end, but when shooting outdoors, the shooting scene is surprisingly dark except during the day, so you want a fast lens (a small number like Fxx in the case of a camera lens). However, bright 35mm full-frame lenses with a aperture of F2.8 throughout the zoom range are expensive, large, and often heavy, making them difficult to recommend for people who take photos as part of enjoying the outdoors rather than as their main hobby
However, I've been using APS-C wide-angle zoom lenses a lot recently, and because they're bright, compact, and reasonably priced, I think they're highly recommended even for people who don't prioritize photography. Incidentally, the Tokina atx-m 11-18mm F2.8 E, which is compatible with Sony E-mount and is introduced here, has a market price of around 54,000 yen. Even though prices have been rising recently, this lens offers excellent value for money
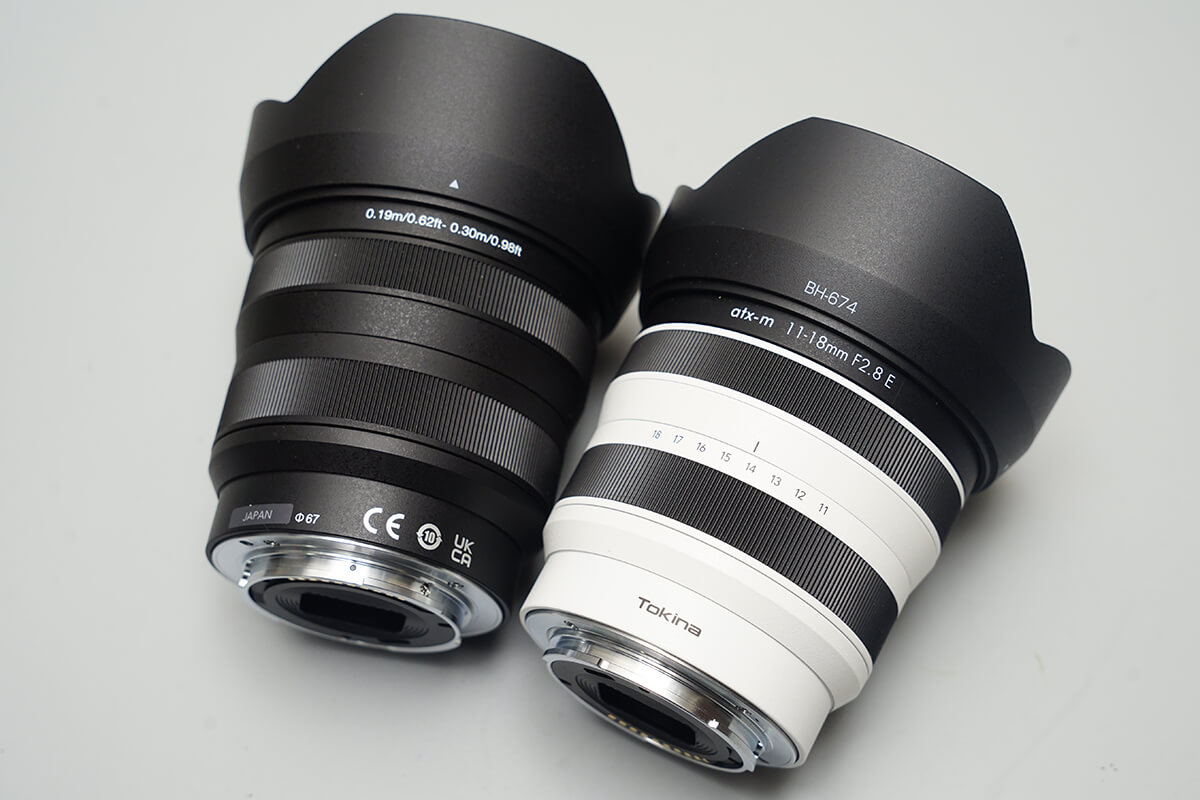
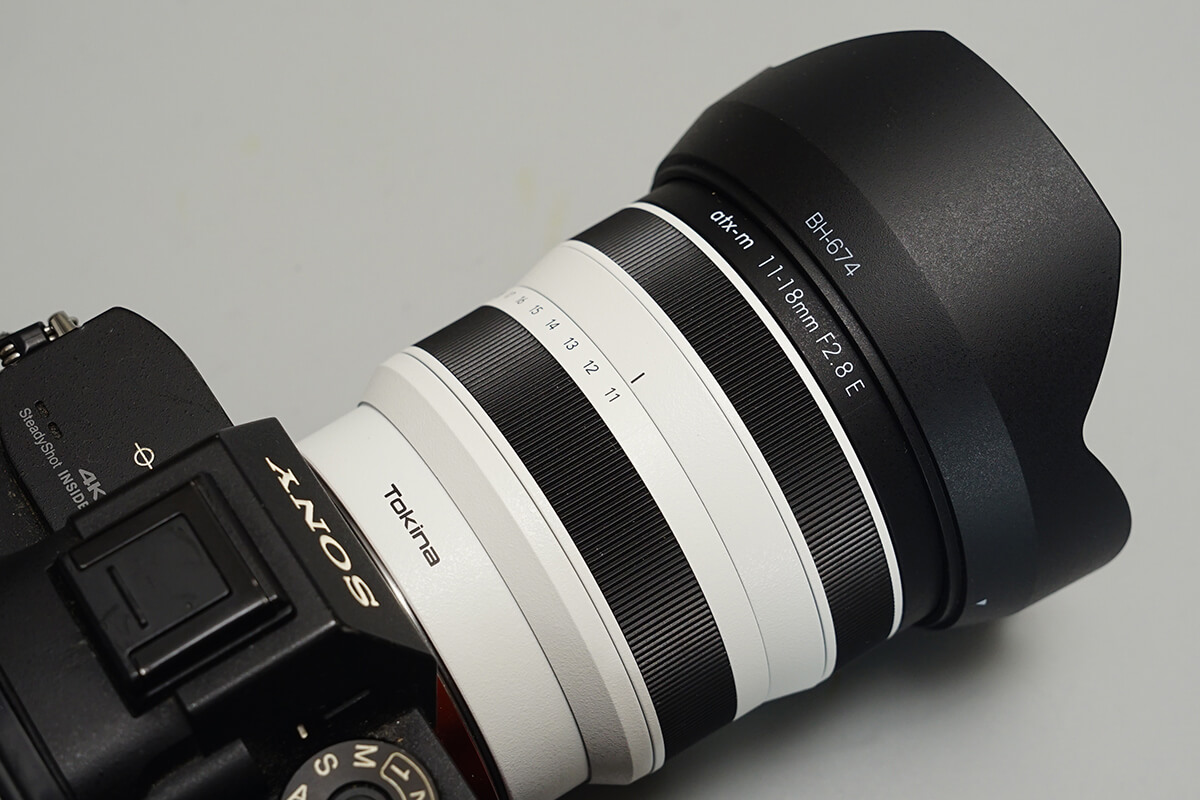
My favorite is the white model of the Tokina atx-m 11-18mm F2.8 E, but it is also available in the standard black color
The Tokina atx-m 11-18mm F2.8 E for APS-C cameras has a focal length of 11mm to 18mm, which covers an angle of view equivalent to 16.5mm to 27mm in 35mm format. Furthermore, the brightness is F2.8 throughout the entire zoom range. Since the same F2.8 is also common in high-end professional zoom lenses, you can shoot with the same brightness as professional and advanced amateur zoom lenses
Some may be concerned that a lens with the same brightness as a professional zoom lens would be cost-effective, but also heavy and bulky. However, the Tokina ATX-M 11-18mm F2.8 E is lightweight and compact, measuring approximately 74.4mm in maximum diameter, 74.1mm in total length, and weighing approximately 335g, making it easy to carry around outdoors and even on mountain climbs. Incidentally, I created the e-book "Tokina ATX-M 11-18mm F2.8 E Lens Database," which thoroughly analyzes the Tokina ATX-M 11-18mm F2.8 E . It demonstrates performance that's hard to believe for a lens priced in the low 50,000 yen range. This high performance, in addition to its price, is the reason I can confidently recommend the Tokina ATX-M 11-18mm F2.8 E to so many people.
Another reason I like and carry the Tokina atx-m 11-18mm F2.8 E is that in addition to the standard black model, you can choose the white model with a white lens barrel, as shown in the photo. I took the white model Tokina atx-m 11-18mm F2.8 E, which has a strong image of being a high-performance telephoto lens, and went to photograph the spring sunrise and sea of clouds from the summit of Mt. Kamui, so I'd like to share what I saw
Recommended points
- A bright wide-angle zoom with an F2.8 aperture, yet reasonably priced
- A rare white model is available for a wide-angle zoom lens
- A wide-angle zoom starting from 16.5mm equivalent that can capture vast landscapes as they are
- When stopped down tight, the image is very sharp even at the edges
- Solidly MADE IN JAPAN manufactured in Japan
Points of interest
- The AF/MF switch is not located on the lens body
Main specifications and evaluation
| item | Tokina atx-m 11-18mm F2.8 E |
|---|---|
| focal length | 11-18mm |
| Brightness | F2.8 |
| format | APS-C |
| Minimum aperture | F22 |
| Lens construction | 13 elements in 11 groups |
| coating | Multi-coating |
| Angle of view | 104.3°~76.7° |
| Focusing Method | Inner Focus |
| Filter Size | 67mm |
| Minimum focusing distance | 0.19m/0.3m |
| Macro Maximum Magnification | 1:9.2/1:12.4 |
| Number of aperture blades | 9 sheets |
| Maximum diameter | Φ74.4mm |
| full length | 74.1mm |
| weight | 335g |
| Wide angle of view | ★★★★☆ |
| design | ★★★★☆ |
| Resolution | ★★★★☆ |
| Portability | ★★★★☆ |
| Low aberration | ★★★★☆ |
| Backlight performance | ★★★★☆ |
| Cost performance | ★★★★★ |
"Tokina atx-m 11-18mm F2.8 E" and the reason why I went to Mt. Kamui in spring
In spring in Hokkaido, bears are a real threat, and it's as cold as mid-winter in Tokyo

I know of several mountains where you can drive to the summit, but it's rare to find a spot where you can park your car at the exact photo spot
Some people might think I'm being lazy when I say I like mountains whose summits can be reached by car. However, in Hokkaido, where I live, I need to visit the great outdoors where I can see vast landscapes in order to take photos, at the most photogenic time of day, either before sunrise or just before sunset. Also, if I want to photograph a beautiful starry sky, I need to be willing to go into darkness so dark that I can't even see my hands
In Hokkaido, where the number of brown bears captured has tripled over the past 10 years, caution is needed to avoid encountering a brown bear, especially in the early morning, at dusk, and at night. People are urged to avoid traveling alone, as the chances of survival are significantly lower in the unlikely event of an accident involving a single bear. However, in order to take photographs, I usually go out alone into the great outdoors, calculating the time of day to avoid the influence of moonlight, such as before dawn or at dusk
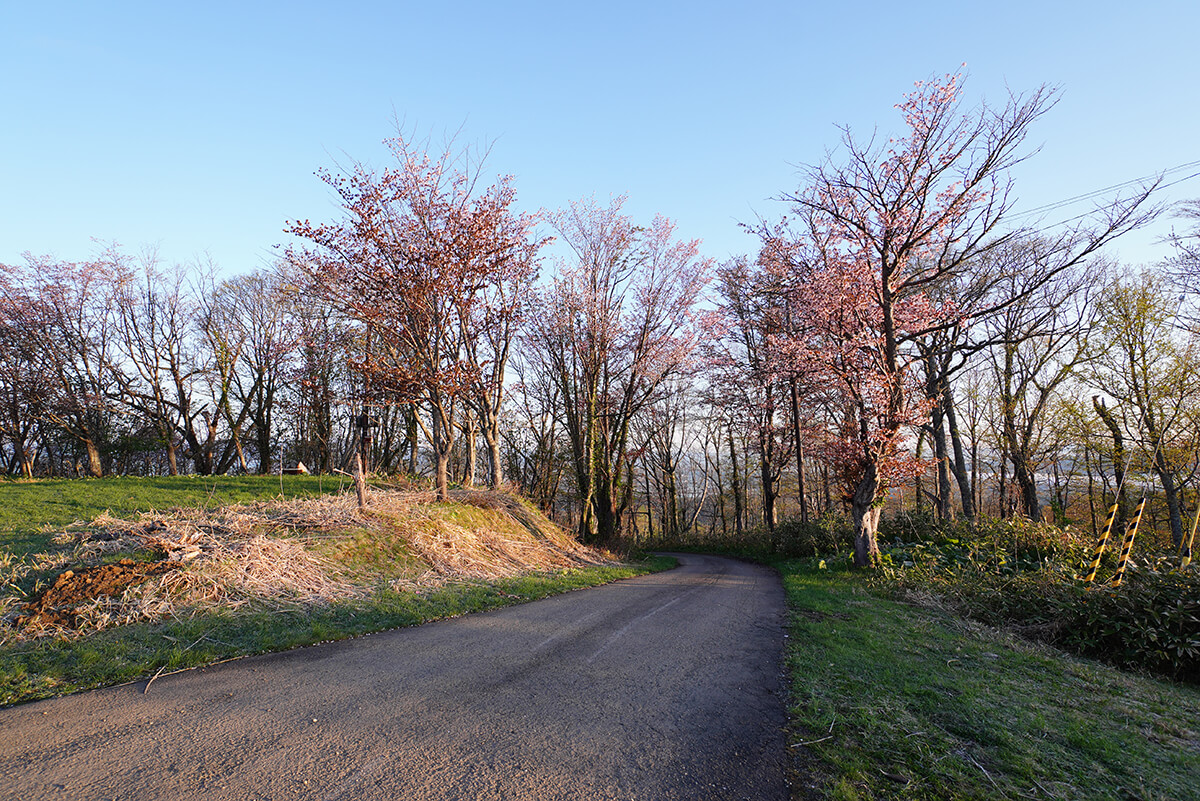
The road is not wide, but it is well paved all the way to the summit. It is closed in winter, but once the snow melts it is possible to reach the summit at night
Furthermore, late at night and before dawn are the coldest times of the day. And Hokkaido is cold. To give you an idea of how cold it is, Mount Kamui in Utashinai City, where I went to take photos, is in the Sorachi region, where the average daily minimum temperature in April is -1.5°C, and even in May it's 4.6°C
If you want to photograph the dawn scenery from near the summit, you have to wait for the sunrise in the pitch black mountains where a brown bear could appear at any moment, enduring cold temperatures worse than mid-winter in Tokyo. Under these conditions, it's normal for anyone, even someone like me, to want to drive to the shooting location if possible
It's one thing if you're traveling alone to take photos, but if you're traveling with small children or family, it's not practical in a sense unless you can get there by car. That's why my favorite photo spot is the summit of Mt. Kamui in Utashinai City. You can reach the summit from New Chitose Airport in about 1 hour and 50 minutes by car. The route is so easy to find on Google Maps that it's extremely convenient
It's a 15-minute drive to the roadside station, and you can enjoy the sunrise at Mt. Kamui after taking photos
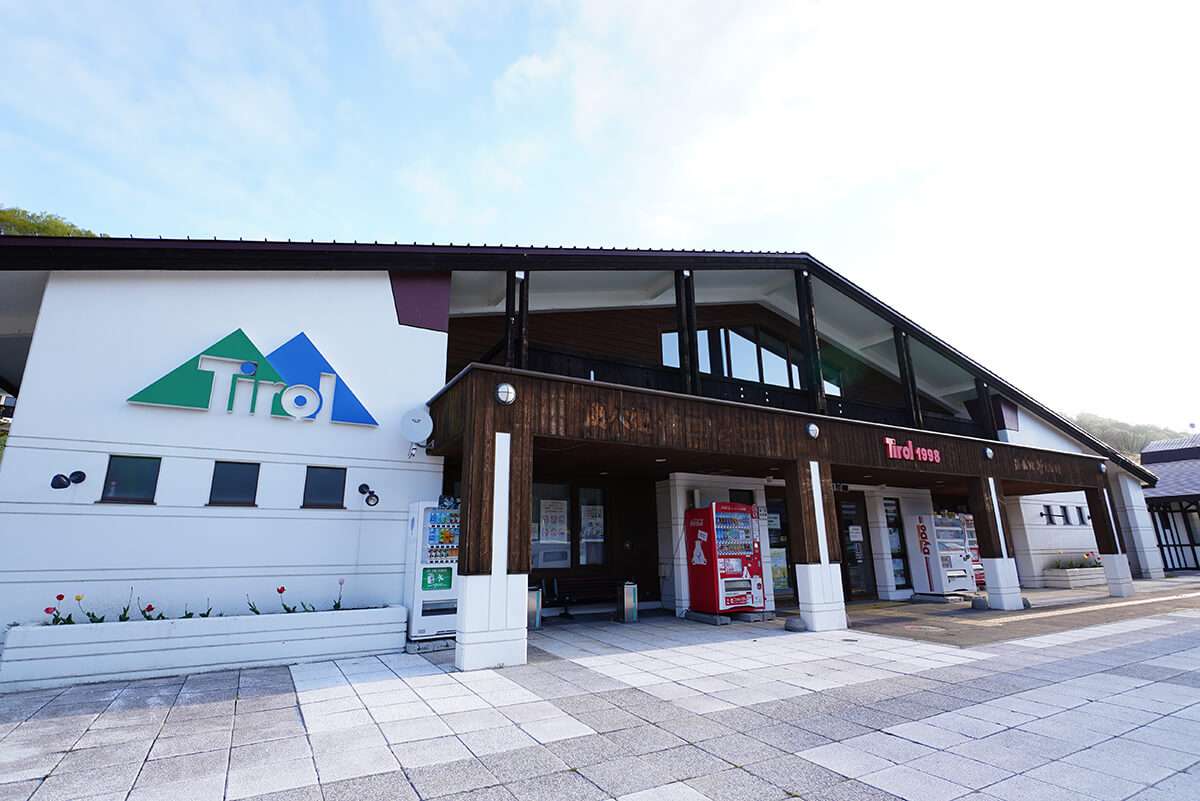
Just a 15-minute drive from the summit of Mt. Kamui is the roadside station "Utashinai Tirol no Yu." It's great that it's fully equipped with not only a parking lot, but also toilets and vending machines
If you search for the summit of Mt. Kamui on Google Maps, you'll see it listed as Kamui-dake West Unkai Terrace, where there's a high probability of a sea of clouds appearing in spring and autumn. There's also a large parking space and observation deck near the summit, making it possible to view the sunrise over the sea of clouds directly from your car window, protecting you from the cold, and since you don't have to stray too far from the car when taking photos, there's less risk of encountering wild animals. No matter how hard you look, it's rare to find such a spectacular view with such favorable conditions. What's more, the road to the summit, although narrow, is paved and free of charge
To capture this magnificent landscape, I set out with the wide-angle zoom lens, the Tokina atx-m 11-18mm F2.8 E. Even in May, sunrise in Utashinai City occurs around 4 a.m., so I plan to arrive at the summit an hour before sunrise. It's also a good idea the astronomical observation times for sunrise, moonrise, and twilight, and start photographing the starry sky even earlier. While photographing the starry sky, I noticed that the Tokina atx-m 11-18mm F2.8 E doesn't have an AF/MF switch on the lens itself. While I don't normally notice it, I found it more convenient to have a physical AF/MF switch when shooting in the dark.
Another big reason why I like Mt. Kamui for photographing the sunrise over the sea of clouds is that it's only a 15-minute drive to the roadside station "Utashinai Tirol no Yu," where you can even take a nap. In Hokkaido, it's not uncommon for a spectacular photo spot to be tens of kilometers away from a parking lot equipped with toilets and washrooms, so it's rare to find a roadside station just 15 minutes away from the summit
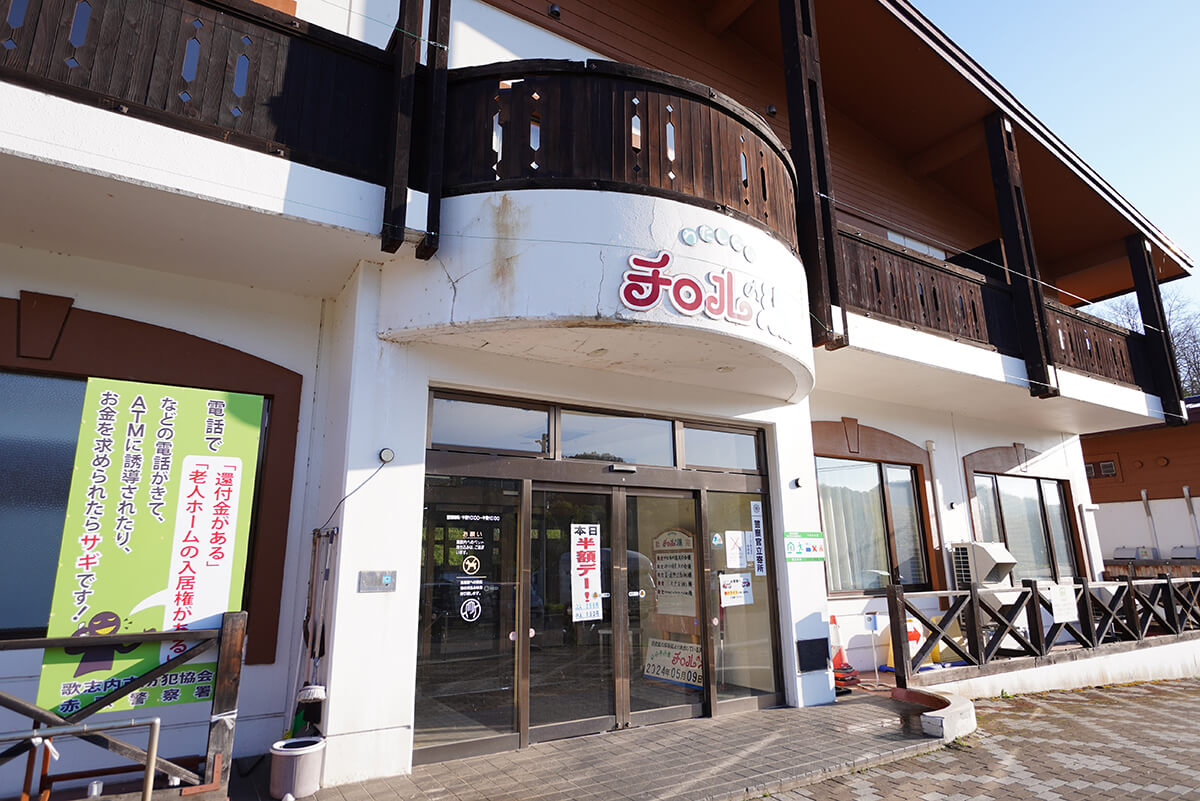
Whenever I photograph the sunrise from the summit of Mt. Kamui, I always stop by the morning bath at Utashinai Onsen Tyrol no Yu. It's a great way to start the day after a quick bath
The summit of Mt. Kamui is an extremely blessed location for taking pictures of spectacular views, but what I actually look forward to is the morning bath after photographing the sunrise. The roadside station "Utashinai Tyrol no Yu" and the adjacent " Utashinai Onsen Tyrol no Yu " are open for morning bathing from 6am. What's more, the price is very reasonable at just 500 yen for adults and 300 yen for children. If you come to photograph the sunrise at Mt. Kamui, be sure to stop by the hot springs as well.
A great spot to photograph the sunrise over the sea of clouds from Mt. Kamui
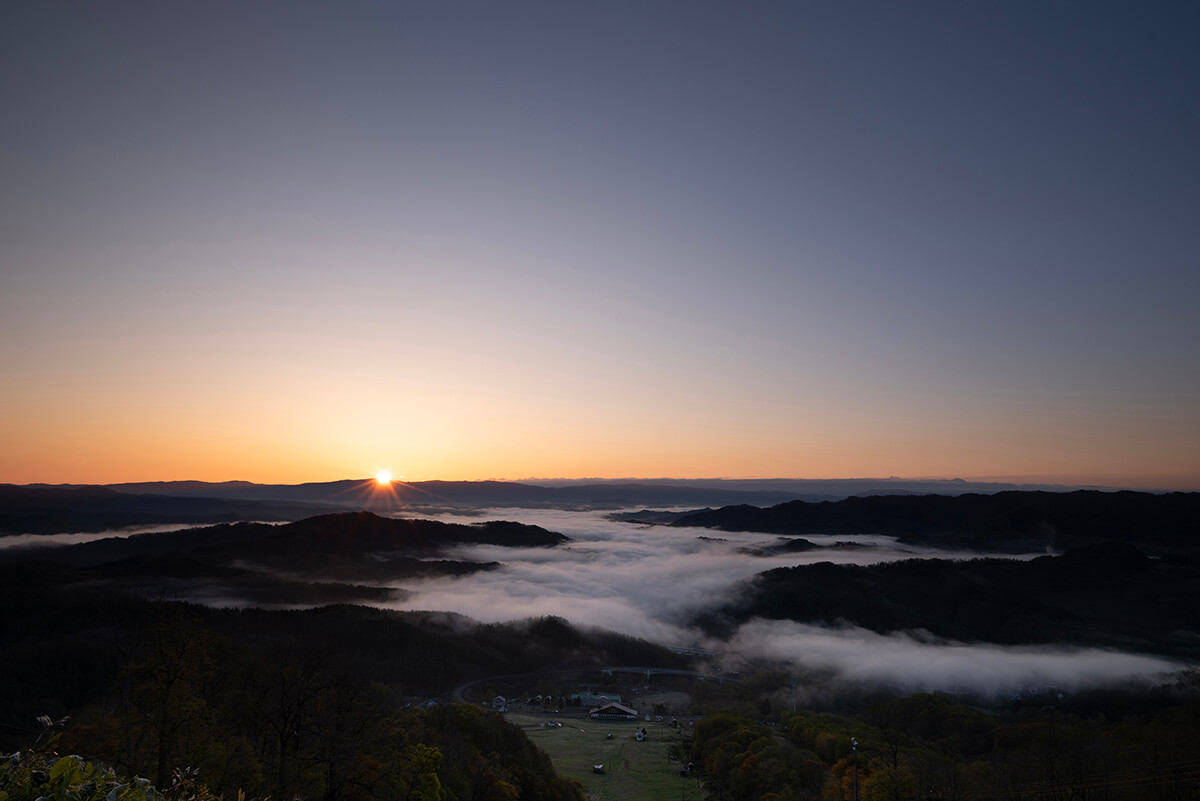
Tokina atx-m 11-18mm F2.8 / Sony α7R III / 24mm equivalent / Aperture priority AE (F5.6, 1/13 sec) / ISO 100 / WB: Sunny / Creative style: Vivid /
The camera was firmly fixed on a tripod and a Cokin NX series GND filter was used to control the brightness difference across the entire screen.
When you come across a beautiful morning, how do you photograph it? Many people will immediately use their smartphone. However, here we will introduce some tips for photographing with an interchangeable lens camera. I generally believe that the most dramatic time of the day is just before and after sunrise, and as someone who loves photographing sunrises, I pay attention to the following five points
- Use a tripod to ensure it is level
- White balance is set to "sunny" or "daylight"
- Wide-angle zoom captures wide landscapes as they are
- Adjust the brightness by adjusting the exposure compensation
- Select the best aperture for each lens
- Plus: Control brightness differences with a gradient ND filter
If you are taking photos of the sunrise, you will not be able to set up your camera properly unless you arrive before sunrise, so we recommend arriving at least one hour before sunrise if possible and starting to set up your camera
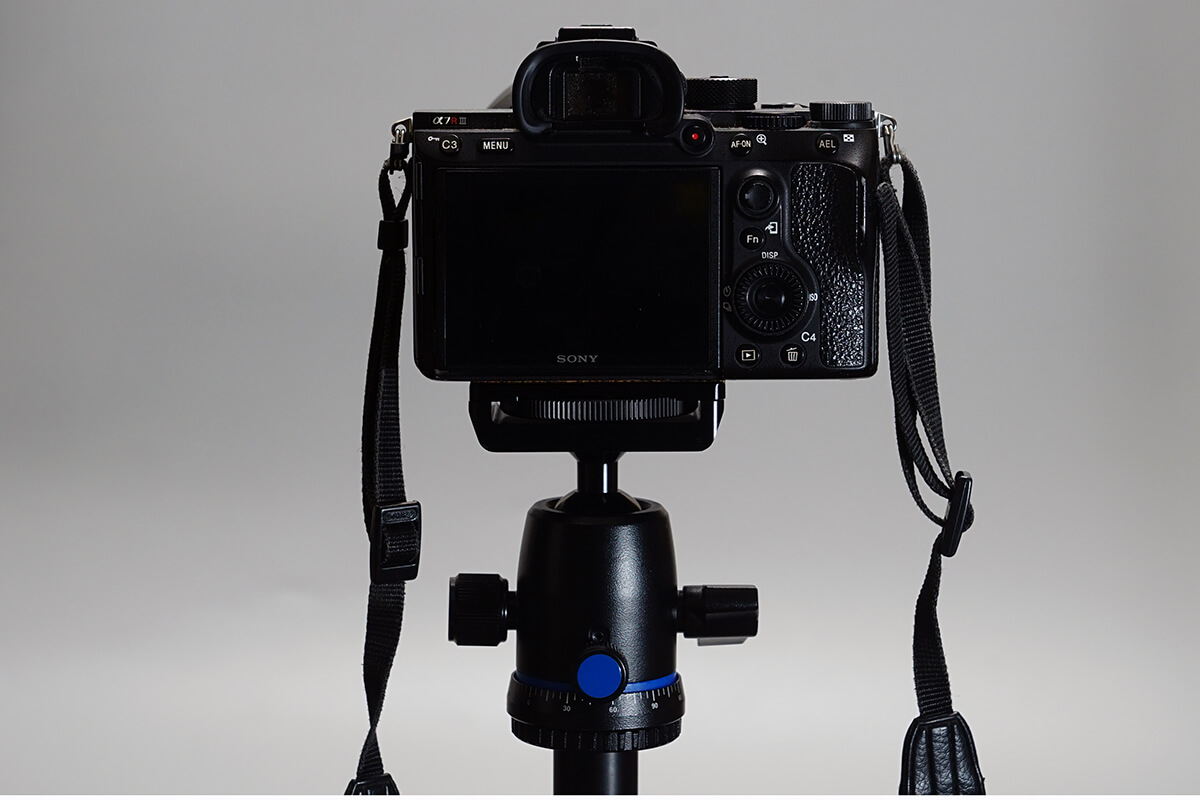
Some people find it troublesome to use a tripod, but when photographing the sunrise, it is much easier to use a tripod than to hold the camera by hand and wait for the best time
And although everyone thinks it's obvious, the camera's level is something that can be surprisingly off. When the sun appears on the horizon, even a slight misalignment can be even more noticeable than when the sun appears on the edge of a mountain, so we recommend using a tripod to ensure it's level. Many modern digital cameras are equipped with an electronic level, so it's a good idea to use this in conjunction with the camera to ensure there's no tilt to the left or right. Even a tilt of around 0.5 degrees can be very noticeable when you look at the photo later, so you need to be careful
The key to capturing sunrises and sunsets in a way that looks like they're real is color. And while many people typically select AWB (auto white balance) when shooting with a digital camera, this setting alone doesn't reproduce the reds that are characteristic of sunrises and sunsets. So, to capture sunrises and sunsets you see in real life as close as possible to the impression you had at the time, we recommend using the white balance settings "daylight" or "clear." The names for these settings vary slightly depending on the manufacturer, but simply selecting these will emphasize the reds in the sunrise or sunset
A wide-angle zoom lens is very useful outdoors, whether you want to capture magnificent scenery as it is or take pictures inside a surprisingly small space such as a tent or a camper van
Naturally, this will vary slightly depending on the shooting location, but if you're photographing a sunrise in the midst of majestic nature, like the one I shot from the summit of Mount Kamui, I recommend a wide-angle lens. Ideally, I recommend a wide-angle zoom lens like the Tokina atx-m 11-18mm F2.8 E I used this time. The reason is that capturing a wide field of view emphasizes the vastness of the scene, but if the field of view is too wide, unnecessary elements may appear in the frame. A zoom lens is convenient in such cases, as it allows you to fine-tune the field of view. Also, since sunrise and sunset photography typically requires completely backlit conditions, a Japanese-made lens like the heavily multi-coated Tokina atx-m 11-18mm F2.8 E offers peace of mind
The reason I recommend using a tripod when photographing sunrises and sunsets is not only to ensure levelness, but also because you'll want to be able to take photos with varying brightness levels using exposure compensation. Most interchangeable lens cameras have an exposure compensation function, which can often be adjusted in increments of 0.3 (EV) using a dial or a "+/-" button. With sunrises and sunsets, there's a big difference in brightness between the bright sun and the surrounding scenery, making it difficult to determine the optimal brightness. So, I take multiple photos in the range of about -1.0 (EV) to +1.0 (EV), then check the brightness balance on a computer screen after shooting to select the one with the best brightness
Additionally, I select the aperture (F-number) with the highest resolution for the lens I'm using at the time. To find the best aperture for the lens I'm using, I photograph resolution charts and compile them into an e-book. The results for the Tokina atx-m 11-18mm F2.8 E used in this study are compiled in the Amazon Kindle " Tokina atx-m 11-18mm F2.8 E Lens Database ." The best aperture values were between F5.6 and F8.0 at both the wide-angle and telephoto ends, so I shot at F5.6, which allows for greater depth of field. It's a good idea to find out the best aperture for your favorite lens.
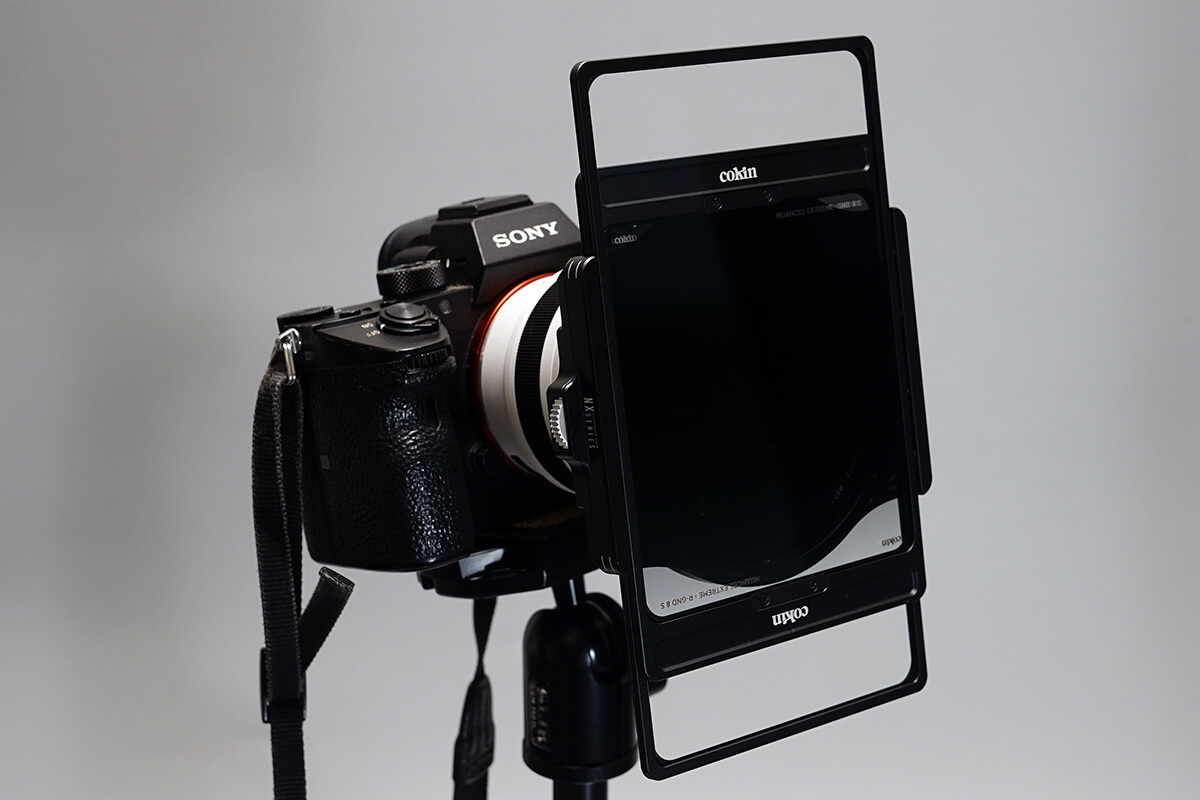
I use the Cokin NX series G (gradient) ND filter when photographing sunrises and sunsets. I plan to explain the details in a future article
Taking these factors into consideration, I used a tripod, carefully framed the image, and posted the best photo I could find, using aperture-priority AE, sunlight, 16mm, no exposure compensation, and f/5.6. However, some of you may have noticed something odd about this photo. In fact, the photo I ultimately selected as my best doesn't overexpose the rising sun, and the scenery at the foot of the mountain beneath the sea of clouds isn't crushed black either. A normal photo wouldn't turn out like this. To achieve this, I used a somewhat unusual filter called the G (gradient) ND filter from the Cokin NX series. I plan to introduce this filter separately in a future OUTDOOR GEARZINE article, so I've included it as an added bonus for now. It's a somewhat complex filter, but mastering it can dramatically enhance your sunrise and sunset photography
Summary: The summit of Mt. Kamui is a great spot to easily see the sunrise over a sea of clouds
Lightweight, high-performance, and cost-effective "Tokina atx-m 11-18mm F2.8 E"

From the top of Mt. Kamui, you can enjoy a spectacular view of the sea of clouds spreading out below you from the car window. You don't have to leave the car to take photos, so it's a safe experience in many ways
Recently, I took my favorite Sony E-mount APS-C wide-angle zoom lens, the Tokina atx-m 11-18mm F2.8 E, and headed to the summit of Mt. Kamui, where you can still drive to the top of the mountain and enjoy a spectacular view of the sunrise and sea of clouds, even in spring in Hokkaido, where it's as cold as mid-winter in Tokyo and brown bears could appear anywhere
I visited in the first half of May, and once again, the sea of clouds appeared, allowing me to take some beautiful photos. Since I was able to capture the sunrise over the sea of clouds on my previous visits and the time before that, it's safe to say that there's a good chance you'll be able to see the sea of clouds at sunrise from the summit of Mt. Kamui
The Tokina atx-m 11-18mm F2.8 E delivers high resolution when stopped down to F8.0, even when photographing the morning sun, and I could clearly see that it is also resistant to backlight. Personally, I'm also pleased with the market price of just under 50,000 yen, which makes it easy to recommend to friends and acquaintances
Also, after photographing the sunrise over the sea of clouds at Mt. Kamui, we stopped off for a morning bath at Utashinai Onsen Tyrol no Yu, which has become a staple in our household. It was half-price day, so the bathing fee was only 250 yen, which felt incredibly lucky right from the start. Mt. Kamui is about an hour and 50 minutes by car from New Chitose Airport, or about an hour and a half from Sapporo city. If you're driving a camper or sleeping in your car, head there the night before. Waking up to a spectacular view of the sea of clouds and a morning bath makes it a great spot to start your trip in luxury, so why not drop by if you're traveling to Hokkaido? Highly recommended
Details and purchase of the Tokina atx-m 11-18mm F2.8 E
For more product details, please visit the Kenko Tokina official website
Please consider a paid membership to support the site while enjoying exclusive offers and content!
Chitose Saito


Related reading