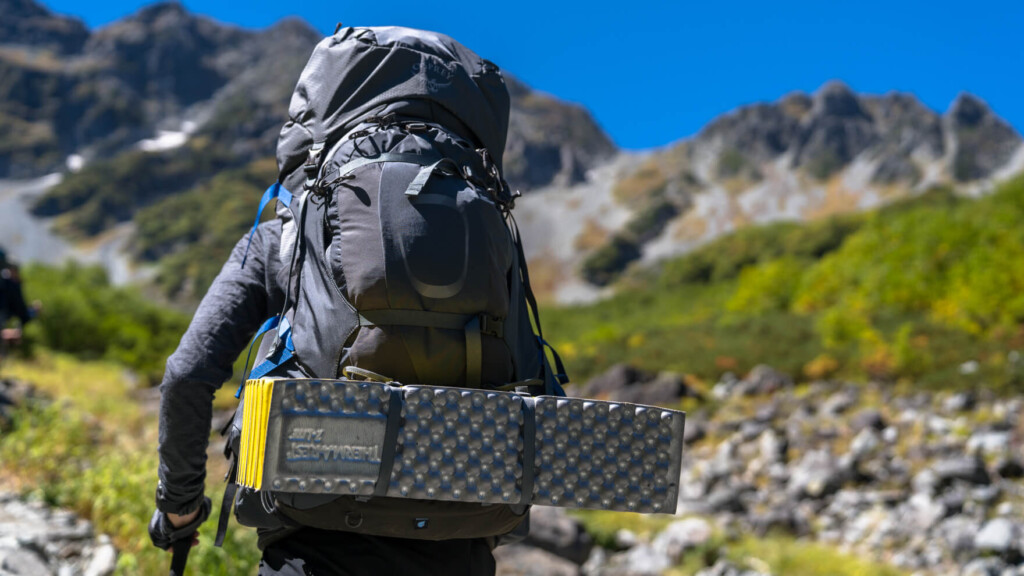
Mountaineering and hiking are activities in which you head to your destination carrying all the equipment and food necessary for the activity (i.e., daily life). In that sense, it goes without saying that a backpack is one of the most important items for carrying your belongings. Along with the history of mountaineering, which has seen people seek higher and more difficult challenges, backpacks have developed over the years to allow people to carry large amounts of luggage safely and comfortably in harsh environments
Backpacks have continued to evolve in this way, and now there are countless models available with different capacities, sizes, functions (purposes), etc. In addition to this complexity, choosing a backpack is difficult because it's hard to know its true capabilities until you actually try it on. What a shame when you find that the backpack you've carefully selected isn't as good as you expected when you actually try it out, or even that it causes strange pain!
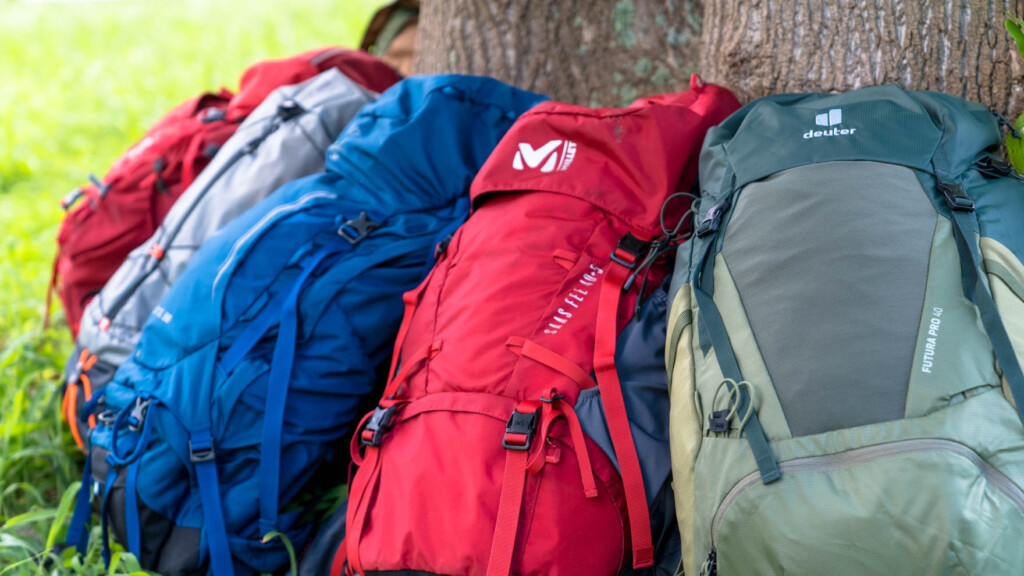
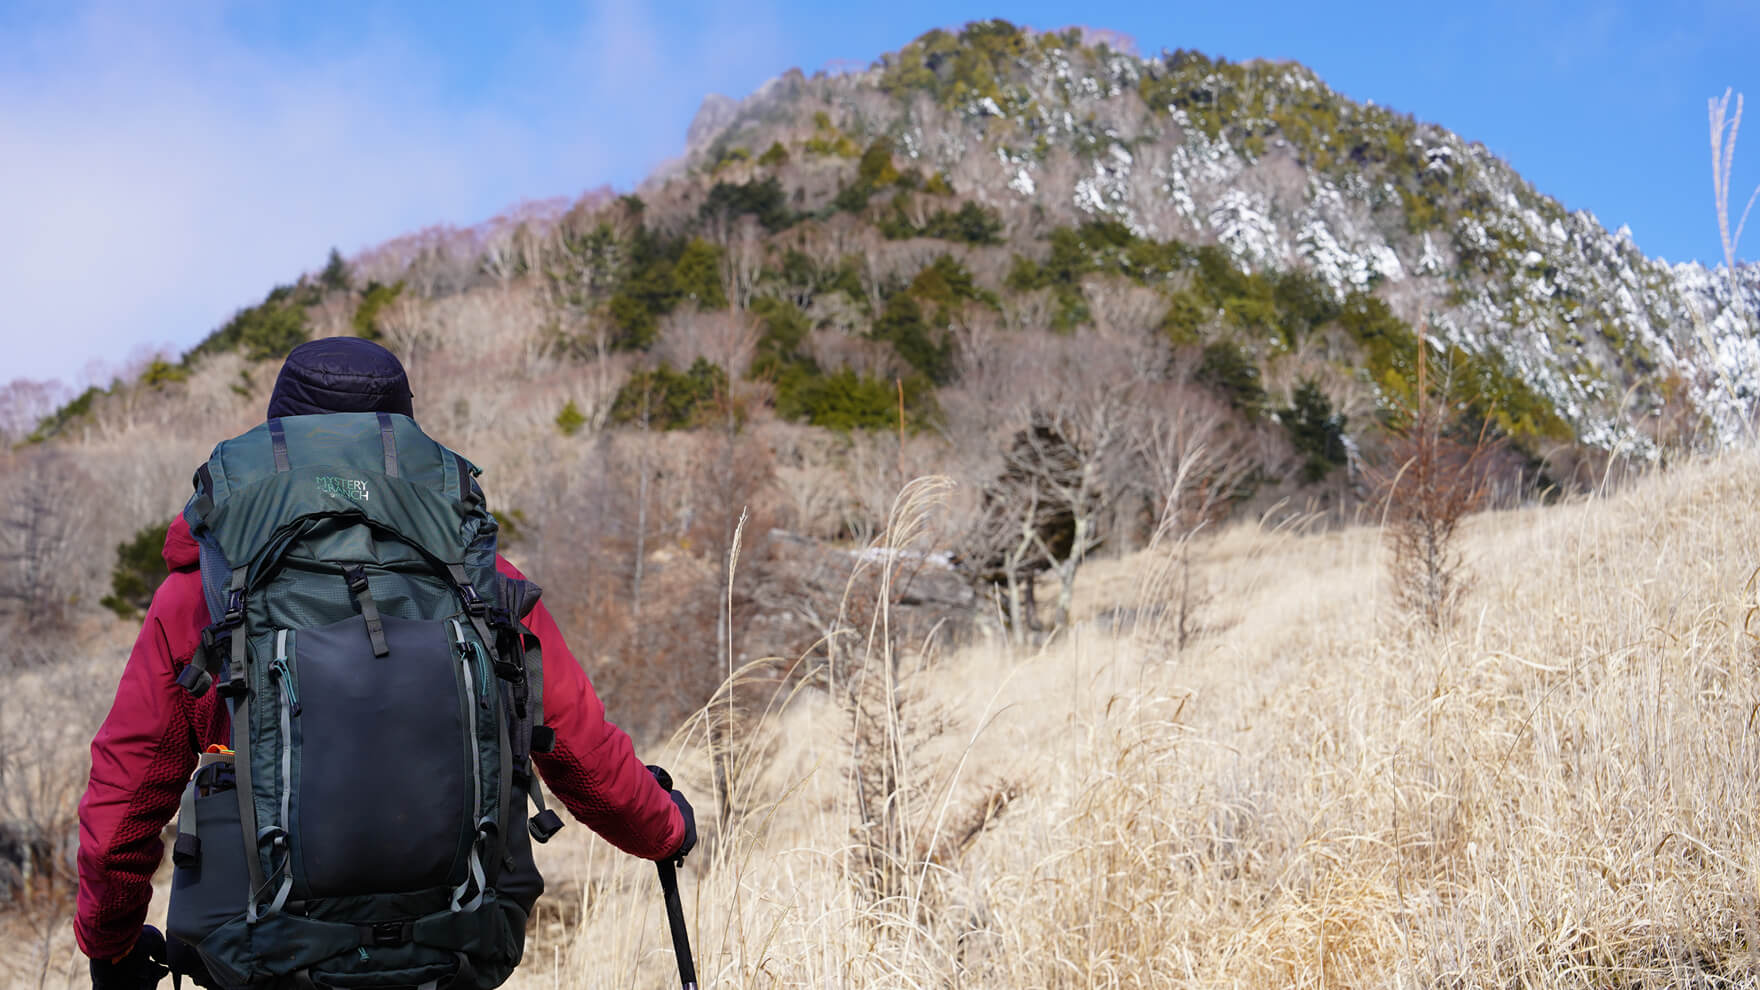
So this time, we've carefully selected the best mid-size backpacks (30-49 liters) for hiking and mountain climbing, especially recommended for beginners, based on your purpose and preferences, and chosen the best models for this season
In the second half of the article, we've compiled some useful tips for choosing the perfect hiking backpack for you. We hope this will help you find the perfect backpack for you without being confused by the names of the backpacks lined up on the store walls


table of contents
- Best Weekend Climbing Backpacks (30-49 Liters)
- Best Balance (recommended for beginners): GREGORY ZULU 35 / MILLET SAAS-FEE NX 30+5 / Osprey Kestrel 38
- Best Lightweight Backpack: MAMMUT Ducan 30 / macpac Hesper 40
- Best Value for Money: Millet Welkin 30 / VAUDE Brenta 30
- Best Back Ventilation Pack: Osprey Stratos 36 / Thule Topio 30
- Best Toughness & Comfort: Deuter AirContact Lite 40+10
- Best Storage & Packing: MYSTERYRANCH Bridger 45
- How to Choose a Backpack for Mountaineering: 7 Tips for Choosing the Right Backpack for Mountaineering and Hiking
- Tip 1: Choose the size that fits your body
- Point 2: Choose the type and structure of the backpack that best suits your purpose
- Point 3: Choose the right capacity
- Point 4: Choose a weight that balances durability and comfort
- Tip 5: Choose the right cushioning and support
- Tip 6: Choose storage that's easy to pack
- Point 7: Other useful parts and features
- summary
Best Weekend Climbing Backpacks (30-49 Liters)
Best Balance (recommended for beginners): GREGORY ZULU 35 / MILLET SAAS-FEE NX 30+5 / Osprey Kestrel 38
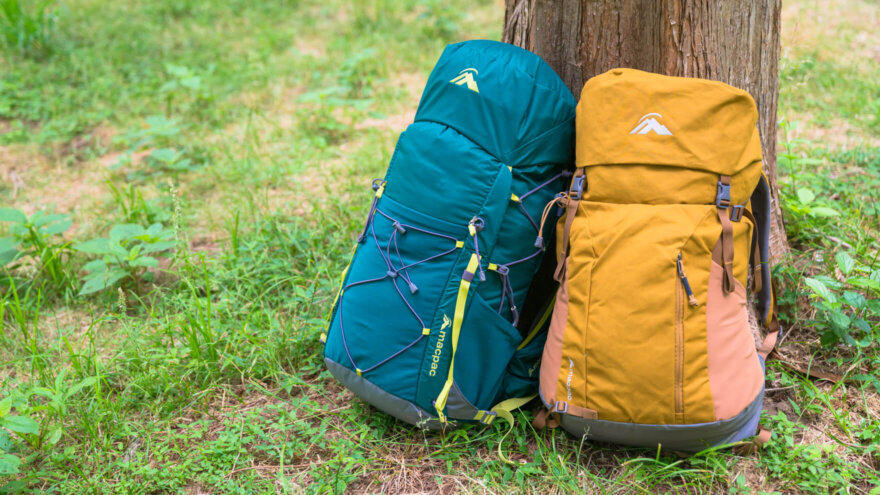
While there are a wide variety of backpacks available to suit different seasons, activities, and preferences, these four are especially recommended this season as the most versatile and universally suitable models. Their appeal lies in their high level of balance, with few drawbacks across the board, from comfort and lightness to durability and ease of use. They are recommended for all types of mountaineering, from beginners to experienced hikers, for camping, hiking, stream climbing, and variation routes. As all are standard models from long-established backpack manufacturers, they are all built on years of experience and are highly refined, making them a safe choice for beginners. And yet, it's interesting to note that each manufacturer's ideal backpack is subtly different: for example, "Gregory for comfortable carrying," "Millet for comfort, stability, and strength," and "Osprey for ease of use and practicality."
GREGORY Zulu 35
Favorite points
- Tension mesh panel on the back for optimal ventilation
- Excellent fit and comfortable carrying (back ventilation, pack stays on your back and provides excellent load stability)
- Various parts such as buckles, drawcords, and zippers that are easy to use and durable
- Large waist pocket
Related articles
MILLET Saas Fee NX 30+5
Favorite points
- The center of gravity is on the waist, providing excellent stability and a comfortable carrying experience that doesn't cause fatigue
- Back, waist and shoulder pads that combine cushioning and breathability
- Slim, vertical form with the center of gravity easily positioned at the top
- The fabric is so rain-resistant that a backpack cover is not necessary
- Large hip belt pocket and mesh shoulder pocket
Related articles
Osprey Kestrel 38
Favorite points
- Back length adjustment is now easier than ever
- Back structure that balances comfort and lightness
- Convenient and efficient pockets, attachments, and parts designed with the user in mind
Best Lightweight Backpack: MAMMUT Ducan 30 / macpac Hesper 40
These are our recommended standout models for this season, taking on the difficult challenge of achieving the lightest possible weight while maintaining overall balance, all the essential features, and a minimum level of comfort. Both of these selected models are more than the weight of a 500ml water bottle compared to the average backpack. While there are certainly even lighter ultralight hiking backpacks available, they are often expensive, offer limited convenience and comfort, or are difficult to obtain, making them somewhat intimidating for beginners. Despite their light weight, these two models don't compromise on comfort, employing a metal, ventilated back frame that provides a stable and comfortable fit even with heavy loads. While they may not offer a plethora of features, they haven't been overly skimped on, meaning even first-time users won't find them inconvenient
MAMMUT Ducan 30
Favorite points
- A back system that combines stability and breathability
- Durable and lightweight fabric material
- In addition to the basic storage, there is also a small item holder on the shoulder strap, so it is lightweight yet has ample storage capacity
- Rain cover included as standard
macpac Hesper 40
Favorite points
- A lightweight, stable and breathable back system
- Reinforced bottom fabric for reliable durability
- Plenty of external pockets and detachable shoulder harness pockets
Best Value for Money: Millet Welkin 30 / VAUDE Brenta 30
Among the models that offer excellent value for money, these models are particularly satisfying, offering not only basic functionality but also a comfortable fit while being reasonably priced. Both models are comparable to high-end models and are not to be underestimated
MILLET Welkin 30
Favorite points
- Lightweight, breathable, comfortable, durable, and has all the basic functions you need at a low price for excellent cost performance
- Easy to use basic functions without any quirks
- Back panel provides excellent ventilation while keeping the center of gravity close to the back
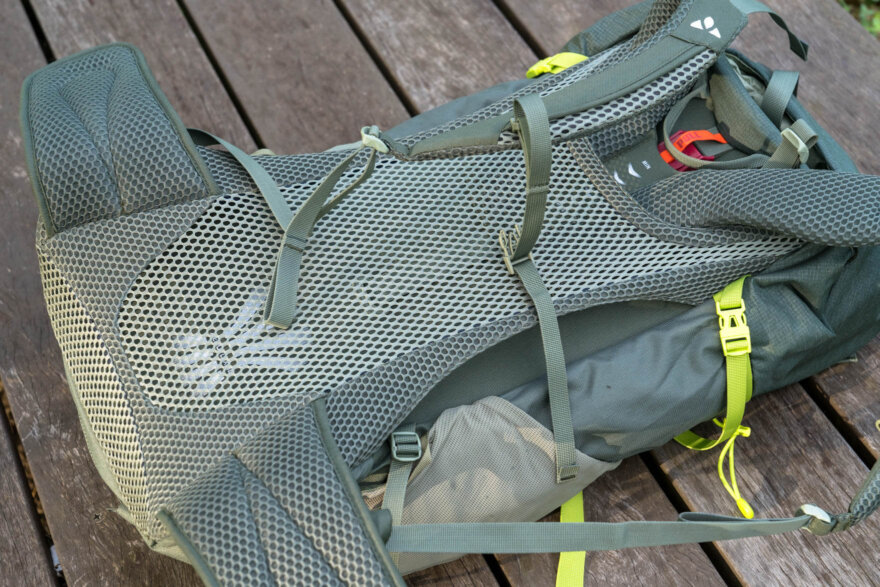
VAUDE Brenta 30
Favorite points
- Excellent cost performance with stable basic performance and abundant functionality at a low price
- Hip belt stability
- Breathable tension mesh back panel
- Adjustable back length
Best Back Ventilation Pack: Osprey Stratos 36 / Thule Topio 30
Backpacks with a structure that allows air to pass between the back and the backpack, reducing the discomfort of sweating, are called "ventilation packs" or "tension mesh backpacks." Deuter, a backpack manufacturer, developed this model and it quickly became popular in the 2000s. I still remember the amazing cooling sensation I felt the first time I put it on, as if I had a fan attached to my back. Now, almost every major manufacturer has this type of backpack in their lineup
However, as time passed, it became clear that the high breathability provided by the hollowed-out back also came with drawbacks, such as an unstable center of gravity and difficulty in packing, and it seems that the temporary boom has died down. However, they are still very popular, especially in Japan, where summers are swelteringly hot and humid. There is no doubt that they have a significant presence, enough to be called a major category among the many backpacks available. The current cutting edge is that, while the high breathability of the back is a given, we are moving into a new competitive phase, focusing on how to overcome the drawbacks and add value by making the backpack even lighter and more comfortable
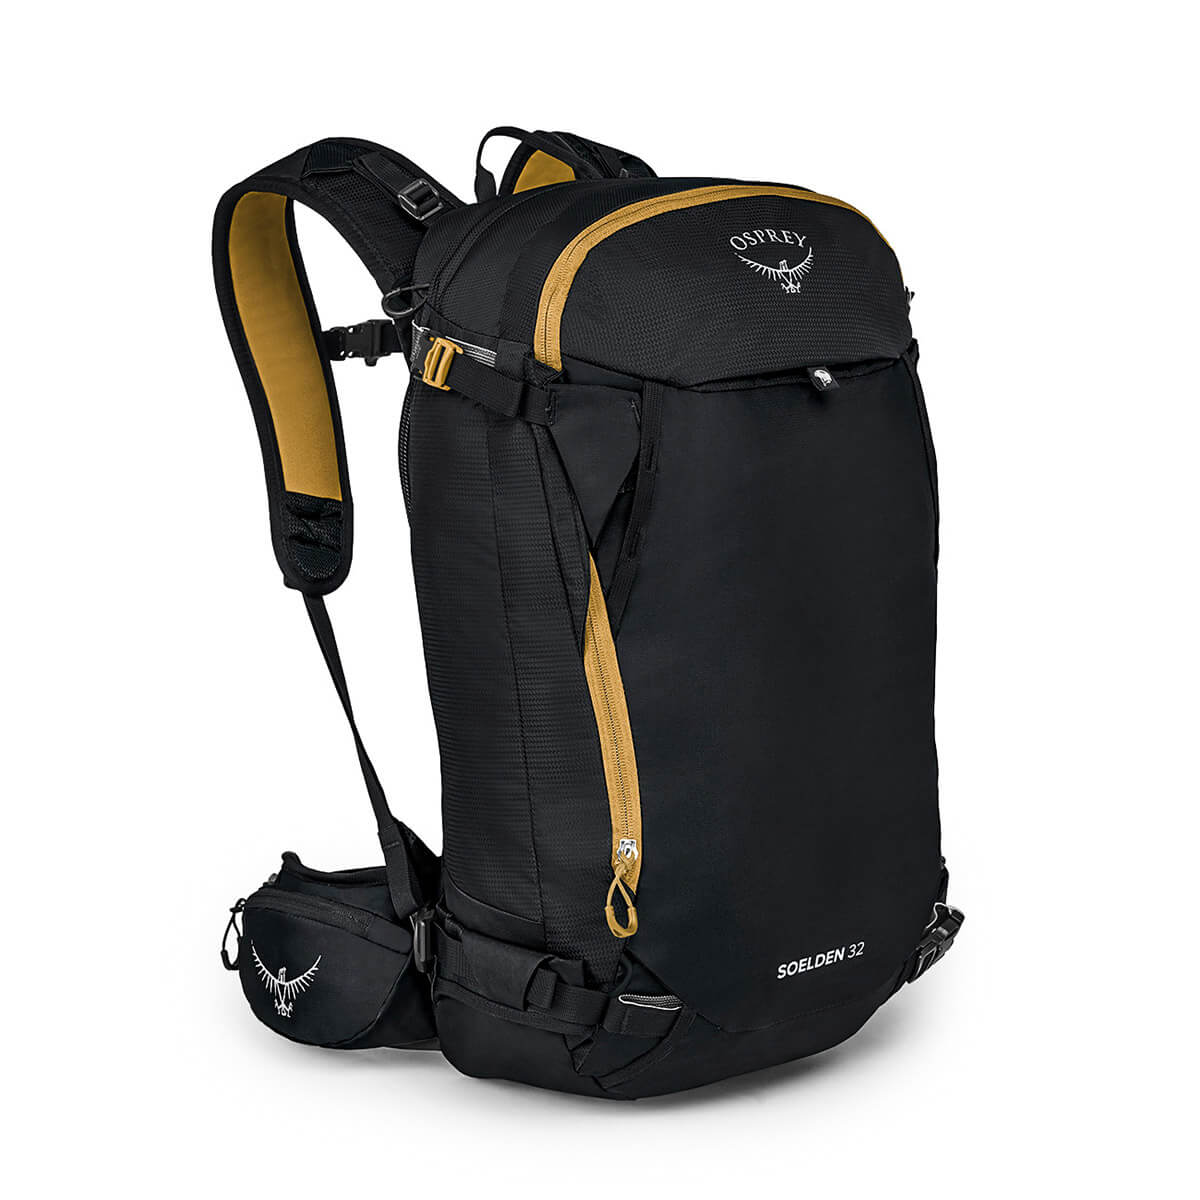
This season, I've carefully selected two of the best models from among the back ventilation packs. The Osprey Stratos 36 the Topio 30 (also available in 40L) from Thule, released last year, is also hard to beat, as it combines innovation with classic build quality for a high-quality product . As expected, I was once again impressed by the design, comfort, ease of use, and flawless finish.
Osprey Stratos 36
Favorite points
- The mesh panel is integrated from the back to the hip belt for an excellent fit
- Adjustable back length
- Convenient features include Stow-on-the-Go, which allows you to temporarily secure your trekking poles while standing
Thule Topio 30
Favorite points
- Mesh panels for a perfect fit and high breathability
- Adjustable back length
- A sophisticated design that's easy to use when getting around town
- Zippered opening for easy packing and unpacking
Related articles
Best Toughness & Comfort: Deuter AirContact Lite 40+10
Favorite points
- The back pad is extremely stable and has ample cushioning that won't collapse even under heavy loads, while also being breathable and quick-drying
- Adjustable back length
- Flexible capacity with expandability up to 10 liters
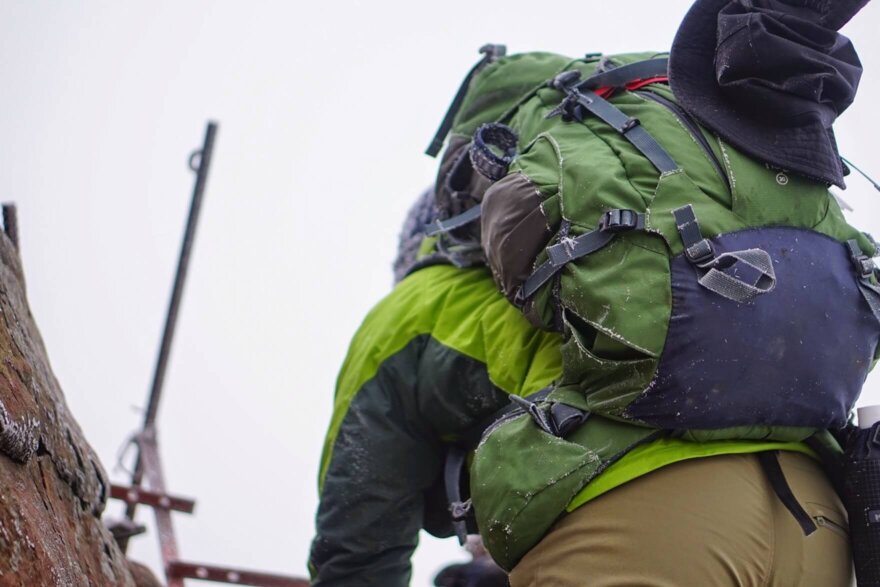
In recent years, new backpacks have undoubtedly focused on models that prioritize "lightness" over "sturdiness" and "lightness when carrying a light load" over "comfort when carrying a heavy load." However, in reality, not everyone is actually hiking comfortably with a light load, and in many cases, this is not the case. After all, luggage is always large and heavy, and there are times when you have to go through rough paths rather than just wide trails, so at times like these, you want to make sure you don't regret having a thin and light backpack
This season's best model is perfect for those who prioritize protection and prefer to walk sluggishly rather than lightly, as it perfectly fulfills the original purpose of a backpack (but is also suitable for beginners in a different sense) with its traditional robustness and ability to maintain stability and comfort even with heavy loads
This lightweight model of a mountain hiking backpack from Deuter, a long-established German backpack brand renowned for its ruggedness and durability, offers a stable and comfortable fit, yet is also lightweight and compact enough not to feel overly heavy. It also boasts luxurious cushioning for superior comfort and advanced, smart functionality
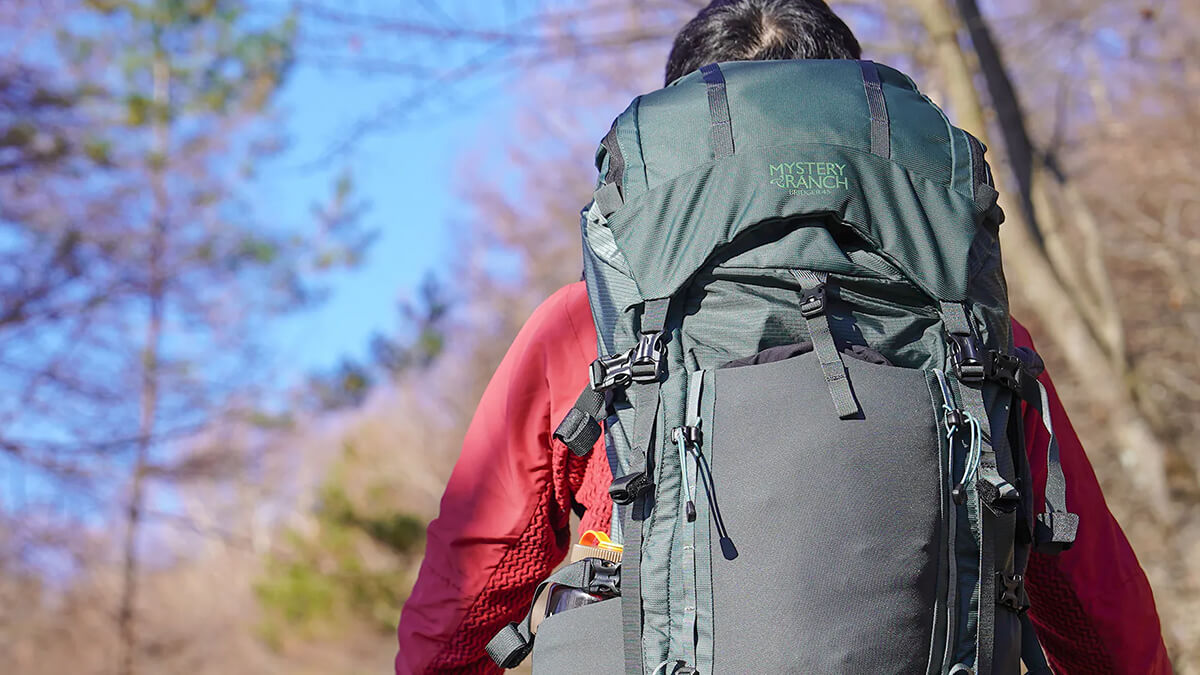
Best Storage & Packing: MYSTERYRANCH Bridger 45
Favorite points
- Ample and easy-to-access storage
- Comfortable back system for stable carrying of heavy loads
- A large, removable top lid that can be used as a pouch for easy access
- Durable enough to withstand tearing and abrasion
Related articles
On long day trips or overnight hikes, you'll be taking things in and out frequently, increasing your need for easy packing. The MYSTERYRANCH Bridger 45 . In addition to the brand's signature zippered main compartment for easy access, it also boasts a wide shoulder harness, borrowed from running vest-style packs, and many other features that further enhance storage capacity. You'll also appreciate the overall excellent construction and high quality, including a unique back panel that provides a comfortable, snug fit and durable fabric.
How to Choose a Backpack for Mountaineering: 7 Tips for Choosing the Right Backpack for Mountaineering and Hiking
Tip 1: Choose the size that fits your body
A spokesman for Deuter, a German pack manufacturer with over 100 years of history, said:
First, find the pack that fits you best, then choose the size and activity
There's no need to take these comments as an example, but the most important thing to remember when choosing the perfect backpack for you is whether it fits your body .
It's fine if you only take one or two steps with a heavy load on your back, but walking for long periods of time can cause more damage to the human body than you might imagine. If you're wearing a backpack that doesn't fit your body, you'll end up feeling more fatigue and pain than necessary in your shoulders, hips, and lower body after walking for 30 minutes or an hour. For this reason, it's especially important for beginners who have never carried a heavy load before to choose a backpack that is comfortable and fits your body well
If you've tried many backpacks, you may be able to guess to some extent from a size chart whether a backpack will fit your body, but to be sure, you have no choice but to try it on at the store. When doing so, try putting weights inside as close to the actual situation as possible, and if you're not confident in your fitting methods, have the store staff adjust it for you
After that, check the following points to see how they fit together to say they are a good fit
Is the back length (torso) correct?
The first step in finding the perfect backpack size is to get the torso length right. Torso length is the distance from the seventh cervical vertebra (the large protruding part behind the neck when you look down) to the end of the hip bones . Most medium-sized and larger backpacks with the same capacity come in different torso lengths, such as S/M/L, and most models have adjustable torso lengths, so it to check the fit by adjusting it to your torso length before purchasing .
Are the width and length of the shoulder harness correct?
Ideally, the shoulder harness that wraps from your shoulders to your armpits should extend in a direction that matches your shoulder width. In rare cases, it may be too wide or too narrow and hit an odd part of your shoulder. To check if this is the case, check that it is sitting firmly on your shoulders when you put it on. Also, if the length of the shoulder harness is too long or too short, it may not fit properly or the padding may get in the way or be insufficient, which can cause inconvenience, so make sure it is the right length for your body type
Does the hip belt (waist harness) fit?
Most mountaineering backpacks, unless they are ultralight models, have a hip belt that covers the waist. This is an important part for properly distributing the load on your hips, so if it's too short so the padding doesn't cover your hip bones, or too long and loose even when fastened, the pack doesn't fit properly, so be careful. Even if you fasten it correctly, be careful if it's too thin, narrow, or stiff, and you're already unsure about the fit and comfort when trying it on in the store. This discomfort will likely become more pronounced once you start walking
If you're a woman, try out a women's model
Recently, many backpacks have been offering women's models that are designed to fit women better, while offering similar functionality. These models have a shorter back length and narrower shoulder width than men's packs, as well as more curved shoulder straps and a shorter hip belt, making them easier to fit the female body. There's not a big difference that all women need to have, but if a product is available for both men and women, we recommend that women try out this version first
Point 2: Choose the type and structure of the backpack that best suits your purpose
Classification by activity style
In reality, there are many different types of hiking backpacks for specific activities, and if you have a specific purpose in mind, the quickest way to choose the best pack is to choose a model that is specialized for that purpose
The table below summarizes the differences and features of each pack. However, if you are choosing your first pack, choosing from the all-purpose packs for long-distance hiking is almost always the best choice.
| type | For hiking and traverses | For alpine climbing | Ultralight hiking gear | For trail running | For backcountry skiing and snowboarding |
|---|---|---|---|---|---|
| image | 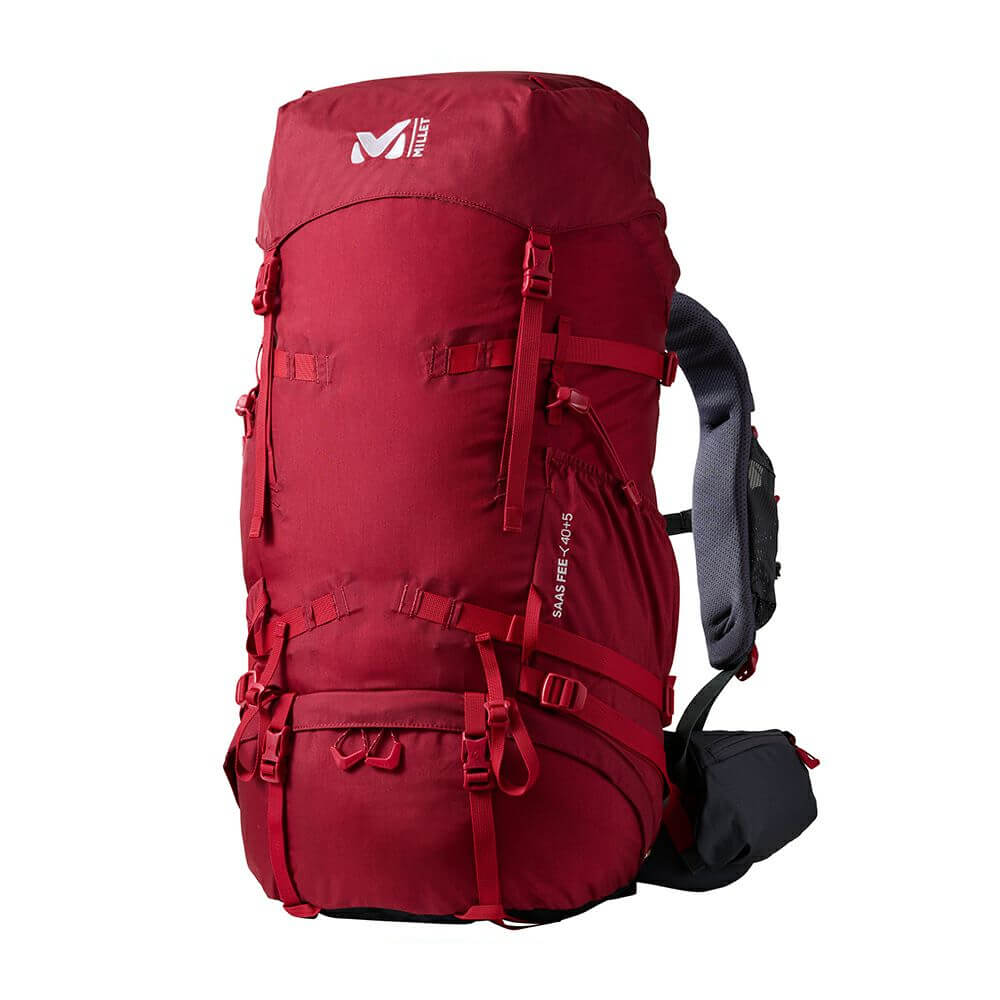 |
 |
 |
 |
 |
| Uses and Features |
|
|
|
|
|
| Strengths |
|
|
|
|
|
| weakness |
|
|
|
|
|
Classification by whether or not there is a rear frame
Most mountaineering backpacks have a rigid frame built into the entire back section to allow you to carry large, heavy loads comfortably. Made mainly from aluminum stays or sheet plastic, this frame acts as a support pillar, accurately transferring the weight to the waist and helping the backpack to fit snugly to the shape of your back
On the other hand, there are backpacks without built-in frames that are designed for people who are aiming for ultralight hiking. The weight of the pack itself is significantly lighter, but on the other hand, it becomes difficult to support the load on your hips. For this reason, they are not suitable for people who are not used to carrying heavy loads or who are not able to lighten their load, so we do not recommend models without a back frame unless you have a clear goal of reducing weight
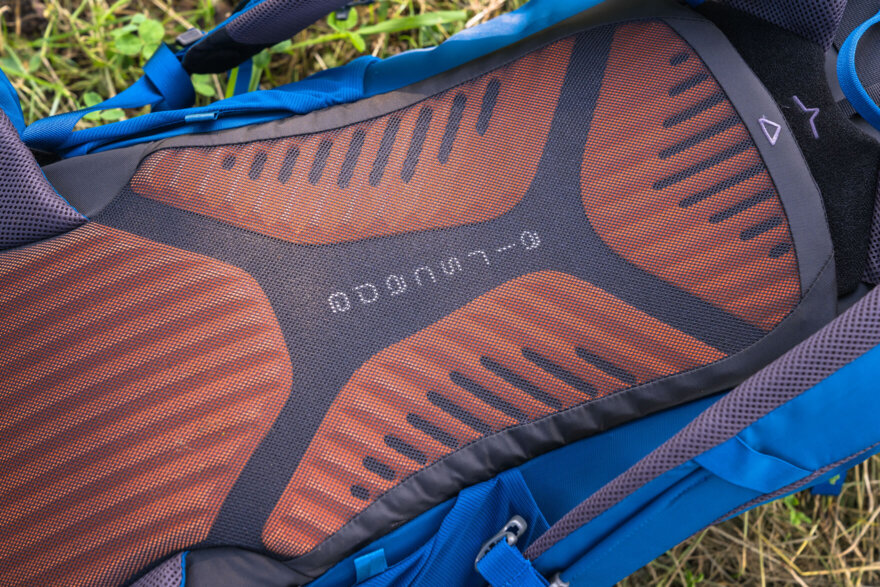
Classification by back panel breathability
If you're backpacking and hiking through the mountains for hours, it's almost inevitable that your back will get soaked with sweat. However, if you can prevent even a little of that unpleasant sweat and overheating, your trip will be more enjoyable and comfortable
This led to the development of backpacks with significantly increased ventilation in the back. Also known as "ventilation packs" or "tension mesh backpacks," these backpacks feature a trampoline-like design in which the back frame is positioned a few centimeters away from the back, allowing the back to rest against flexible, breathable mesh fabric
This allows air to constantly circulate around your back, making it extremely breathable. No matter how much you sweat while hiking, you won't feel uncomfortable, and your sweat will dry before you know it, making it the perfect choice for hiking in the warmer months of spring and summer
However, two weaknesses of this tension mesh frame are often cited: the recessed back reduces the capacity of the main compartment, making it difficult to pack; and the space created on the back tends to shift the center of gravity backward (making it more likely to swing around when carrying heavy luggage) . Personally, I also feel that in cold winters, the wind blowing through my back can make me feel a little cold. In that sense, a backpack with this frame isn't perfect, and it's ideal for trips in milder weather when you're not carrying too much luggage.
Recently, models have been developed that achieve a considerable degree of breathability and quick-drying in the back without using tension mesh. While each manufacturer has different methods, the general approach is the same. By using a textured foam that ensures air passage in the back, or a back panel that combines elastic, breathable padding with mesh fabric, breathability can be increased without increasing the distance between the back and the backpack. This provides a reasonable level of comfort in the back without compromising the center of gravity stability or packing performance
Breathability and center of gravity stability. If you're only doing light hiking in the spring and summer, you can choose breathability, but if you're prioritizing year-round versatility, tension mesh is not recommended. You should choose one based on your preference
Classification by storage compartment entrance type
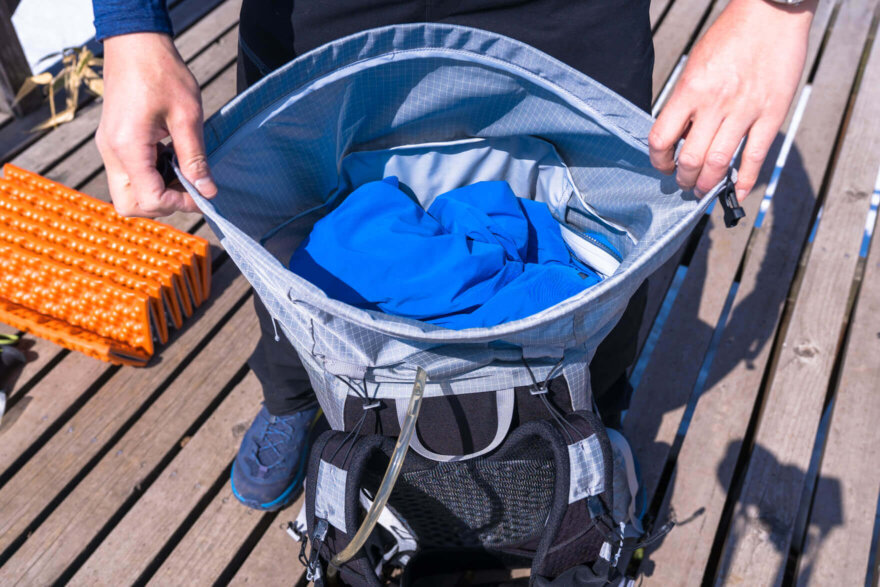
Top loader type
Many medium-sized backpacks for mountaineering, 30L or larger, have an opening structure known as a "top loader." A top loader backpack is basically a backpack with a fixed rain cover (also called a canopy or top lid) that fits over the entrance to the main compartment. This structure not only makes it easy to protect against rain, but also makes it easy to compress luggage from above, making it ideal for carrying large loads such as when hiking. Rain covers also generally have pockets for small items, which are very convenient for storing small items that you want to access quickly

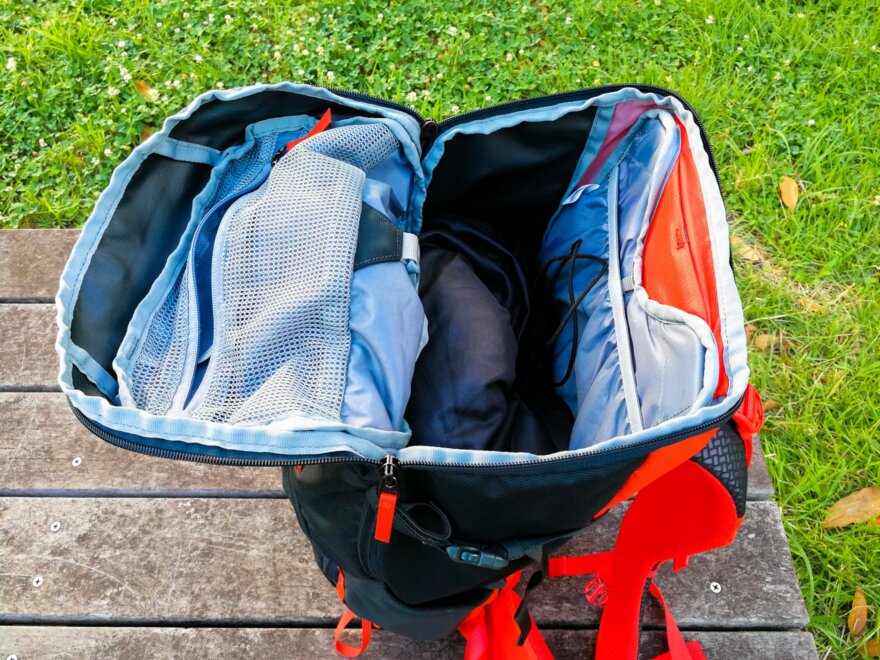
Shipper type (panel loader type)
However, smaller models around 30L also have zippered (or panel-loader) openings in addition to top-loader openings. As you can see, these have the advantage of allowing easy access to the main compartment through the zipper. Some models even have a wide U-shaped opening, which makes it easy to take things in and out, just like a travel suitcase. These are ideal for light hiking and travel

Roll-top type
The "roll-top" design, where the opening is rolled up and fastened with buckles on both ends, is becoming a familiar design, mainly for lightweight backpacks, due to its advantages of being lightweight, expandable, easy to put in and take out, and preventing water seepage. However, it is not often seen in entry-level backpacks because it can be cumbersome to operate until you get used to it, and it does not allow the use of a rain cover pocket
Top loader, zippered, and roll-top backpacks all have their pros and cons, but if you're new to mountaineering backpacks and don't have any particular preferences, we recommend starting with the versatile top loader model
Point 3: Choose the right capacity
In the extreme, as long as you have a large backpack, you can travel any length of time (when I was a broke student, I used one 70-liter backpack for everything from day trips to two weeks...). That said, a backpack that's too small won't hold all the luggage you need for a long trip, and a pack that's too big can be dangerous as the luggage inside can move around and shake, and the fatigue caused by unnecessary weight can be considerable, so it goes without saying that it's best to choose a backpack that's the right size
Although it will vary slightly depending on the activity and personal preference, based on many guides and personal experience, the appropriate backpack capacity can be considered as follows:
- Day trips or overnight stays in huts: up to 30L
- Day trip - 2 nights in a tent: 30-50L
- Tent for 2 nights or more: 50L or more
First-time mountaineers will likely only use it for day trips at first, but if you've been doing it for a while and are thinking about stepping up, it might be a good idea to choose a backpack around 35L from the start. This size might be a little big for a day trip in the summer, but in the winter, the amount of luggage you carry will increase, so it's not too big. Best of all, this size just barely allows you to camp overnight. It's also versatile and can be used for a wide range of purposes, including winter mountaineering, climbing, river climbing, and skiing, so if you want to get by with just one backpack, this size is recommended
Point 4: Choose a weight that balances durability and comfort
A backpack is by no means a small piece of equipment, so weight is a big factor in the overall impact of mountain gear
Generally, heavy backpacks have thick frames, thick padding, and durable fabrics, and are designed to be safe and comfortable even when carrying a heavy load. With equipment now dramatically lighter than in the past, it's true that traditional designs are a bit overkill. However, that's only true for people who are used to hiking, and not necessarily for first-timers or those who aren't as well-trained
When you first start hiking, you tend to be drawn to the obvious appeal of "lightness," but as someone who isn't particularly tough, and with 20 years of mountaineering experience, I can say that "( especially for people who aren't used to walking) you should never skimp on padding or the back frame just for the sake of weight reduction ." Veteran ultralight hikers say that reducing the weight of your backpack is the last thing you should tackle after you've exhausted all other gear. I agree, and don't sacrifice comfort for the majority of your trip just to save 500 grams.
As a rough guideline, for a 35-40 liter backpack, around 1,500 grams is standard, around 1,000 grams is light and has low support, and anything over 1,700 grams is considered to be a durable and supportive backpack (for a 30 liter backpack, you should consider it to be about 200 grams lighter)
Tip 5: Choose the right cushioning and support
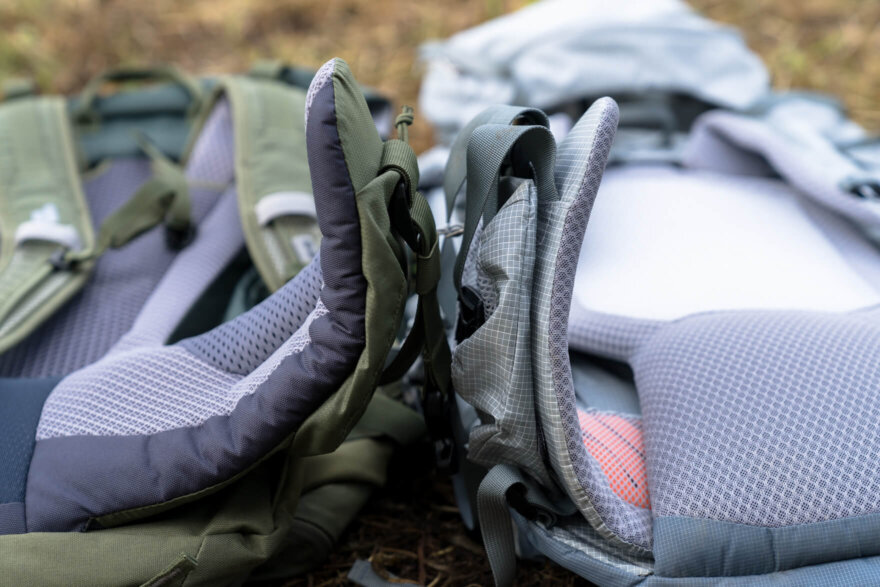
The entire back panel supports the load, but the thickness and quality of the padding on the shoulder straps (shoulder harness) and hip belt (waist harness) are particularly important factors in ensuring a comfortable carrying experience
When a backpack fits properly, approximately 80% of the weight should be distributed evenly across your hips, with the remaining small weight being distributed evenly across the shoulder straps and back. Try wearing the backpack and pay close attention to whether the padding is balanced (not too little or too much) and whether there are any uncomfortable areas or areas that rub against your body
The harness area of medium-sized and larger backpacks uses elastic foam to absorb the impact and stress of the load. Soft, highly compressible foam feels nice and comfortable against the skin, but padding that is too soft will not be able to support the heavy load properly when carrying a heavy load. It may feel comfortable at first, but it will start to take a toll over time if you carry a heavy load for a long time. Of course, too little (too hard) is not good, but choose one that strikes a balance between cushioning and support, taking into account your own preferences
As mentioned above, this padded area is also prone to sweat buildup, so it's important that it's not only cushioned and supportive, but also breathable and quick-drying. A key feature of a good backpack is that it's designed to be suitable for hot climates, using mesh or lightweight foam
Tip 6: Choose storage that's easy to pack
Backpacks that are difficult to take things in and out of, difficult to organize, or difficult to fit things in without leaving any gaps are not just frustrating the night before a hike, but they become even more unbearable on overnight hikes where you'll be taking things in and out frequently. Naturally, ease of packing is an important factor when it comes to backpacks for mountain climbing
Main compartment clearance and easy access from outside
The main compartment is the large storage area of a backpack where most of the luggage is stored, and is where you can put in and take out a variety of items of different sizes, shapes, and softness
If the main storage compartment is a simple cylinder, it will be easy to pack all of these tools without leaving any gaps, but if it is slightly curved, it will be easier for gaps to form, which is a disadvantage when it comes to neat packing
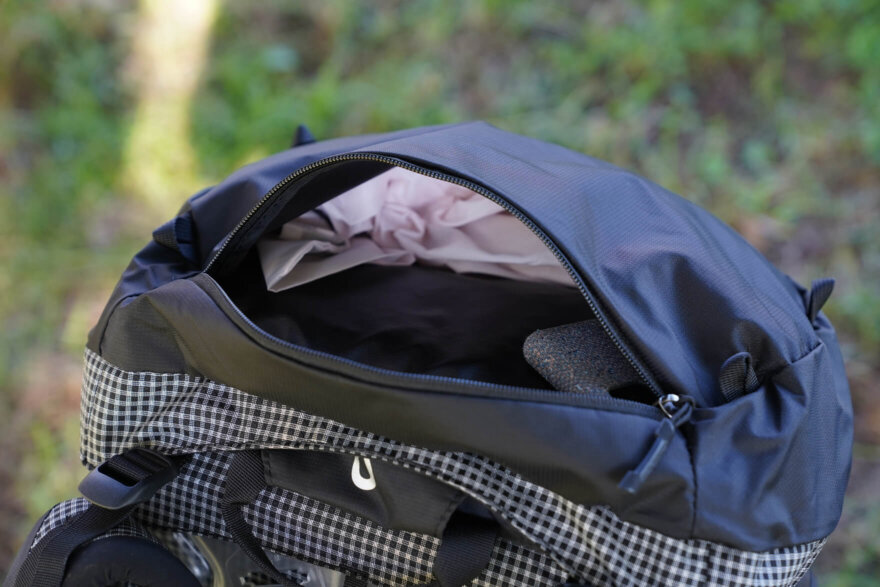
Also, when it comes to accessing and taking out items, a typical top-loader backpack requires you to access the items inside through a large opening at the top, making it surprisingly difficult to take out tools. If you don't pack your backpack smartly, you'll end up having to do the tedious work of pulling your belongings out from the bottom of the pack. Direct access zippers attached to the sides, front, and bottom make it easier to access the inside in such situations. Having one makes a huge difference in how easy it is to access things, so the larger the capacity of the pack, the more important it is to check
Easy to use pockets placed in various places
In addition to the main storage compartment, the backpack also has numerous pockets and attachments on the outside that are designed for ease of use while hiking. Tools that you want to access quickly (trail snacks, towels, bottles, gloves, sunscreen, etc.) can be conveniently stored in these pockets located in various places. These are undoubtedly useful, so some people like to have lots of them, while others who don't want to add unnecessary weight will prefer to have only the bare minimum of pockets. In either case, you should consider whether you need pockets that you won't use, and whether the size and usability of each storage compartment are suitable for your intended use
Top lid pocket
The pockets on the rain cover are generally designed to hold small items that you want to access quickly while on the move. For example, snacks, sunscreen, maps, headlamps, gloves, etc. If they're too big, they're awkward, but if they're too small, they're hard to use. Also, two pockets are easier to organize than one. It's best to use one that's as large as possible, with a wide zipper opening, and that allows for easy organization
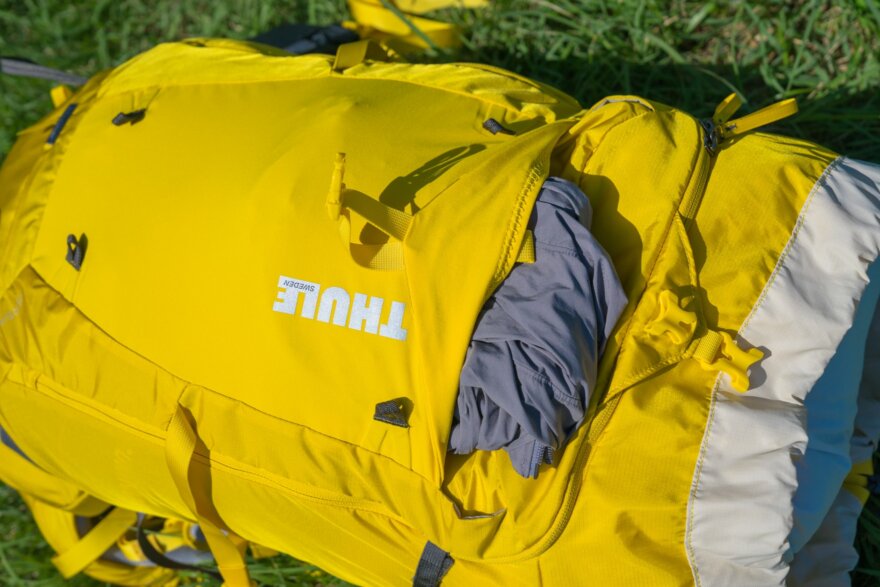
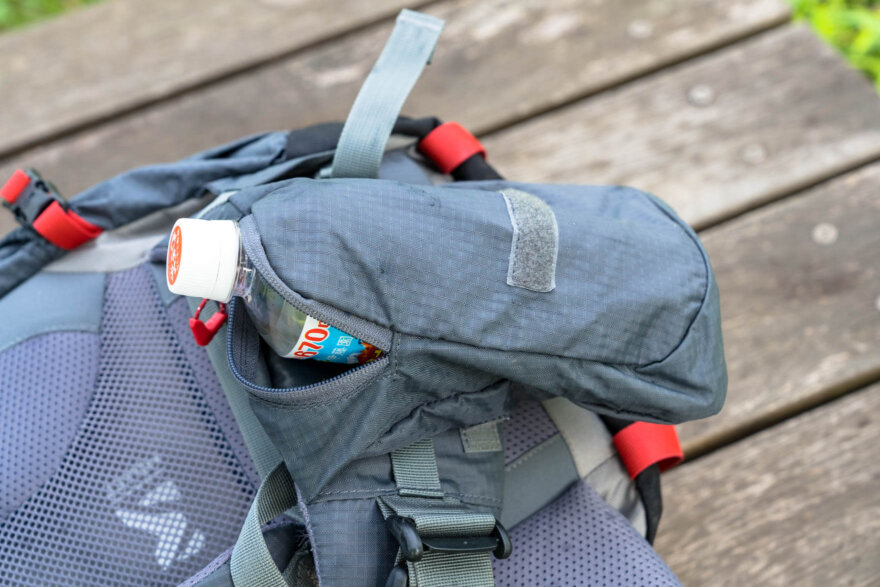
Side pockets
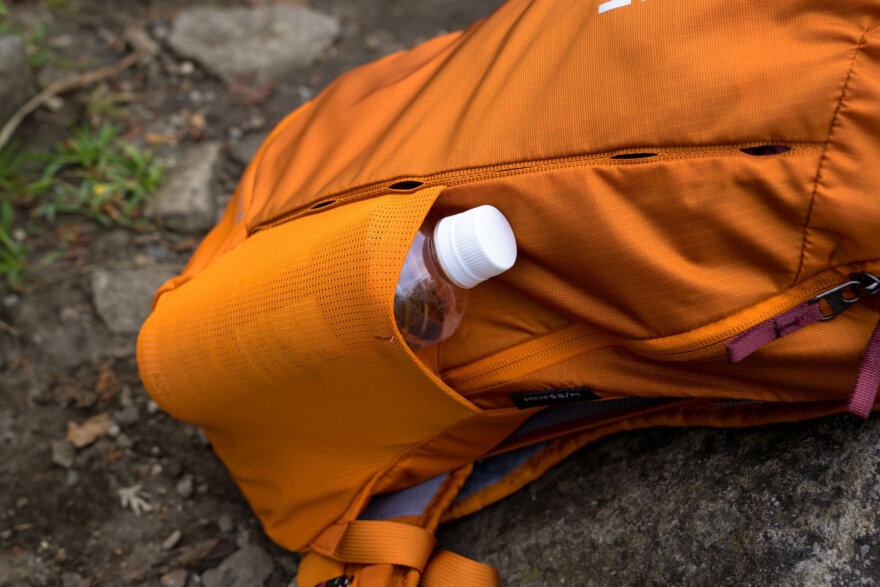
The side pockets are located on the exterior sides. These pockets have gussets and are made of stretchy fabric, making them convenient for storing long, thin items such as poles, water bottles, and sandals. The larger and deeper the pockets are, the easier it is to store things inside, but pockets with too much gusset are prone to getting caught on branches and I personally don't like the look of them. Some models are designed specifically to hold bottles so you can take them out while walking and quickly hydrate, so be sure to check them out
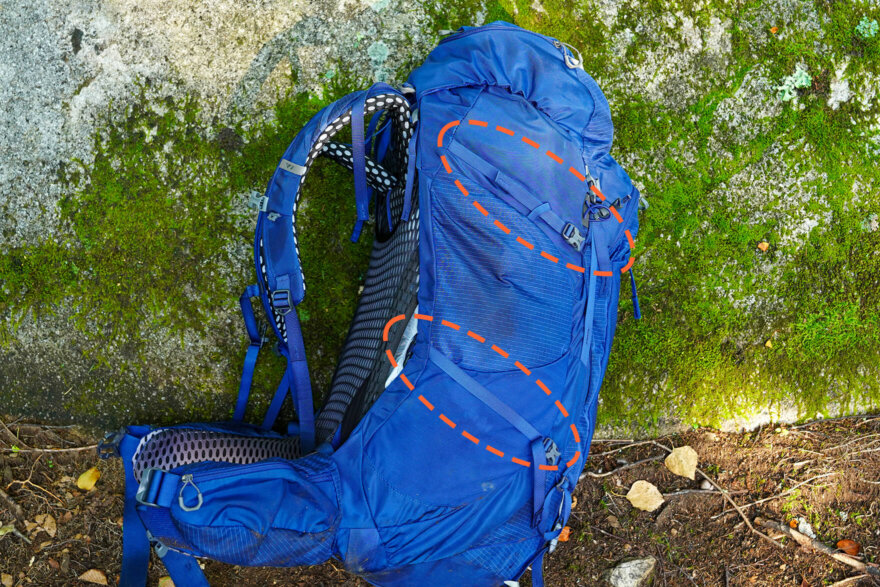
Front pocket
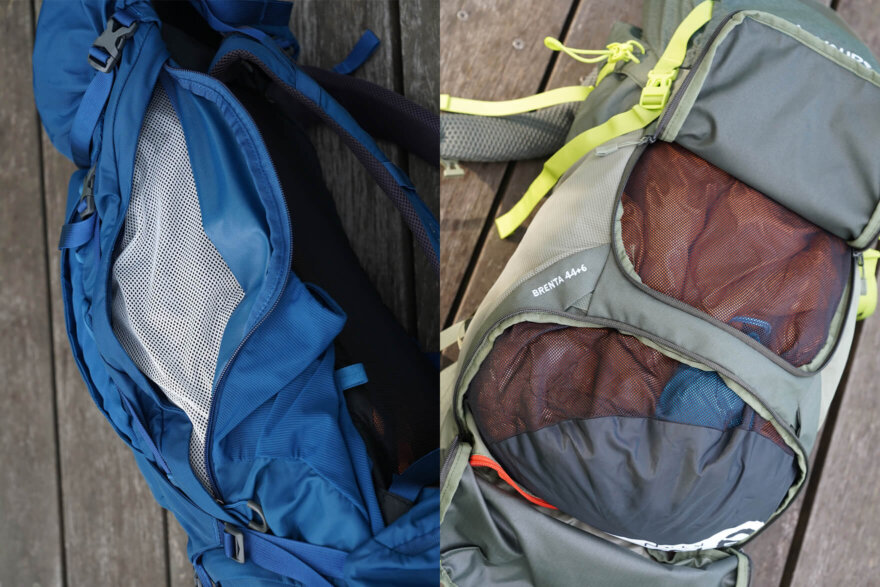
While not all backpacks have this, models with large front pockets on the front of the pack are a recent trend. Because they are relatively large, they are a very handy pocket that can hold a variety of items, including windproof and cold weather jackets and hats. Mesh fabric is convenient and easy to use, but it is also in a position where it is prone to rubbing against the ground and tearing, so be sure to check the durability of the fabric
Hip belt pocket

The small pockets at the hip belt are ideal for storing items you are likely to need to access quickly, such as candy, sweet bean paste, a smartphone, lip balm, etc., as they can be accessed without taking off the backpack or stopping. However, in my experience, they are often too small and I have never found them to be particularly useful (only the folding hip belt on the Millet Saas-Fee was extremely convenient)
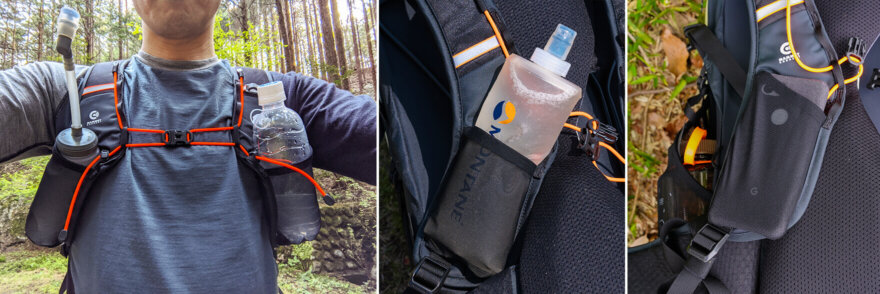
Shoulder harness pocket
Similarly convenient because you can access things without taking off the backpack are the pockets attached to the shoulder harness. These are mainly used to store things that are easily accessible while on the move, such as a camera or smartphone. Given the necessity of these pockets, not many models come equipped as standard, and even if they are, they are often not the size you expect. Personally, I like to store my smartphone in this area, so I use third-party pouches from various manufacturers to accommodate such situations

Attachments and straps
Trekking poles and ice axes cannot be stored inside the pack, so you will need to use the `` ice axe/trekking pole attachment '' on the outside of the pack (it's unlikely you'll find a backpack without this).
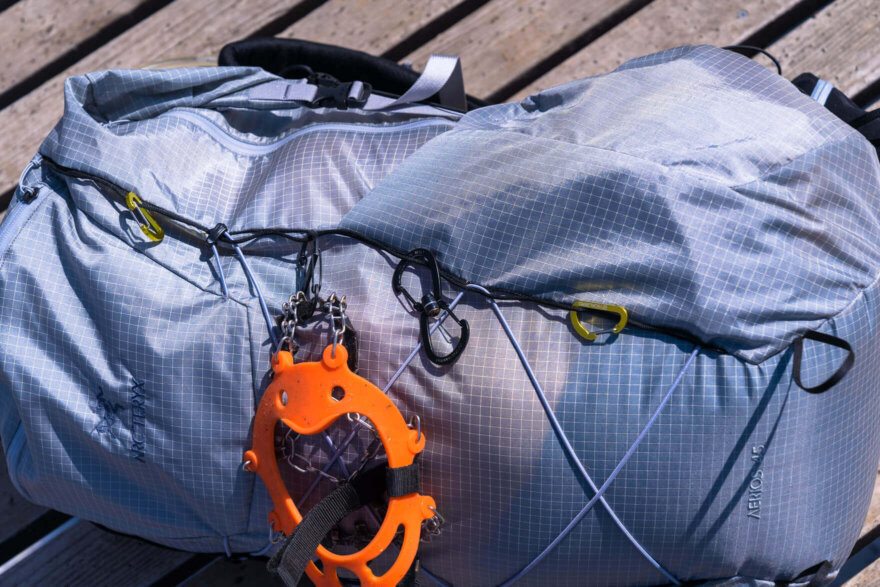
daisy chains sewn onto the outside of the pack allow you to attach carabiners or straps yourself, allowing you to attach items that don't fit in the main bag, such as a helmet or crampons.
side compression straps attached to the sides tighten the entire pack to compress the contents and improve center of gravity stability, and are also useful for securing long items (such as tent poles) when stored in the side pockets.
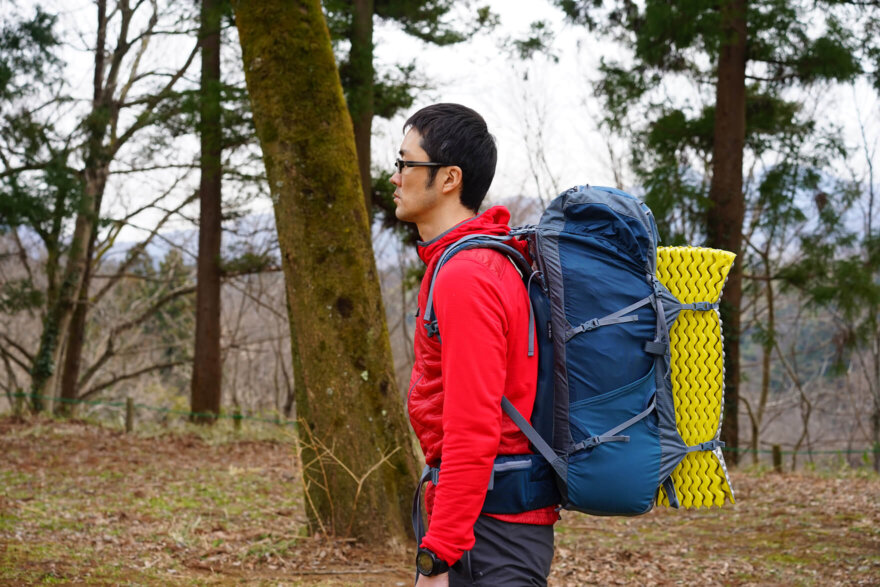
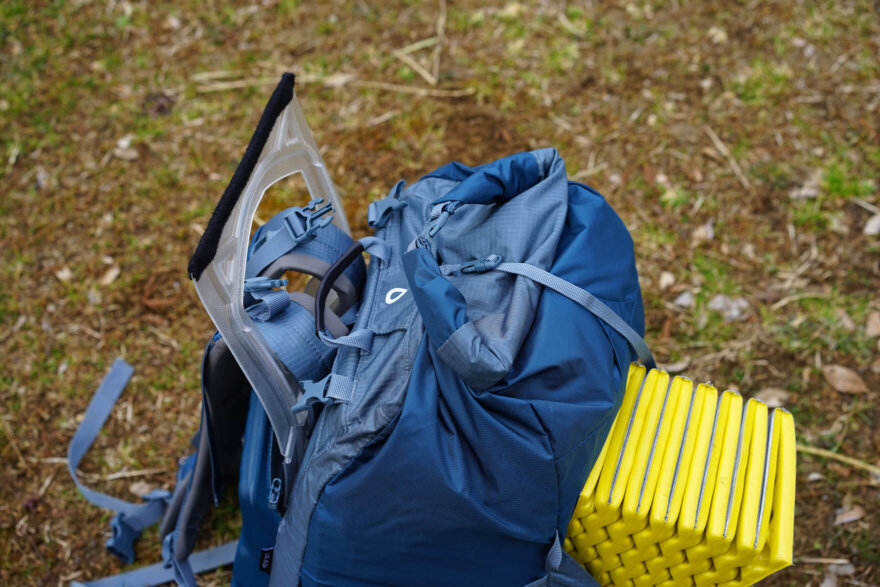
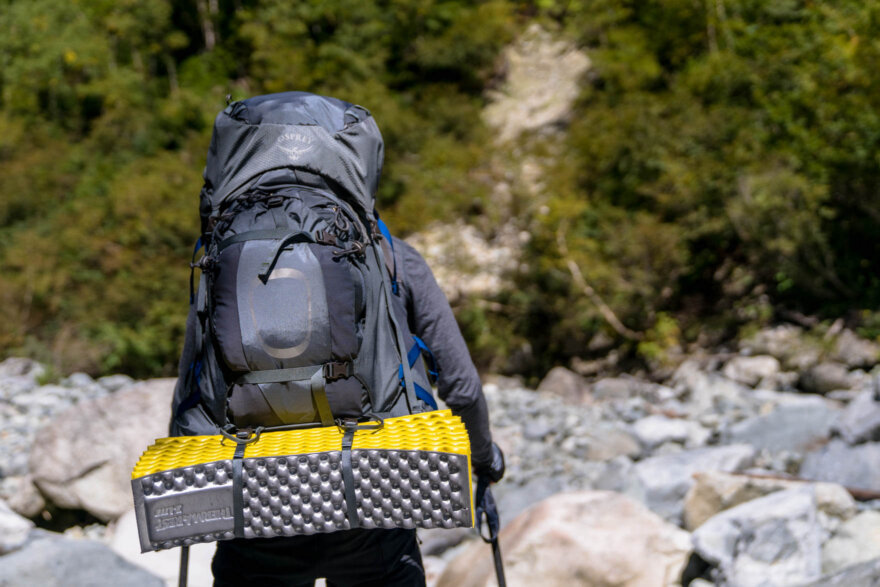
bottom strap to the bottom of the outside , you can attach a closed-cell foam sleeping pad here. Even if there is no bottom strap, you can also tuck a mattress into the side or rain cover.
Point 7: Other useful parts and features
Rain cover
If you get caught in the rain in the mountains, leaving your backpack exposed to the rain will cause the gear inside to get wet and become unusable, so a rain cover for your pack is a must. Models that come with this cover as standard are definitely a good deal in terms of functionality and price, so be sure to check. However, even when this rain cover is attached, it does not protect the back of your shoulders. Water will inevitably seep into the pack from there, so don't rely on it too much (don't forget to waterproof any gear inside the pack that would be bad if it got wet)

Highly water-repellent (water-resistant) fabric
Many mountaineering backpacks have a DWR (durable water repellent) treatment on the fabric itself, which means they are able to repel water droplets to a certain extent, but they will not be able to withstand heavy or prolonged rain without a rain cover. However, this water-repellent performance varies in quality depending on the manufacturer and fabric, and some models with stronger water-repellent performance can prevent water from entering so well that a rain cover is not necessary (for example, Dyneema composite fabric is expensive, but is popular as a lightweight fabric with excellent strength and water resistance)
However, no matter how water-resistant a bag may be, be sure to put any items that you really don't want to get wet in a waterproof stuff sack or dry bag to protect them from water damage
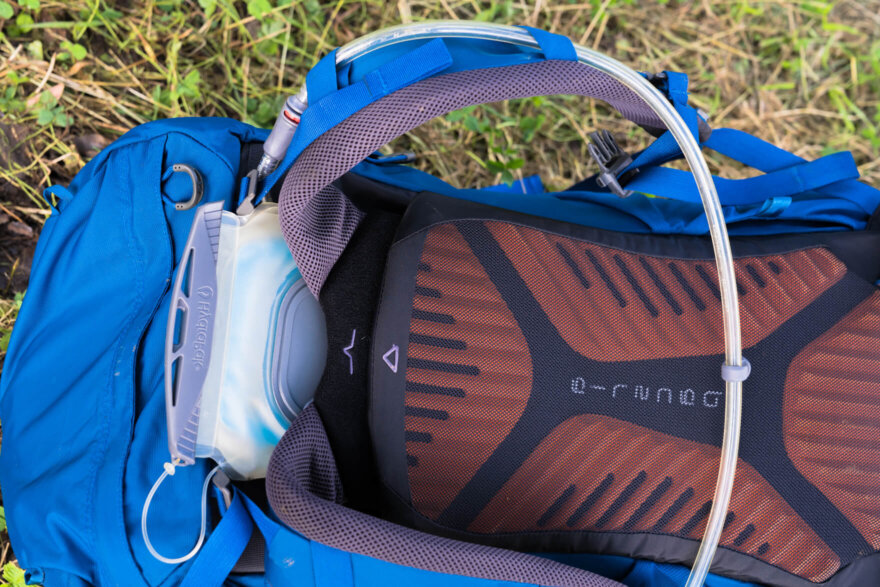
Hydration pocket attachment
For those who prefer hydration systems that allow them to replenish fluids while on the move, the usability of a pack will change dramatically depending on whether or not it has an internal pocket for storing hydration and a hole for threading the tube out. Furthermore, having a tube attachment to secure the tube to the opening will make using hydration even easier
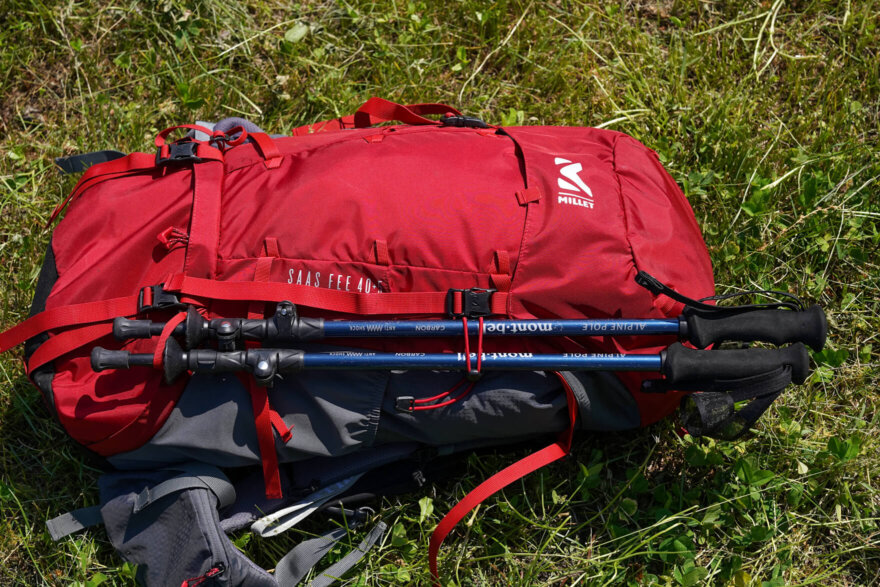
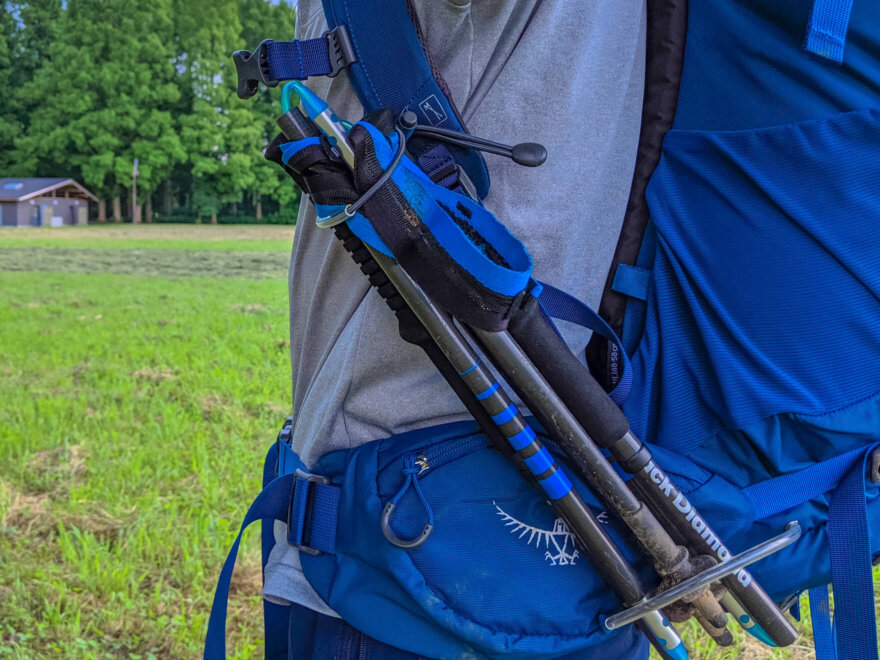
Trekking pole attachment loops
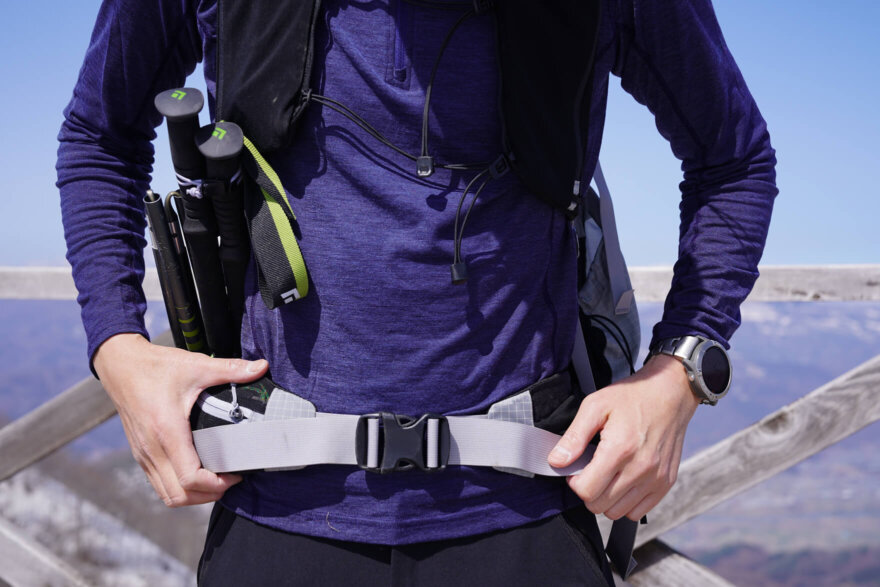
When you come across a rocky area or other place that requires you to use both hands to climb, some backpacks feature "trekking pole attachment loops" that allow you to attach your trekking poles like a wakizashi (without having to take off your backpack), which is very convenient
summary
Backpacks are still the star of outdoor gear. This season, many new models have been released that show new advancements, and gear lovers will be keeping an eye on them
We can confidently recommend all of the models introduced here, but you won't know if they suit you until you actually try them on. When purchasing, we recommend that you try them on in store, ask the store any questions you may have, and consider them until you are satisfied
Finally, we'll leave you with four basic steps on how to fit your backpack. We hope you have a wonderful mountain trip this season
1. Place the center of the hip belt (which is roughly concave) over the upper protrusions on both sides of your pelvis and tighten the belt to secure it in place
→At this time, make sure that most of the weight is firmly on your hips
2. Fasten the shoulder harness (strap)
→ Adjust the back length so that the shoulder harness fits firmly around your shoulders and the base of the harness is positioned at the top of your shoulder blades
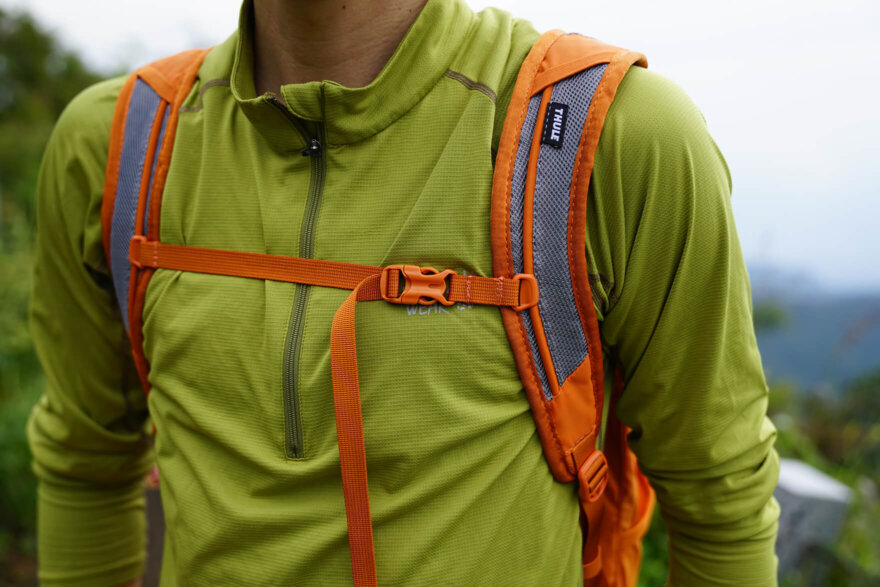
3. Tighten the chest strap
→The height is the height that comes on the extension of the armpit
4. Tighten the top stabilizer and bring the pack close to your body to finish
→This is the tape that connects the top of the pack to the shoulder strap. Be careful not to tighten it too much, as it will pull up the shoulder strap and cause it to slip
Please consider a paid membership to support the site while enjoying exclusive offers and content!
Related reading