table of contents
- The problem everyone is concerned about is "How to carry a DSLR in the mountains"
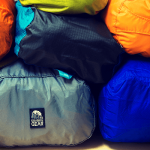
- The gear that people have been talking about online is certainly useful, but it's hard to call it perfect
- table of contents
- Verification assumptions
- Summary of comparison of features of each carrying method
- Recommended gear for each occasion
- Recommended for day hikes with minimal luggage: Holder type
- Front pack type: Recommended for all-around mountain climbing, including heavy loads and long-term mountain climbing
- Chest bag type: Recommended for those who want ease of use but also want safety
- Moderate effectiveness but cost-effectiveness: Chest strap type
- Not suitable for the mountains, but perfect for travel: the instant-shooting strap type
- summary
The problem everyone is concerned about is "How to carry a DSLR in the mountains"
Once you're hooked on the charm of SLR cameras, you won't be able to let them go for even a moment when you're out and about. Those who don't have one might wonder why they bother with something so heavy and bulky. It's true, even a day trip can make your luggage incredibly heavy, and an expensive and cumbersome SLR camera can make you feel a bit depressed every time you pack
However, SLR cameras, with their high expressive power, can, on rare occasions, capture a moving moment fresh, like a vacuum-packed bag. For those who have experienced this magic, it's impossible to go back to beautiful but flat images like those taken with an iPhone, and in that case, the option of "it's too heavy to carry" is no longer an option
If you start bringing an SLR camera into the mountains, one problem you'll undoubtedly face is how to transport a heavy, bulky SLR camera
Of course, you can simply carry it in a backpack, but it's not practical to take it out and put it back in every time you feel like it while walking. On the other hand, walking around with a standard neck strap hanging from your neck is not only heavy and causes neck stiffness, but it's also obviously dangerous as it dangles loosely
The gear that people have been talking about online is certainly useful, but it's hard to call it perfect
For this reason, over the past few years, our editorial team has thoroughly searched for the most user-friendly portable gear, examining every single item that we've heard of as a recommendation with our own eyes, and trying out any that seem good
What I found was that while they all have their reputations and are excellent in some respects, there is still no best way to carry them in all situations. Since they are tools, they all have their weaknesses. The key is to know the advantages and disadvantages of each and find the best way to carry them for you
So, in this article, we've organized the main ways to carry a camera in the mountains, along with their respective advantages and disadvantages. In the second half, we'll introduce our editorial team's recommended methods for carrying a camera based on your purpose and style, along with our evaluation of the methods we've actually used
table of contents
2. Summary of comparison of features of each carrying method
3. Recommended gear for each situation
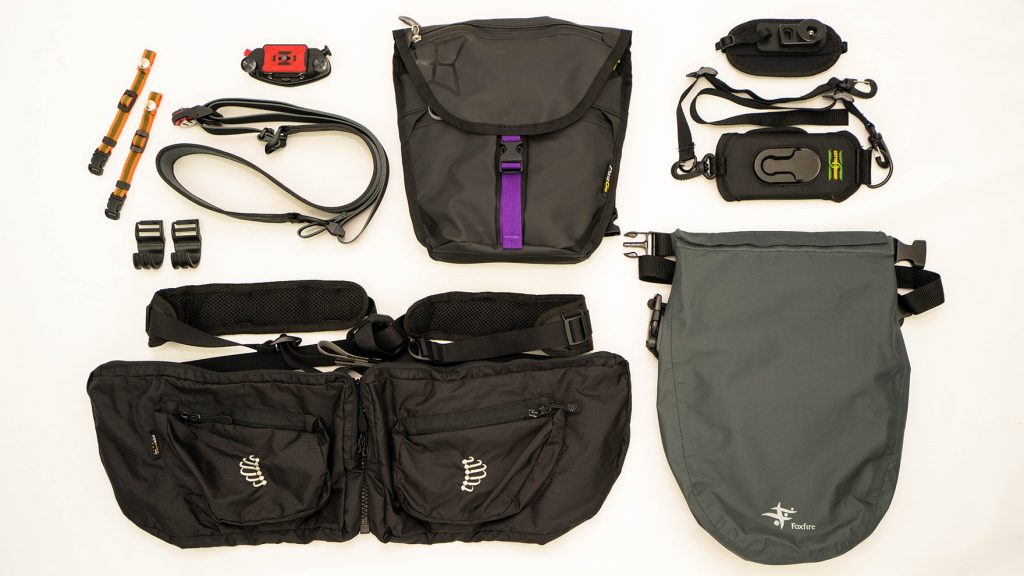
Verification assumptions
First, let me introduce the equipment I used for this test below. As you can see, it's not the level of equipment a professional photographer would use, but I wouldn't deny that you might say, "No, that's enough equipment to put both feet in the water." I'm assuming a situation where you'd use the camera in the same way as you would on a regular mountain climb where walking is the main focus
Not that it's because of that, but this time I ruled out super expensive, professional equipment for professional photographers, such as heavy equipment that would take longer than normal to move around in, backpacks made to carry cameras, and vests to wear to carry cameras
- Camera: SONY α7


- Main lens: SONY Vario-Tessar T* FE 16-35mm F4 ZA OSS zoom lens
![Sony Vario-Tessar T* FE 16-35mm F4 ZA OSS [SEL1635Z]](https://images-fe.ssl-images-amazon.com/images/I/41n4Q9z2xwL._SS100_.jpg)
- Sub-lens: SONY Sonnar T* FE 55mm F1.8 ZA prime lens

- Tripod (carry with me when absolutely necessary): Velbon UT-43Q

Summary of comparison of features of each carrying method
When hiking in harsh environments and staying there for long periods of time, you need to consider many more points than usual when carrying a camera, and especially when it comes to a heavy, complicated-to-handle SLR camera, you need to take into account a variety of points, such as the following. The results of our evaluation, taking these points into consideration, are summarized below
- Portability : Naturally, you want your luggage to be as light and compact as possible.
- Balance : If the load is not balanced, fatigue will gradually accumulate in that area, resulting in stiffness and pain.
- Comfort : Does it get in the way when you walk? Does it have any uncomfortable features such as being prone to getting stuffy? Does it concentrate the weight on your neck or one shoulder, causing fatigue?
- Speed of shooting : Even with a high-performance SLR camera, if it's a hassle to take it out, you'll miss a great photo opportunity.
- Safety : To protect expensive equipment from the risk of damage, it needs protection such as waterproofing, dustproofing, and shock resistance.
- Setup (ease of setup) : Is it easy to attach to a backpack or camera? Note that it may not be possible to attach to some items.
- Multifunctionality ...Of course, the main purpose is to carry a camera, but items that add various other conveniences are even more attractive.
- Price : When it comes to items of this type, there are big differences in price between each item, so you need to think carefully about it.
| item | Chest strap type | Quick-shooting strap type | Holder Type | Holder Type | Chest bag type | Front pack type |
|---|---|---|---|---|---|---|
| item |  |
 |
 |
 |
 |
 |
| Portability | ◎ | ◯ | ◎ | ◯ | △ | △ |
| balance | ◯ | × | × | × | ◯ | ◯ |
| Comfort | △ | × | ◯ | ◎ | ◯ | ◯ |
| Quick shooting ability | ◯ | ◎ | ◎ | ◎ | △ | ◯ |
| safety | × | × | △ | △ | ◎ | ◯ |
| set up | △ | ◎ | ◯ | △ | ◯ | ◎ |
| multifunctionality | × | × | ◎ | △ | ◯ | ◎ |
| price | ◎ | × | × | × | △ | △ |
| Here is ◎ |
|
|
|
|
|
|
| Here is △ |
|
|
|
|
|
|
Next page: Recommended gear for each situation
Recommended gear for each occasion
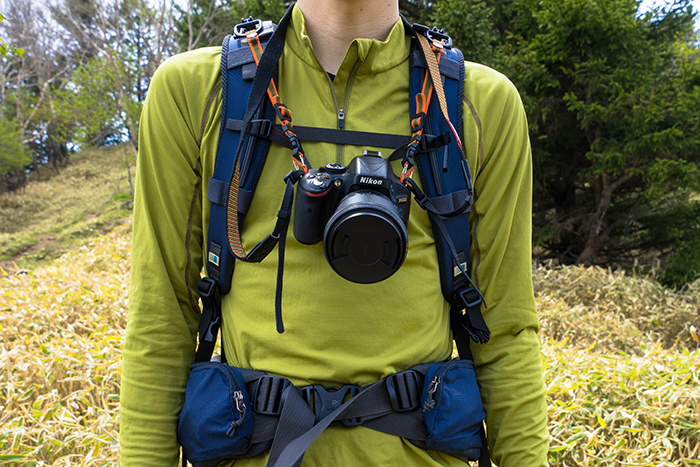
Recommended for day hikes with minimal luggage: Holder type
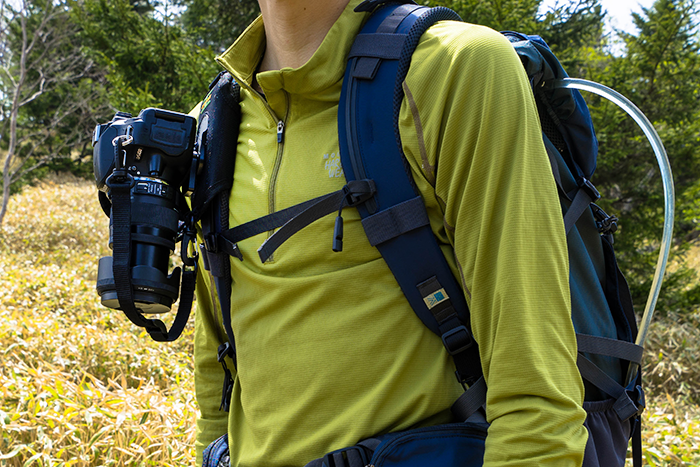
The two types we tried out this time differ Peak Design ) and a rotating type ( COTTON CARRIER COTTON CARRIER , which seemed a little wobbly, also came with a strap to prevent it from falling, so it was safe.
Above all, the camera's exceptional speed allows you to quickly get into a shooting position when you feel the moment is right. Despite being a single-lens reflex camera, its ease of use is on a par with or even surpasses that of a compact digital camera or smartphone, and it has dramatically changed the way I photograph
It's also smart that it doesn't get in the way when you take off your backpack or put on or take off your clothes. What's more, Peak Design a wide range of optional products that can be attached to this attachment , making it the best in terms of expandability for your entire camera life (although on the other hand, there's a chance that you might need to purchase additional options to suit your setup).
However, as you can see, the exposed camera is vulnerable to rain, dust, and shocks, so there are concerns about using it for long periods of time. Also, on long mountain trips, the shoulder of the person wearing the camera inevitably becomes fatigued and sore after the second day, and in rare cases, it even causes pain (of course, this impression varies depending on the person's physical strength and the weight of the camera). While the holder type seemed perfect in such a stable environment, there were some concerns when using it on long mountain trips with a relatively heavy load
In that sense, the holder type is most suitable for long-term, light day hikes that do not require a heavy load , and of these, if you are only looking for simple usability, the COTTON CARRIER , but if you also consider expandability, we recommend the Peak Design


Front pack type: Recommended for all-around mountain climbing, including heavy loads and long-term mountain climbing
First of all, it's just a bag, so it doesn't require any special setup. There's no need to choose a backpack, and it can be matched with any style. Attention has been paid to even the smallest details, such as the cushioned shoulder pads, so it feels great to wear. The straps that tighten around the waist ensure that the bag always fits to your body and doesn't swing around too much when you walk
The biggest advantage of this pack is its excellent load balance. By moving some of the luggage that would normally be packed in a backpack to the front, the load balance is improved not only from side to side but also from front to back, which obviously makes it less tiring to carry
On the other hand, as you may have noticed, this type of pack is not designed to carry a camera, so it is important to note that it does not have the same quick-shooting capabilities as a holder-type pack, nor does it offer the same protection as a camera chest bag
Ultimately, it depends on how much importance you place on the hassle of opening and closing the zipper and the safety of features like the shock-absorbing inner cushion. While it's not the best, it's quick to access and has adequate protection, and its load balance and storage are excellent. Overall, it 's definitely a type that's easy to use for long-term mountain climbing with heavy loads.

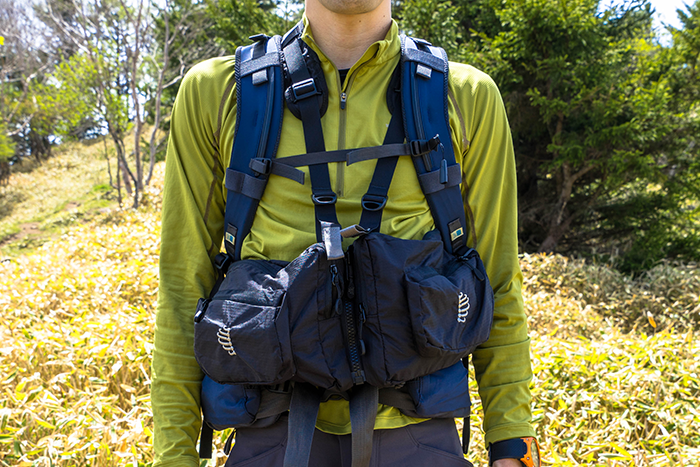
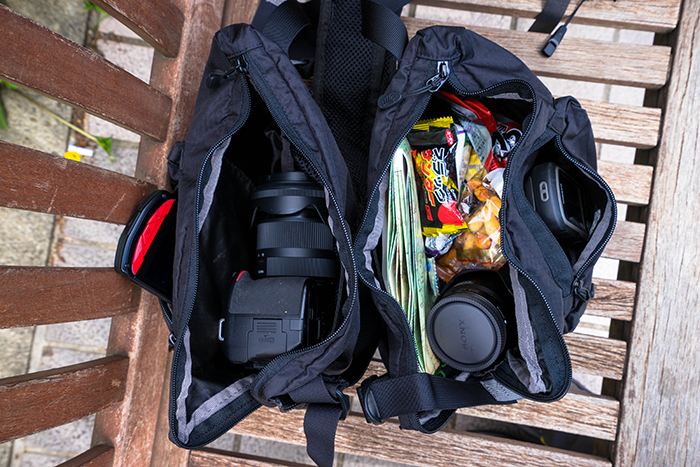
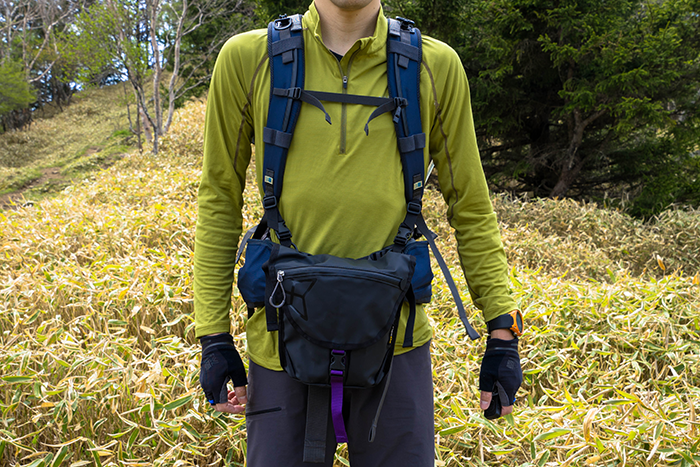
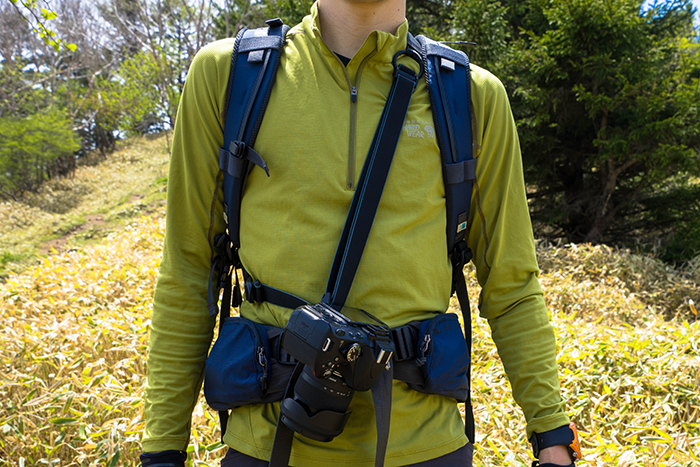
Chest bag type: Recommended for those who want ease of use but also want safety
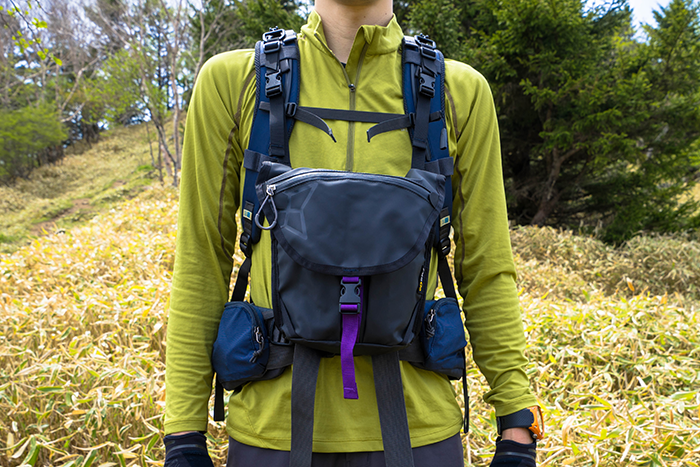
Among them, the model we chose as the easiest to use is the PaagoWorks FOCUS (pictured left or above) . Despite its high level of protection thanks to its rain-resistant material and shock-resistant detachable inner case, it's lightweight and compact, offers decent access to the camera, and features two front pockets with waterproof zippers for ease of use. It's a very complete bag to use as a base. However, since it's inferior to the two above in terms of quick shooting and convenience, we recommend it if you prioritize safety over anything else, regardless of the length of your trip or the weight of your luggage .
It's certainly possible that your backpack just isn't the right size, but since backpacks don't all have the same structure across all manufacturers, it doesn't necessarily mean that the problem is with the individual
What can you do in such a situation? You can either use a separately attachable D-ring (sold separately) or attach it directly to the shoulder harness with a carabiner, which will allow you to find the perfect position

Moderate effectiveness but cost-effectiveness: Chest strap type
The drawbacks are that it's only so-so in all respects. It doesn't completely eliminate the discomfort of the backpack hanging down, it does block your downward view, and having to remove the straps every time you take a photo or take the backpack off isn't very smart. Also, few backpacks these days have D-rings on the shoulder harness, so if yours doesn't have one, you'll need to find a separate D-ring to attach, as mentioned above
In the photo, the strap is attached directly to the camera, so it is exposed, but you can also wrap the camera in a camera bag and then hang the bag itself, which can increase protection depending on how you do it

Not suitable for the mountains, but perfect for travel: the instant-shooting strap type
there is the quick-release strap, which has a good reputation in the world of general camera straps . This strap is attached to the tripod screw hole on the bottom of the camera, and its distinctive feature is that it can be quickly switched between shooting mode and carrying mode.


summary
I'm sure there are many interesting reviews online on personal blogs about the gear I tried out this time. Reading them will be very informative. However, everyone has their own unique shooting style, and naturally, the way they are used and the environment they're used in will also vary. I simply wanted to know which gear is truly easy to use after trying them side by side. I also thought that a more objective evaluation like this one would be worth sharing. In that sense, I hope the results of this review will be helpful to you as well
There is still room for improvement in this genre of gear, and many users around the world are eagerly awaiting it, with new ideas emerging one after another on Kickstarter in the US and elsewhere. Outdoor Gearzine will continue to keep an eye on the latest gear