Practical Use of the Garmin inReach, an Affordable Satellite Communication Device, for Hiking - Two-Way Messaging, Facebook Integration, and More
Written by Yoshihiro Murakami
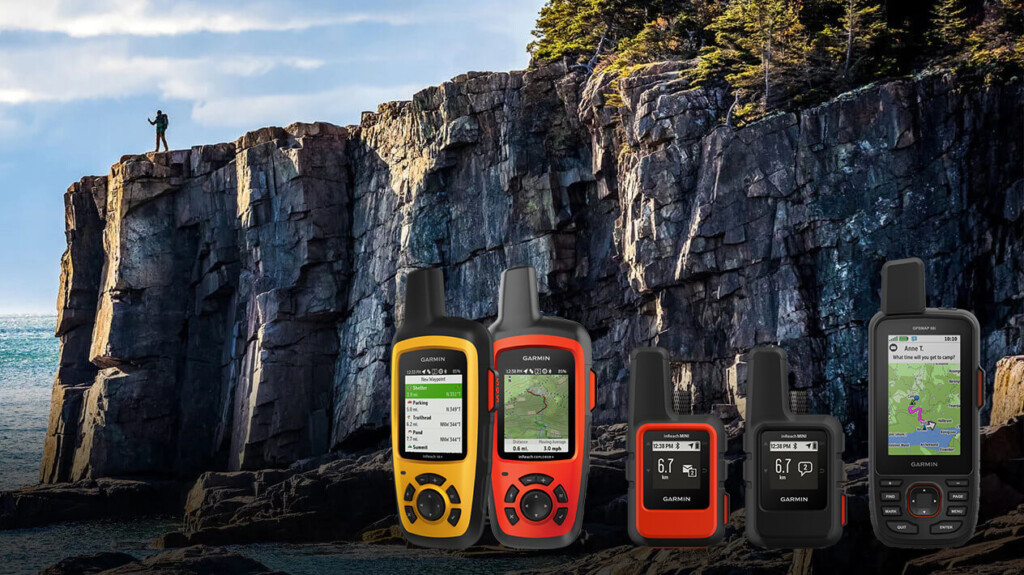
Garmin released the inReach Explore+ and Mini in 2018, and the GPSMap 66i in 2019. Both are two-way messaging systems with location information using the Iridium satellite network and can send SOS messages.
The inReach Explore+ can display maps on the device and can also be used as a standalone GPS. The Mini is an ultra-lightweight satellite communication device. The GPSMAP 66i combines a standalone GPS with the inReach Mini, incorporating technologies from Garmin and the former DeLore. Both devices connect to a smartphone via Bluetooth for easy messaging. The Earthmate app can also be used as a standalone GPS app.
The first-generation inReach model was developed by DeLore and was enthusiastically embraced by American hikers. In the mountainous regions of the United States, where mobile phones are rarely available and populations are scarce, calling for rescue is difficult. With inReach, you can send an SOS message with location information from anywhere, making rescue more precise, faster, and less costly, increasing the chances of survival.
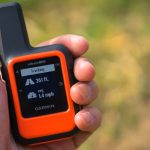
Garmin acquired Delore in 2016, but continues to support the company's products, including older models. I'm a loyal user of the older Delore Explorer model. Last time, I borrowed the Mini (Photo 1) from Outdoor Gearzine and compared it with the older model to check its performance. I
've been using it since 2012, but the usage know-how is written in English, making it difficult for those who can't read it. More than a year has passed since its release in Japan, and it has gradually become more popular, but the number of users is still small, and there's still a lot of room for improvement in terms of usage. This time, I'll focus on the two-way communication function and explain how to connect it to Facebook.
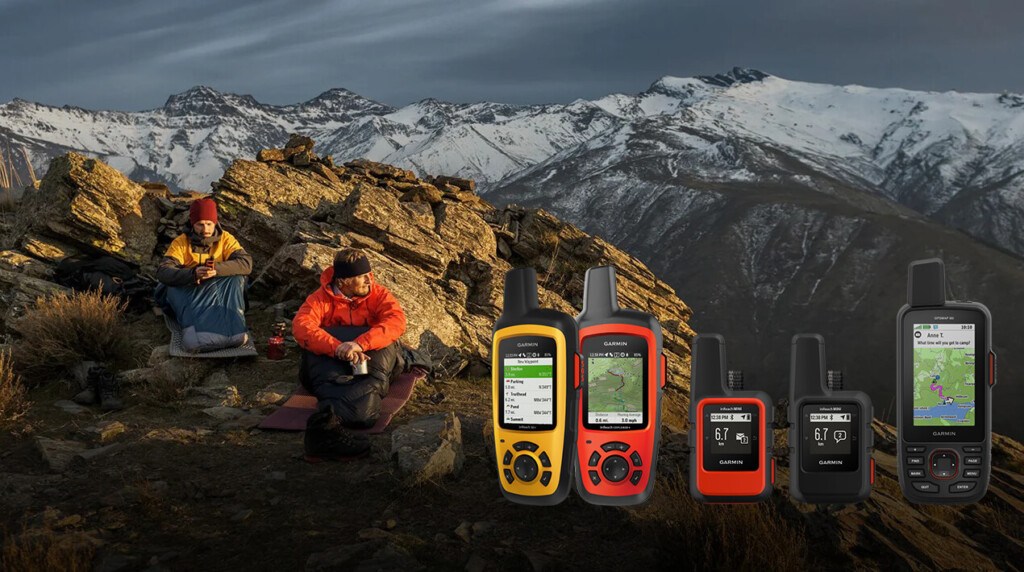
Photo 1: Garmin models with two-way satellite communication (from left: inReach Explore+, Mini, GPSMap 66i)
table of contents
Practical Use of Garmin inReach for Hiking
satellite communications contract
After purchasing an inReach device, you will need to sign up for an Iridium satellite communications contract. There are two types of contracts: Personal and Professional. The Personal plans come in three types: Safety, Recreation, and Expedition. Here, we will explain the Personal Safety plan
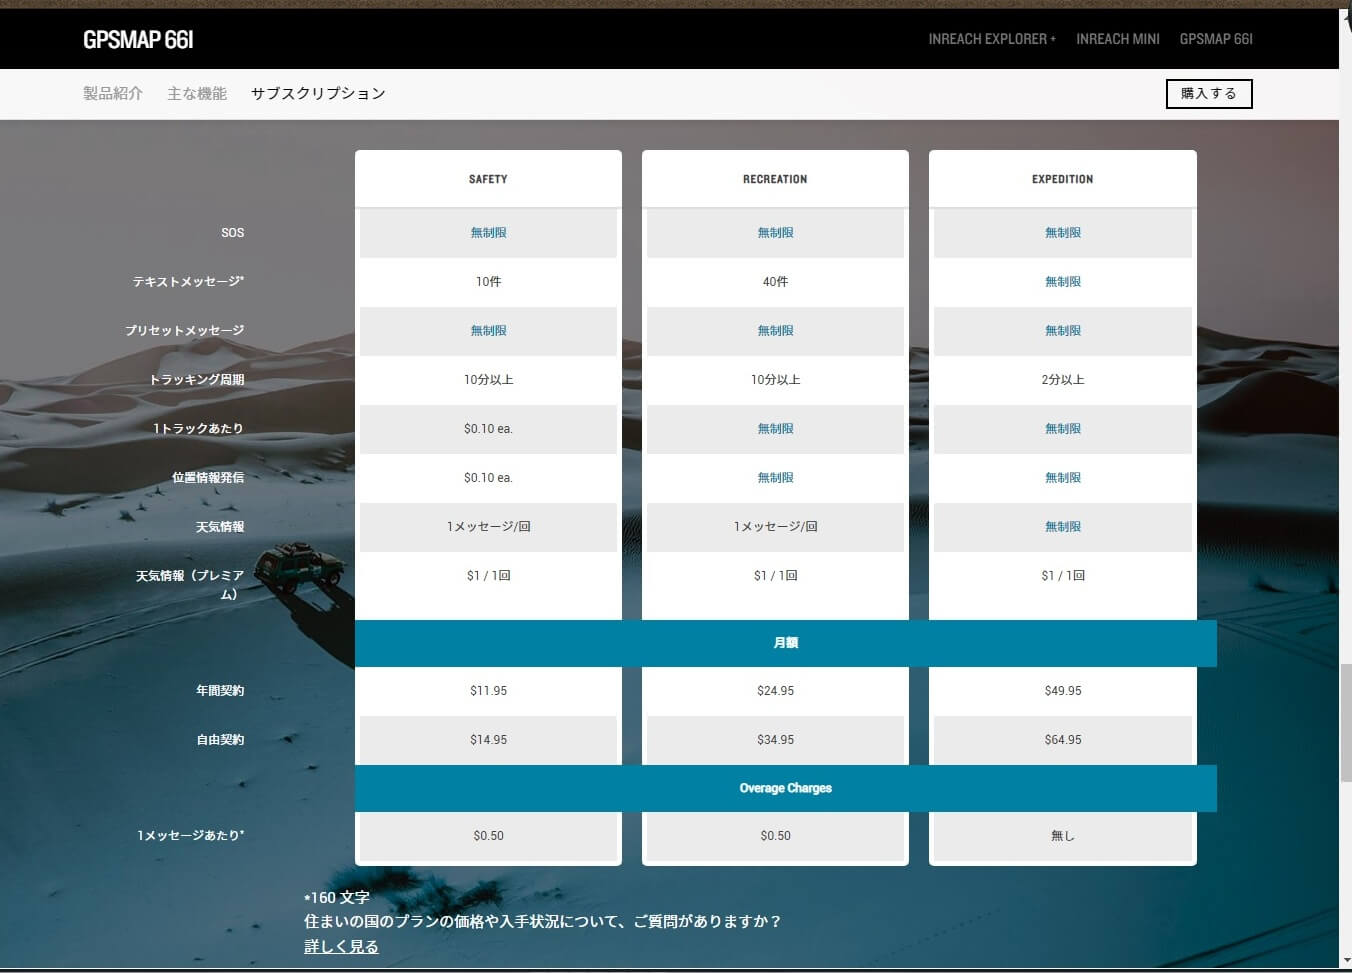
Photo 2: Subscriptions have been simplified a bit, making it easier to change plans
The Safety plan is $15/month for a monthly contract or $12/month for an annual contract, and includes unlimited SOS calls, 10 free text messages per month, $0.50 each for excess messages, and unlimited preset messages
Rescue Insurance
InReach device owners can sign up for GEOS SAR for $18 per year, which stands for SAR 50, meaning search costs are covered up to $100,000. To sign up, subscribe on Garmin's EXPLORE website, then click GEOS SAR in the Account tab
If you are rescued from an accident in a foreign country, you will usually be taken to a hospital in that country for treatment. However, if you are unsure of the level of medical care or if the cost is so high that you would go bankrupt, it is a good idea to purchase GEOS MEDVAC insurance for $130/year. If you are rescued, they will transport you to Japan if possible
GEOS SAR and MEDVAC are rescue insurance, not medical insurance. You will need to purchase medical insurance separately
On the right side of the account page, you can register an emergency contact email address and set up SNS messages. This is the setting for American phones, where the phone number is the email address. There is no need to set this up for Japanese phone numbers
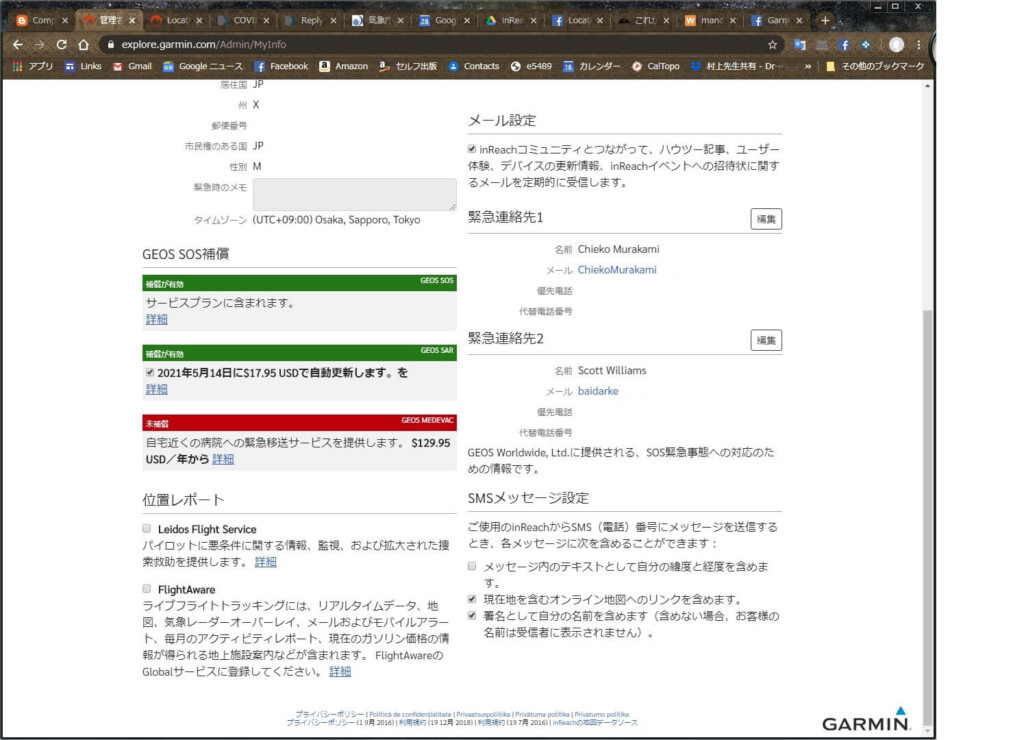
Photo 3: You can apply for rescue insurance through your EXPLORE account. This is the screen after I applied. It is automatically renewed every year
In Japan, rescue costs are free or only cost a few hundred thousand yen. However, in other countries, they are often one or even two digits higher. You could go bankrupt after requesting rescue. Since it is inexpensive, it is definitely a good idea to get rescue insurance
The insurance payout is conditional on pressing the SOS button on the inReach device. Failure to press the SOS button may result in the insurance not being paid out
You should avoid pressing the SOS button whenever possible. Even if you are injured in an accident and unable to move, in Japan you can avoid pressing the SOS button and instead email a friend or the police to ask for help. However, if paying for rescue costs is essential, it is better to press the SOS button
Another limitation of this insurance is that it only covers inReach device owners. If you are hiking with a friend and your friend is injured and unable to move, and presses the SOS button to call for help, you will not be covered by the insurance. Since you were not the person being rescued, your friend will not be covered by the insurance. Also, since your friend does not own an inReach device, the insurance will not be covered
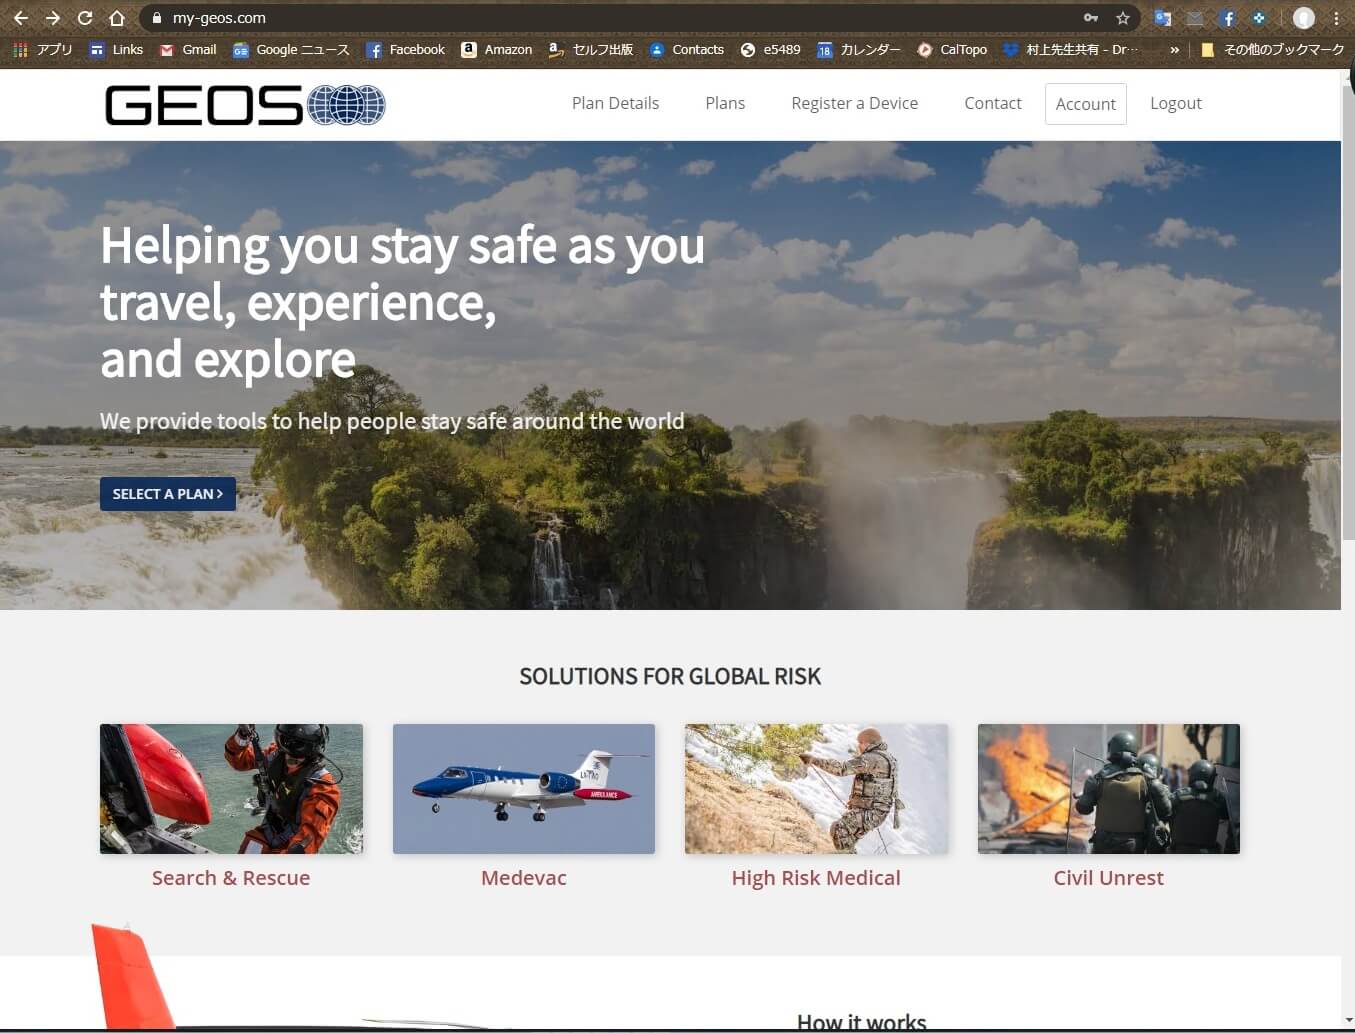
Photo 4: myGEOS opening screen
If you apply for rescue insurance through Garmin's EXPLORE website, you will be applying for this GEOS SAR50 insurance. Garmin's website cannot do anything more than this
By visiting the GEOS website and creating an account, you can upgrade to a slightly more expensive rescue insurance plan such as SAR100, or add friends and family to your rescue insurance
In my case, I registered my wife and the total premium for two people is $32/year. The rescue insurance is up to $100,000 in total, with $50,000 per person. This is sufficient in most cases. If the insurance amount is insufficient, you can change it on the GEOS website
GEOS is a global rescue organization that monitors SOS signals 24 hours a day. When it receives an SOS signal, it immediately sends a simple confirmation email (in Japanese in Japan) to understand the situation and send rescue instructions to rescue teams in each country
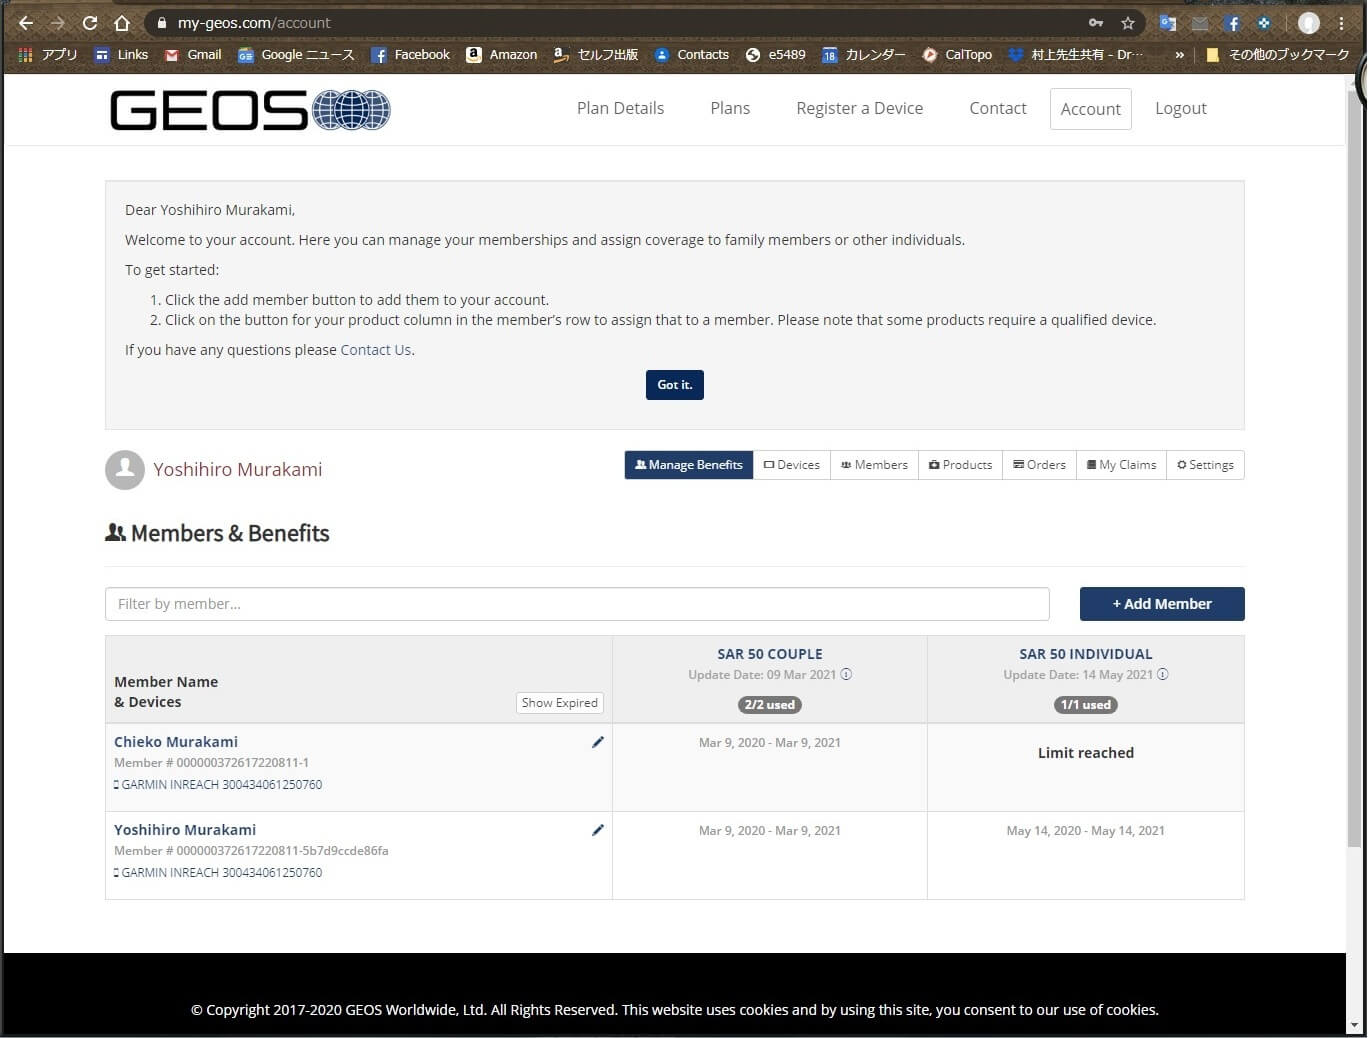
Photo 5: My example, a couple registering
Two-way communication via email
The Iridium satellite network covers the entire world, allowing you to send two-way emails and send SOS messages anywhere in the world. As long as you can see the sky, you can send emails to friends from anywhere, even if you don't have cell phone reception. Your friends can see your location on a map and send you an email
However, due to political circumstances, it is best not to use it in Taliban-controlled areas of Afghanistan, Crimea in Ukraine, Cuba, Iran, North Korea, South Korea, China, Myanmar, Sudan, Syria, Thailand, Vietnam, India, or Russia
Two-way communication with preset messages and quick text messages (using inReach devices)
If you are only using an inReach device, it is better to send preset messages. You can create three preset messages and send them to multiple locations at the same time. Sending these messages is free, no matter how many you send
Since messages are selected using the keys, it takes time to select messages 1, 2, and 3 in that order. Therefore, it is a good idea to use frequently used content for message 1 and less frequently used content for messages 2 and 3. In most cases, three types of preset messages are sufficient
However, inReach devices cannot display Japanese. If you write in Japanese, the message can only be read on a smartphone or computer. To read it on an inReach device, you must write in Roman letters or English. In my case,
- Rest stop. I will go further
- Lunch time. I rest at least for half an hour. -- Lunch, I rest for at least 30 minutes
- Tent here. A good place to spend a night
In short, it's just a break, lunch, and tent. To make it easier to understand, I added Japanese at the beginning because I thought it would be easier for the recipient to read on their smartphone
I take a break every 1-2 hours, so I send my current location using the inReach device at those times. Even if I get lost and can't send an SOS, I'll be found quickly because the search range is small. An example of the settings is shown in Photo 6
You can set multiple email addresses as recipients. In my case, I set it to send to MapShare and Facebook at the same time
You can also create quick text messages in advance, which you can easily edit and send from your inReach device. Each message costs $0.50. I tried using it, made some edits to the text, and then left it alone and never used it again
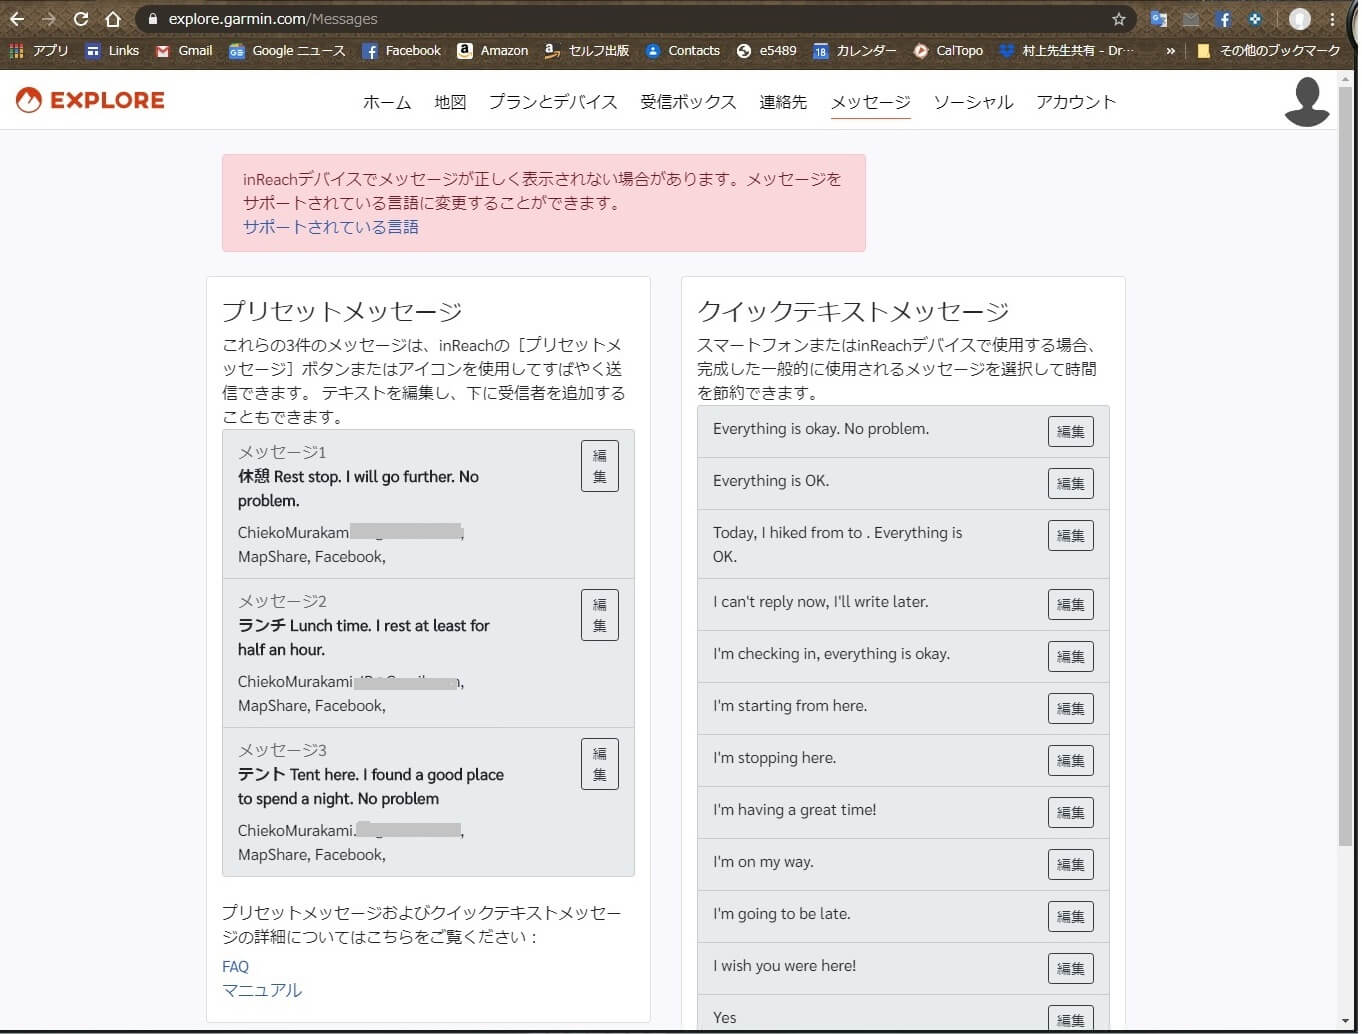
Picture 6: My example message. Preset messages are sent to multiple addresses simultaneously

Photo 7: Preset messages I sent. These are free to send as many times as you like
I think it takes about a few seconds to send and receive emails. In other words, it's the same as Gmail. However, there may be some delays if there are problems with the Iridium satellites or if there is a large amount of email being sent at once. If there is an error in the email address, it may take a little longer, but unlike in the past, an error message will be returned. This is a very good improvement
Sending and receiving regular emails (using the smartphone app "Earthmate")
This is the case when an inReach device owner is out of range, such as in the mountains, and their friend is in an environment where they can use a smartphone. In this case, the inReach device sends a message to a regular email address, such as Gmail. The friend who receives the message can read and reply to the email with location information. Up to 10 messages (160 characters) per month are free, with each additional message costing $0.50
It's easier to create messages using the Earthmate app on your smartphone, connecting your inReach to it via Bluetooth. You can also create messages on the inReach device, but it's a bit more work
Message destinations are linked to Google Contacts and your address book. If you sync your inReach with your computer, email addresses will be automatically registered. Click the Message menu in Earthmate, enter the email address, and create a message
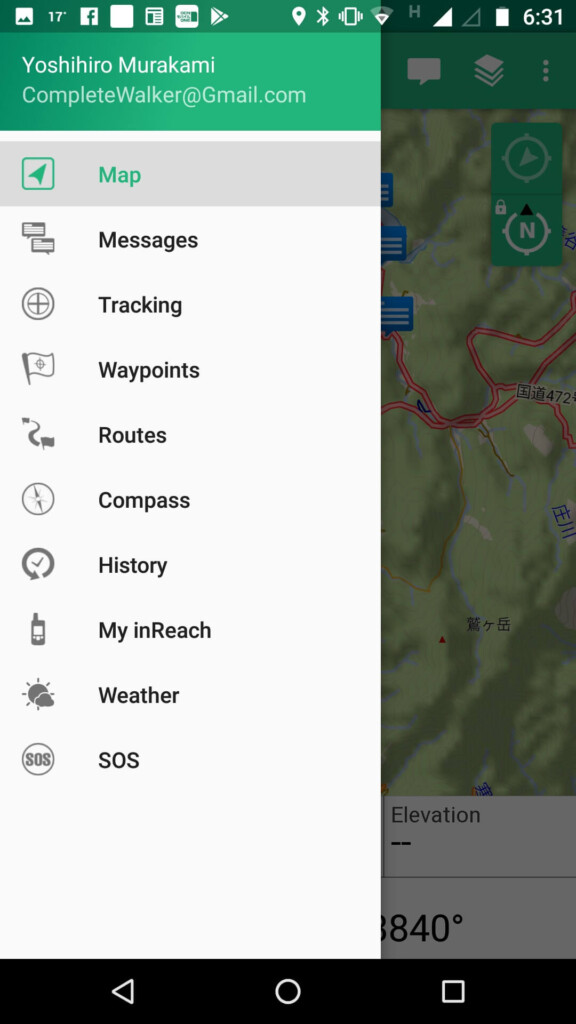
Photo 8: Click the menu in the top right corner of Earthmate to display the full menu, then click Messages
inReach.Garmin email address
When you own an inReach device, you are assigned an address of xxx@inreach.garmin.com (where xxx varies depending on the individual). This is the address used to send and receive messages between inReach owners
Using this address, the sender and receiver can exchange messages even if they are both in the mountains and out of range of their smartphones. This address cannot be used on PCs or smartphones. It is an address exclusively for Iridium satellite communications
MapShare is software that displays your messages, longitude and latitude location information, etc. on a map, and was inherited from Delore. From the Social tab of your account, click MapShare Settings (Photo 9) and MapShare Data Filtering to set the name and description, password, viewer control, display period, etc. There was a bug in the display period filtering, but this has now been fixed
To allow people who view your map to reply, check the option, as shown in Figure 9. Please note that there is a $0.50 fee for receiving emails, depending on your contract
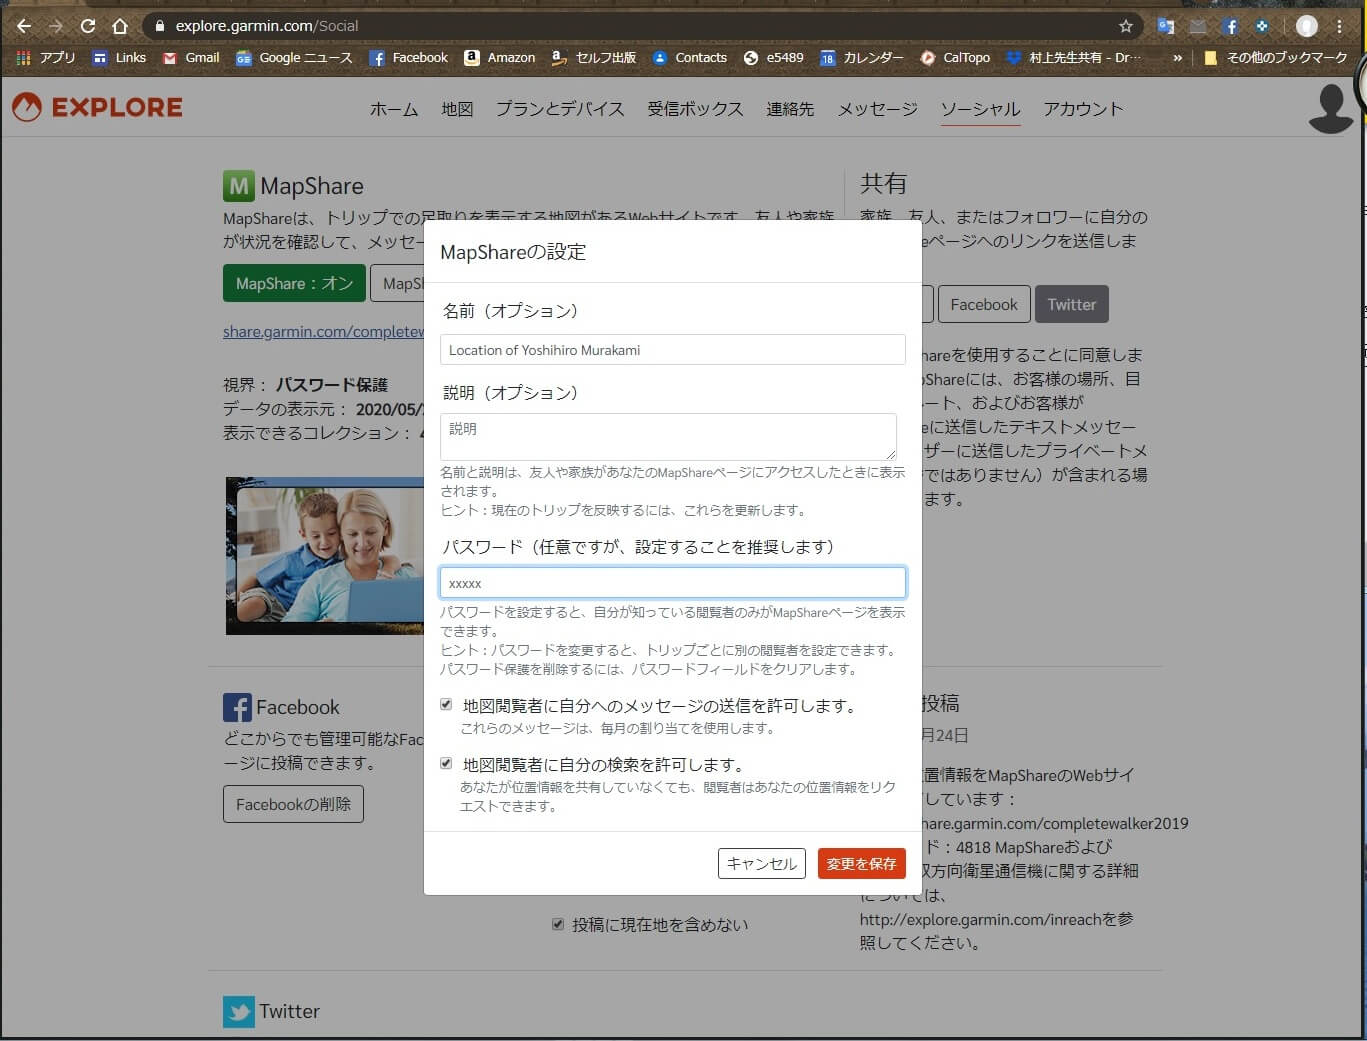
Picture 9: Mapshare preferences. Unless you want to make your location completely public, it's a good idea to set a password
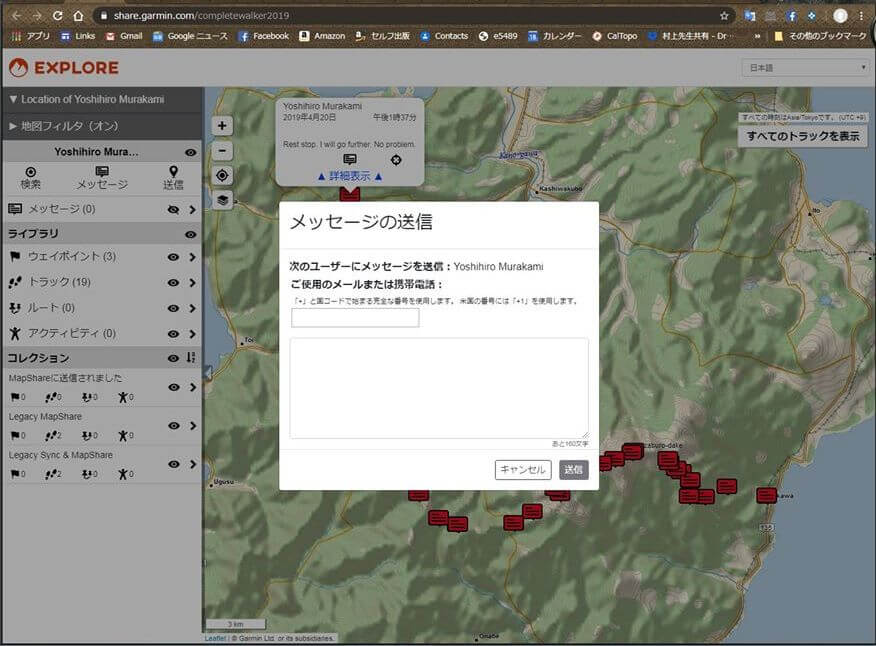
Figure 10: Clicking on the message icon for your current location on the map will bring up a reply window that your friend can use to send you a message
To share your location with friends, turn on MapShare. You can easily send this URL to each person using the share email, Facebook, or Twitter buttons
Practical use: How to share your location on Facebook
Due to Facebook's security policy, it is no longer possible to post directly to the timeline from an inReach device. So, there are three ways to do this: post the MapShare URL to your timeline in advance, create a private group and share it there, or create a page and post directly to it from your inReach device. Each method has its pros and cons
1) Sharing via Timeline
To make Mapshare public to only specific friends, just post the Mapshare URL on your Facebook timeline before you go out and set the privacy settings. If you limit the privacy to only friends, you probably won't need a MapShare password. However, if you want to limit it to a smaller number of friends, it's better to set a password. This is the easiest procedure
The biggest drawback is that over time, your posts will be relegated to the bottom of your friends' Facebook timelines and disappear, meaning no one will notice your messages or your location
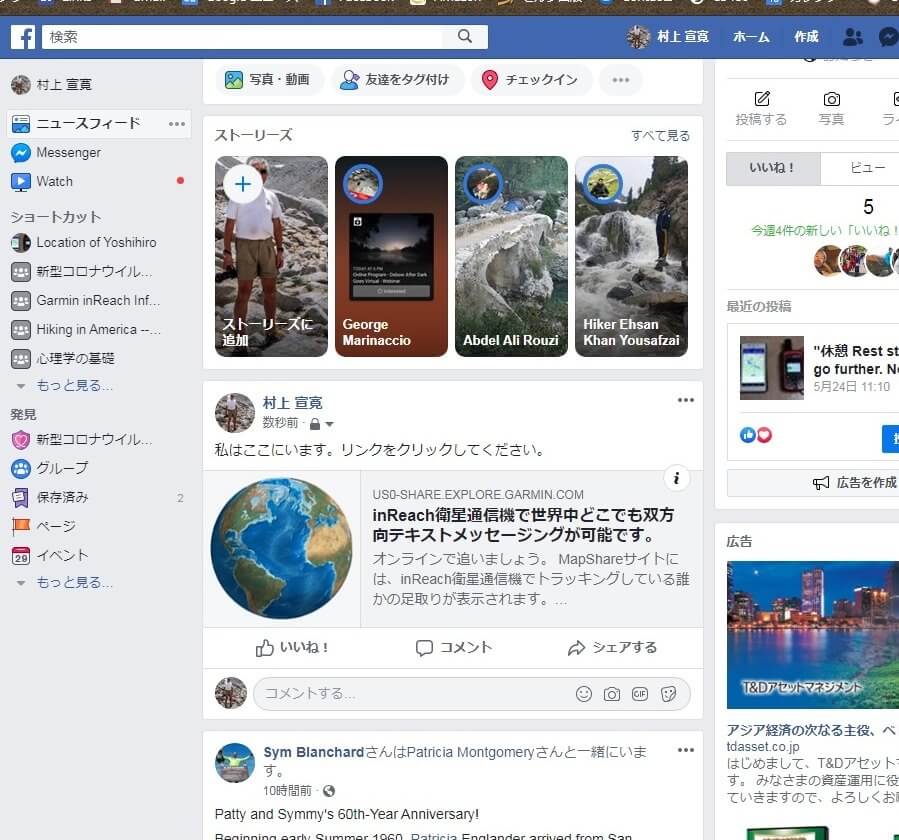
Photo 11: How to post the MapShare URL to your Facebook timeline
2) Sharing via Facebook Groups
Another way is to create a group that shows your location and add members to it
- To create a group, click Groups in the left column of Facebook and select +Create Group. A screen like Figure 12 will then appear. Set the group's name and privacy settings. Members can be added after the group is created
- Include the MapShare URL in your post, provide directions, and pin the post to the top of the announcement, otherwise it will get lost in the group timeline
- Add friends to groups whose messages and locations you'd like to share
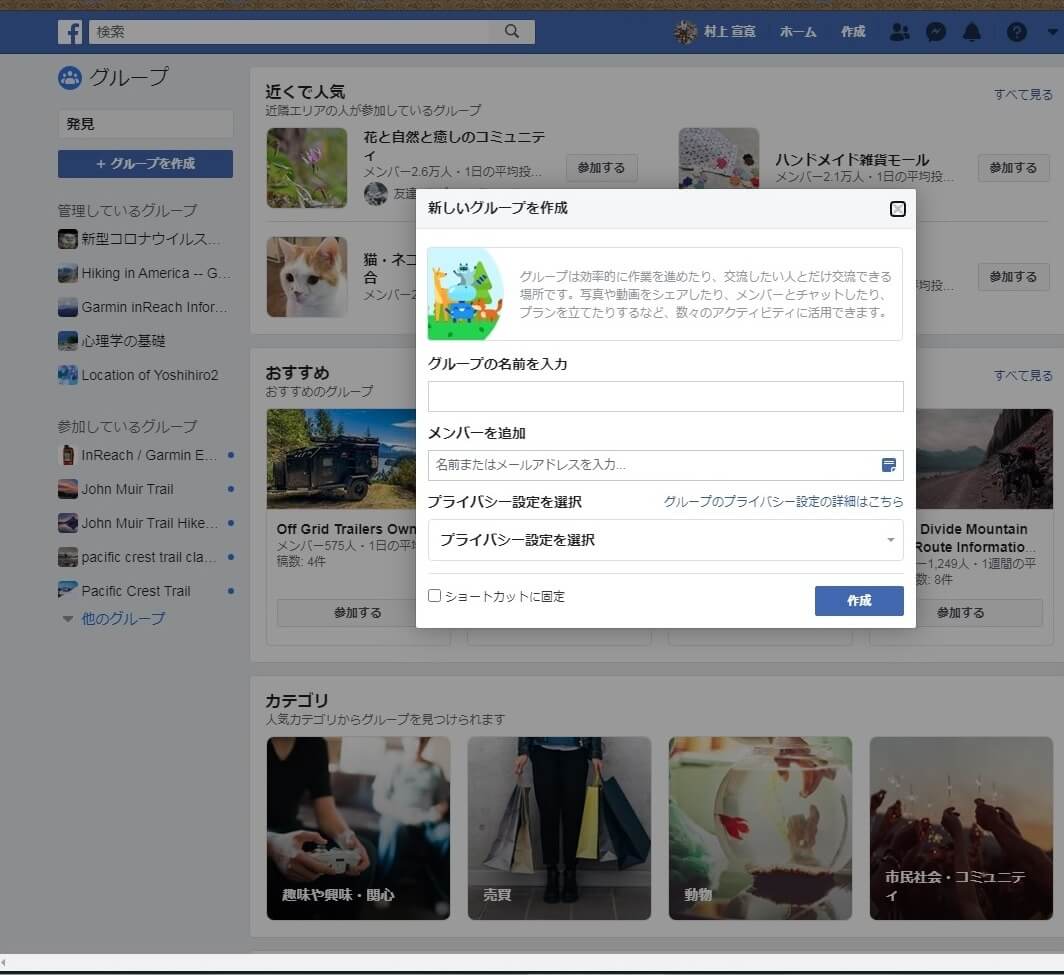
Photo 12: Create a new group and share your location there
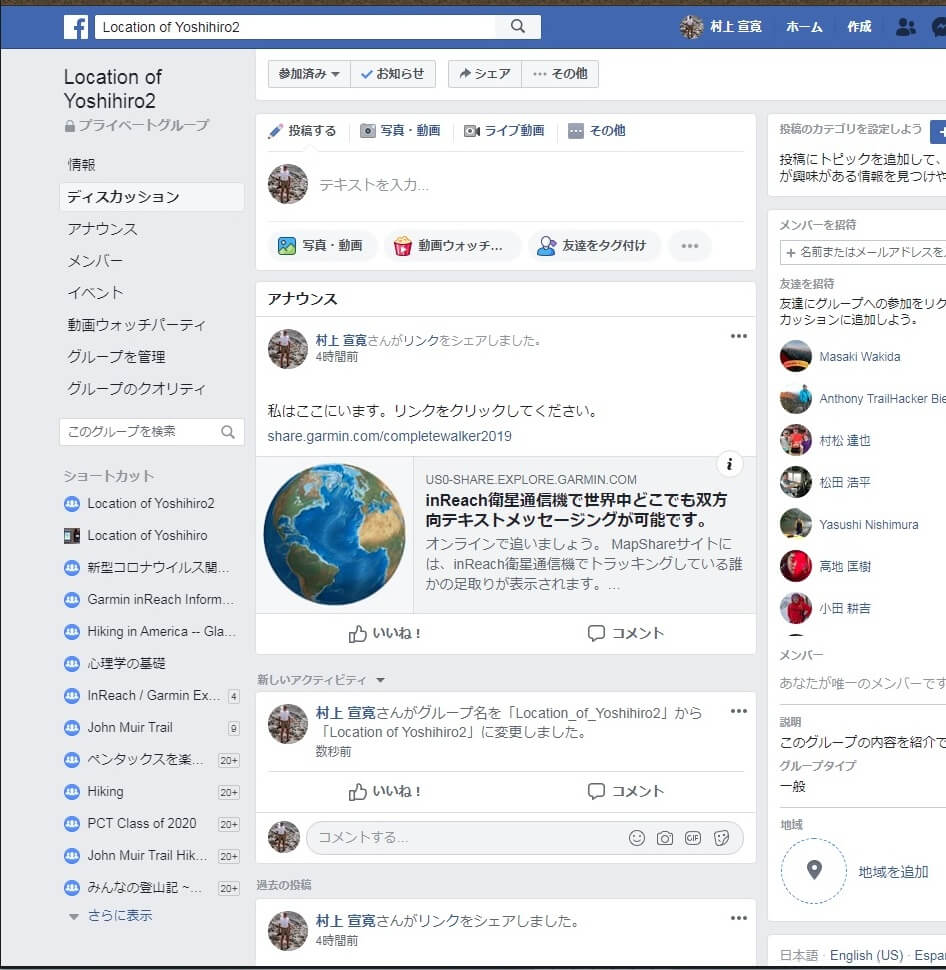
Figure 13: My example. By creating a private group and pasting the Mapshare URL there, you can share your location with specific friends
This method has many advantages: you can change the privacy settings of the group, you can use existing groups, and members will be aware of any posts made to the group. The downside is that unless your friends have access to MapShare, they won't be able to read the messages or be aware of new messages
Photo 13 shows my example. In addition to the MapShare URL, it says, "I'm here. Click the link." I used this method on the John Muir Trail in the summer of 2019 and it worked relatively well
Sharing via Facebook Page
You can only post to public Facebook pages from inReach. Posts are displayed in chronological order from newest to oldest, making them easy to view. Here's how
- To create a page, click on Pages in the left column of Facebook and select Create a Facebook Page in the top right corner. You will then be asked to choose whether to create a page for your business or community
- If you select Community, the screen shown in Figure 14 will appear. Enter the page name and category. The category is pre-determined and suggestions will appear. You can choose celebrities or blogs, but it doesn't matter for use
- Adding photos to the page completes the creation. You can skip this step and add photos later
- Click on "About" in the menu on the left side of the page and enter your username. I chose @inReachHiro to make myself more searchable
- Ask your friends to "like" your page and prepare for them to see it
- On the Garmin EXPLORE website, there is a Facebook menu at the bottom of the MapShare screen. Here you can connect to Facebook and decide which page to post to. Photo 15 shows an example of my post. Note that all posts here will be public, so I checked the box to not include my current location
If you uncheck "Don't include location" when posting to Facebook, your message and location will appear on the map, even if you password-protect MapShare. You can't make your location private. Furthermore, people viewing your map won't be able to send you messages using the messages on the map
This is fine for professional adventurers who want to share their messages and location information widely, but it's a problem for ordinary hikers who want to share their messages and location information only with specific friends
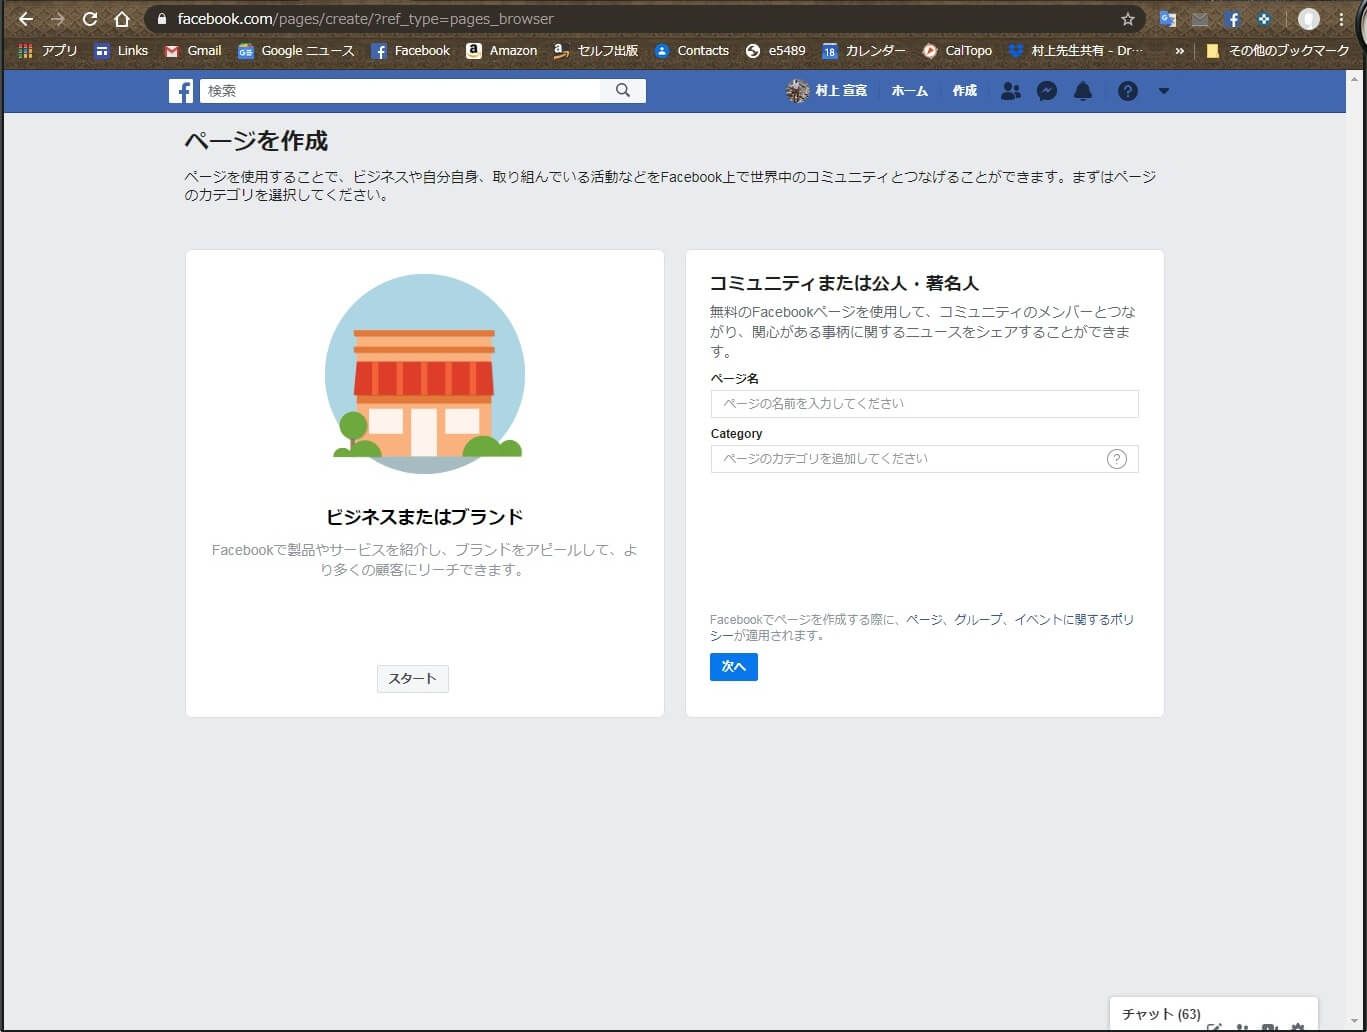
Picture 14: Page creation screen
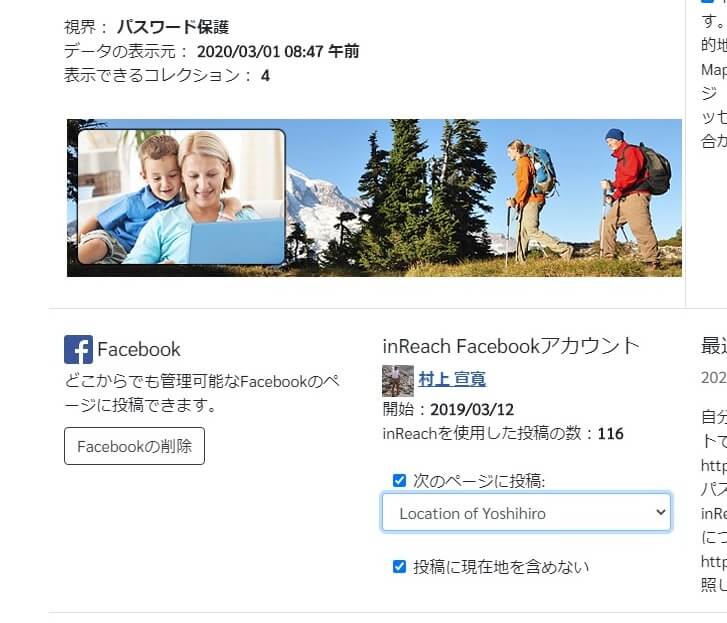
Photo 15: Connecting to Facebook on the Garmin EXPLORE website. My example setup
Separation of location information and messages
All pages will be public. Unfortunately, you can't keep both your location and messages private. So, when you post to Facebook, check the box next to "Don't include my location in posts." Then, only messages will be stored on the page
Your message will be public, but no one will be able to see your location. So, pin a post with your MapShare URL to the top of your page. This way, only friends who know your MapShare password will be able to see your location and send you messages on that map
The result is shown in Photo 16. This way, the MapShare location information will be displayed at the top, and the other messages will be displayed in chronological order from newest to oldest
The page seems to be made for commercial purposes, and Facebook will occasionally nag you to advertise the page you created. Click the X to remove it, and select the option to not show this advertisement
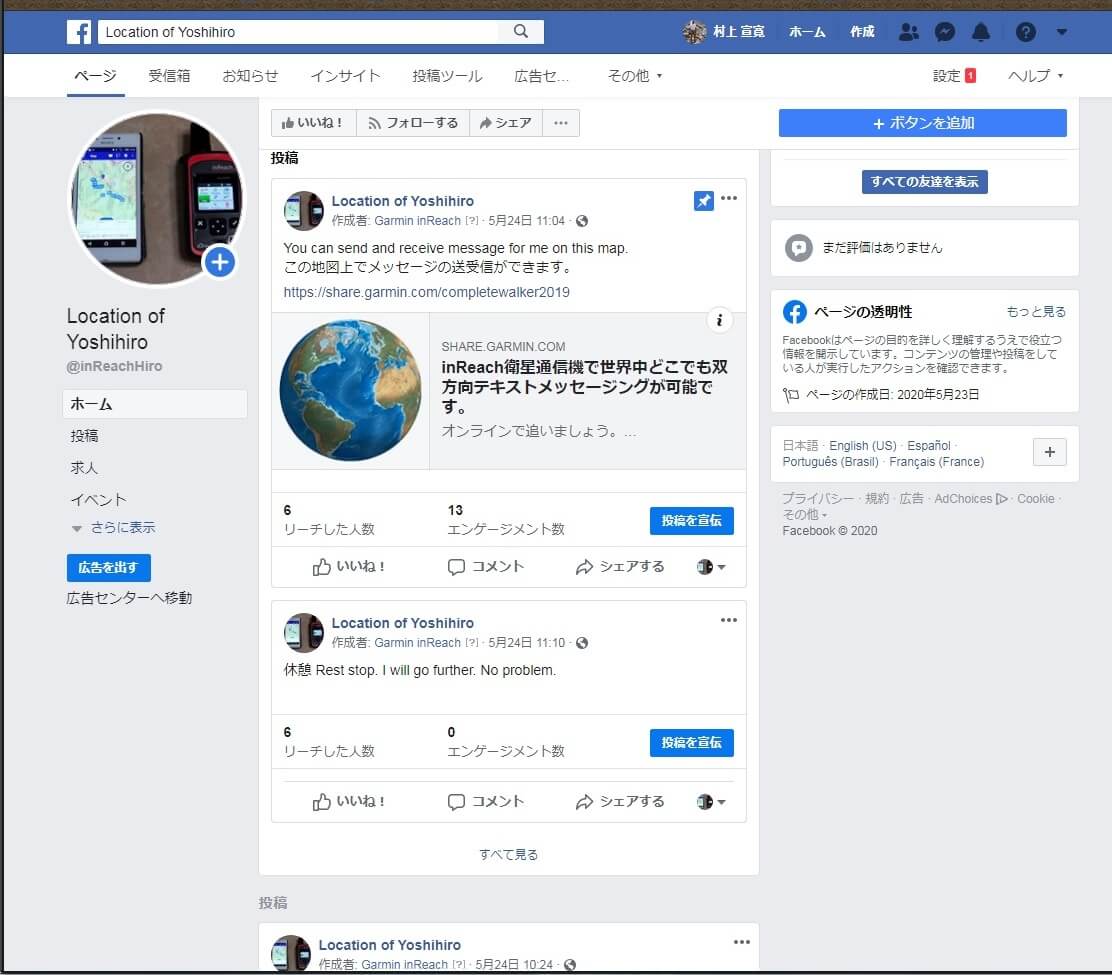
Photo 16: A page with location information and messages separated. When posting with inReach, use the option to not include your current location
Sync at the end
After changing any settings on the Garmin EXPLORE website, be sure to sync your inReach device. Firmware updates and other updates are often released without notice, so syncing regularly is essential
The synchronization method is shown in Photo 17. If you are using a computer, connect the inReach device with a USB cable. If you are using a smartphone, connect via Bluetooth, and launch the respective app. The website settings will be transferred to the inReach device
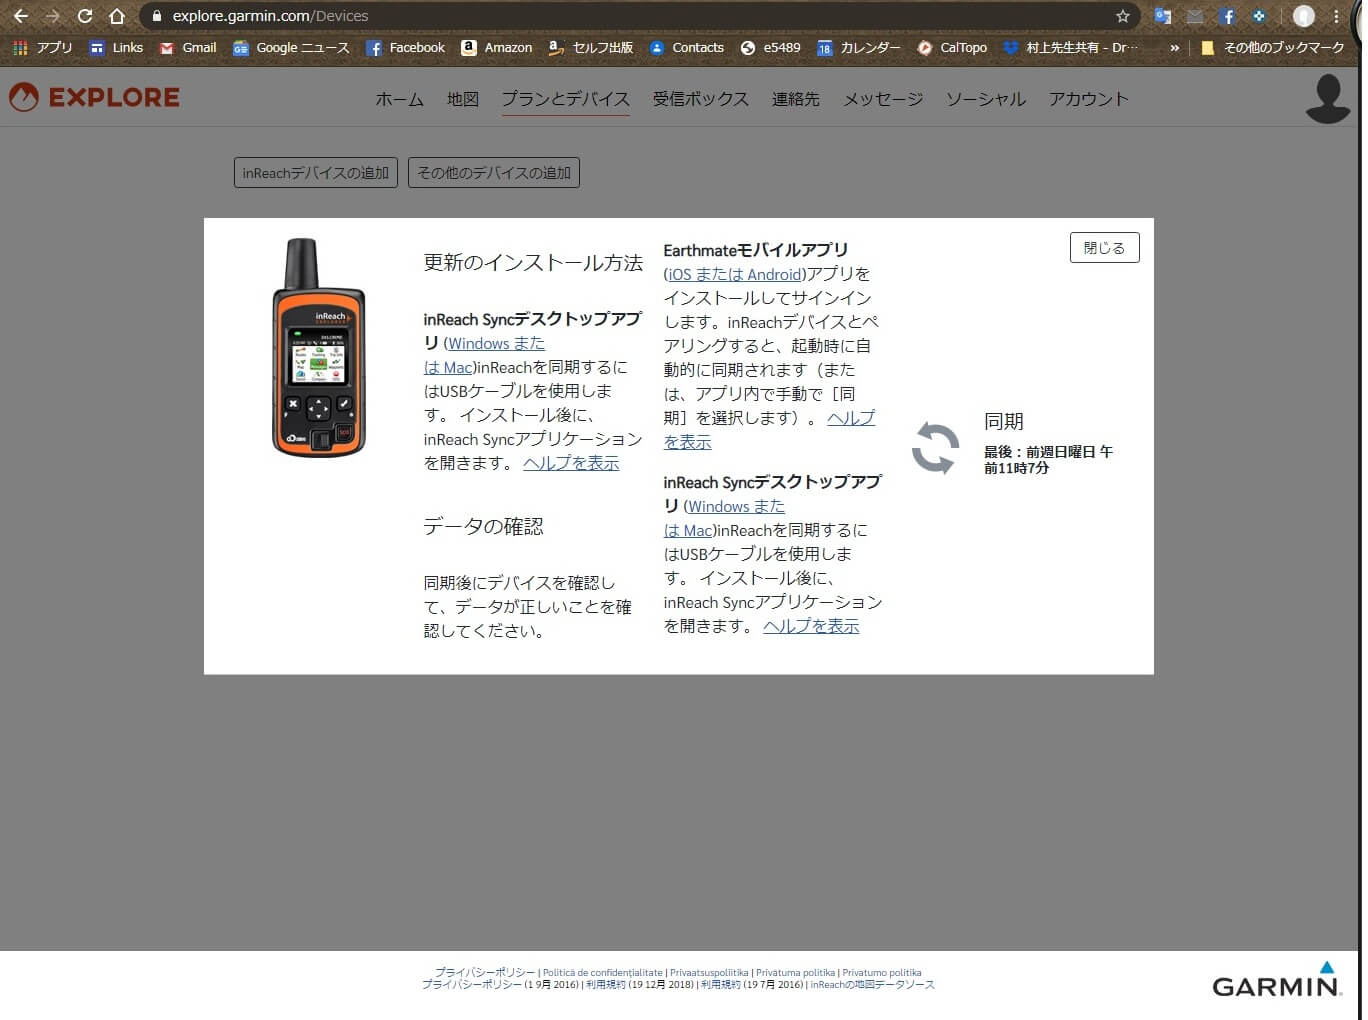
Photo 17: Syncing instructions, found by clicking the link on the right of the Garmin Explore Plans and Devices page
summary
InReach devices are more than just SOS transmitters. If you use two-way email or connect with Facebook, you'll realize their benefits. I felt that Japanese users still had a long way to go, so I decided to write this article. I'd like to clarify that I'm simply a long-time InReach user and have no vested interest in Garmin

 Garmin inReach® Mini: A revolutionary satellite communication device that everyone who goes into the mountains should know about
 Goodbye Garmin inReach. Welcome au Starlink Direct
 Buying Guide: CASIO, GARMIN, and EPSON: Finding the Best GPS Outdoor Watch for Your Purpose [Part 2]
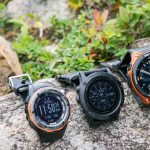 Buying Guide: CASIO, GARMIN, and EPSON: Finding the Best GPS Outdoor Watch for Your Purpose [Part 1]