[Fall/Winter 2025] The best backpacks for backcountry skiing and snowboarding, with tips for choosing the right one and avoiding regrets
Written by Yasushi Hisatomi
What is the best backpack for backcountry skiing?
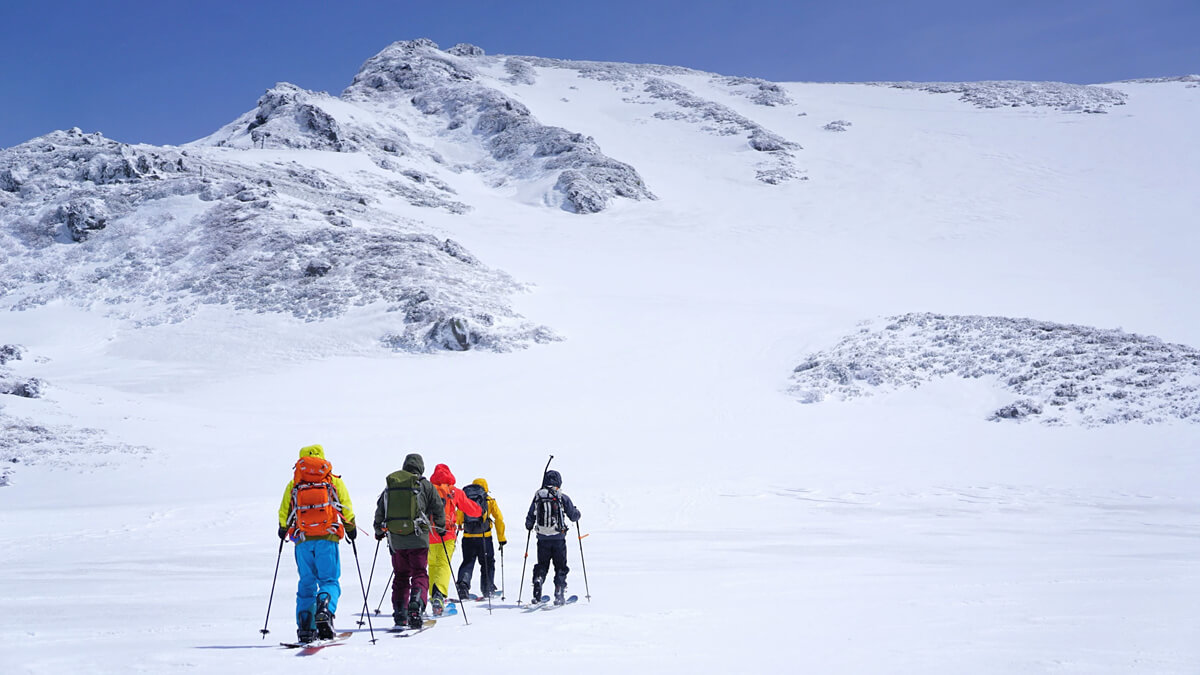
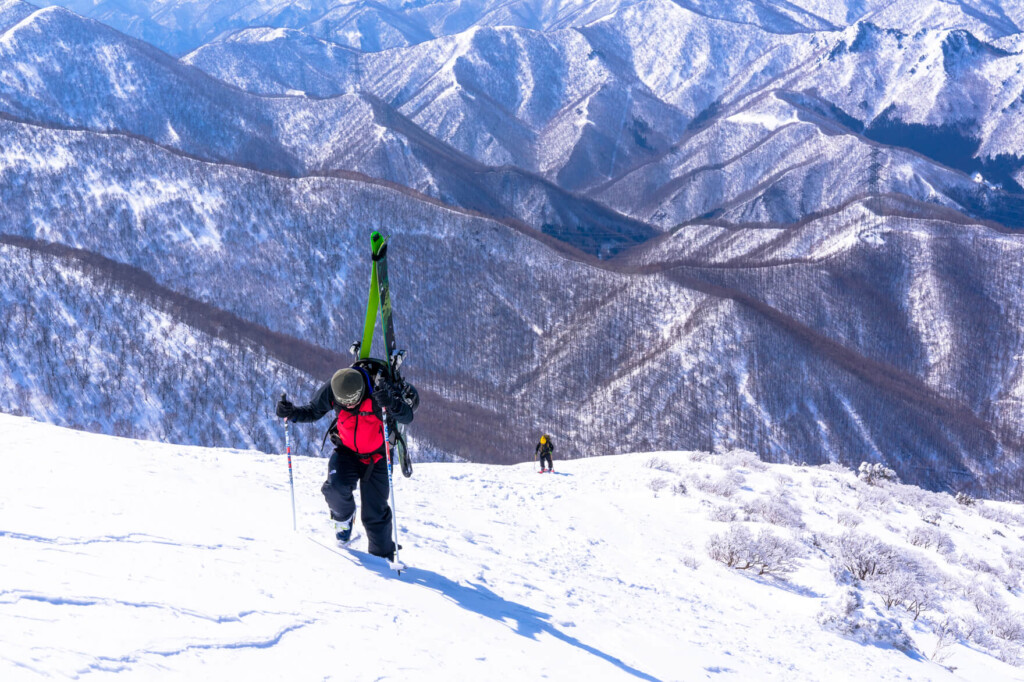
For those who love the dangerous yet exhilarating sensation of white powder, safety and comfort are always a priority, especially when it comes to arguably the most important piece of equipment in any mountaineering trip: your backpack
Although it is certainly possible to go backcountry skiing (ski touring) with a regular mountaineering backpack, to be fully prepared you'll want to use a backpack specifically made for that purpose
Of course, this is not simply a matter of preference. Even though they are both mountaineering backpacks, the way you use your body, the equipment you store and carry, and the types of danger you face are all very different between mountaineering and ski touring, so backpacks made for backcountry skiing have very different overall comfort levels, including how they feel when you wear them and how easy they are to use
So, for those who want to fully enjoy backcountry skiing and snowboarding, I'll write about recommended backpack models for backcountry skiing and snowboarding in the first half, and tips on how to choose one in the second half. After doing some research, I've learned that there are a wide variety of preferences for backpacks for ski touring, depending on the manufacturer and the person. Therefore, the selection method I'll write about here inevitably reflects my personal preferences and habits, so there may be many differences in opinion with experts. I hope you'll read on with that in mind.
Please note that we are only introducing one or two recommended models in each category here, but you can view a comparison table of all 169 best candidates, including other backpacks for snowy mountains, by becoming a member.
Outdoor Gearzine's content is made possible by your support. If you're interested, please consider becoming a member!
All recommended snow backpacks and a comparison table of all 169 models are available with a paid membership.
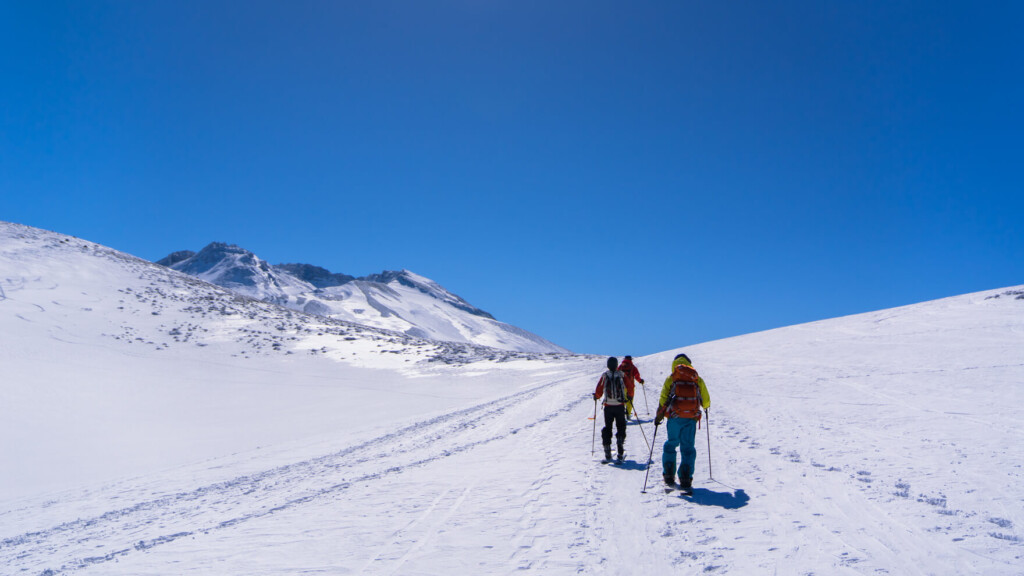
table of contents
- [By Use/Preference] Best Backcountry Ski and Snowboard Backpacks
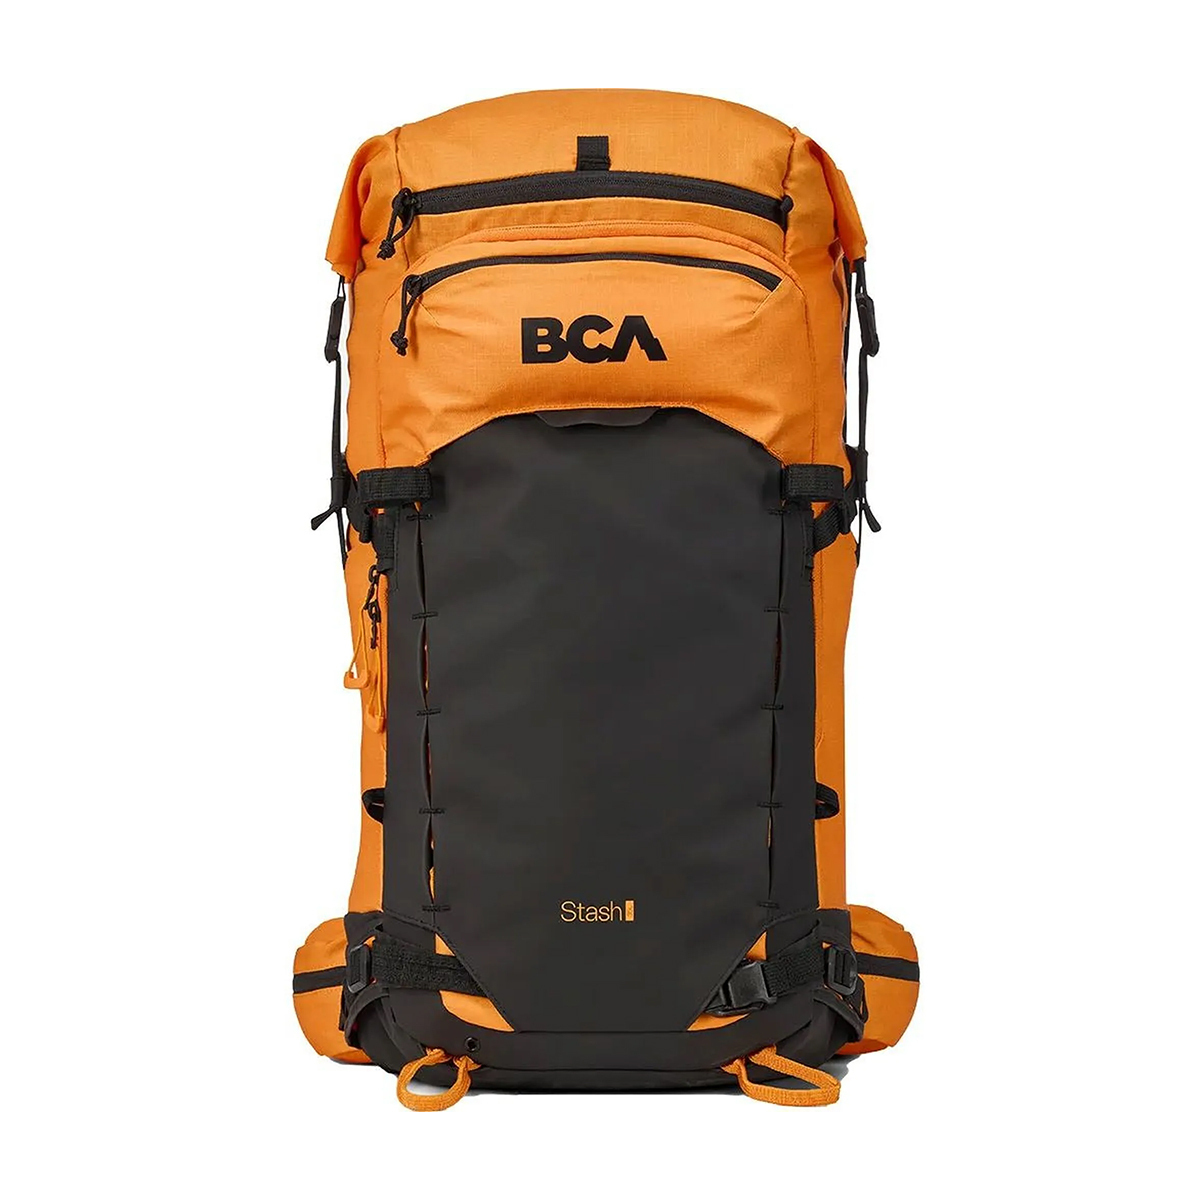
- All-around Backcountry Ski Backpack: bca STASH 35
- Best Backcountry Ski Backpack with Great Storage Capacity: Haglofs Sensate Pro 32
- Affordable Backcountry Ski Backpack: ARVA RESCUER 32 PRO
- Lightweight Backcountry Ski Backpack: ORTOVOX Switchback 27
- Large Backcountry Ski Backpack: Osprey Soleden 45
- Avalanche airbag for backcountry skiing: bca FLOAT E2 35L
- How to Choose: What is a Backcountry Ski Backpack? How is it Different from a Regular Backpack?
- 10 things to look for when choosing a backpack for the backcountry
- Point 1: Size (capacity)
- Point 2: Avalanche airbag or no?
- Point 3: Comfort and stability when carrying
- Point 4: Ski/snowboard attachment method
- Point 5: Dedicated storage for avalanche tools
- Point 6: Access to the main storage
- Point 7: Helmet holder
- Point 8: Storage for other special tools
- Point 9: Comfort of the shoulder straps and waist belt
- Point 10: Easy to use zippers and buckles
- Finally, check here
- summary
[By Use/Preference] Best Backcountry Ski and Snowboard Backpacks
All-around Backcountry Ski Backpack: bca STASH 35
The most difficult choice this time was the best model of backpack for backcountry use. This is because all of the models listed here are comfortable, convenient, and well-made, and it's hard to choose a favorite. However, since it would be boring to recommend them all, I chose two backpacks that I personally recommend, not only based on objective performance but also on whether they suit my style.
What I look for in a backcountry backpack is, of course, ease of carrying, but "convenience in terms of storage" is also a major factor, as it makes a big difference. Backcountry skiing requires a lot of packing and unpacking, with ski attachments, avalanche gear, ski crampons, helmets, skins, goggles, gloves, and balaclavas (although I personally have a tendency to carry a lot of stuff). And it requires quick action. For that reason, I want a backcountry backpack that can handle all the complicated and varied gear I need in the simplest and smartest way possible.
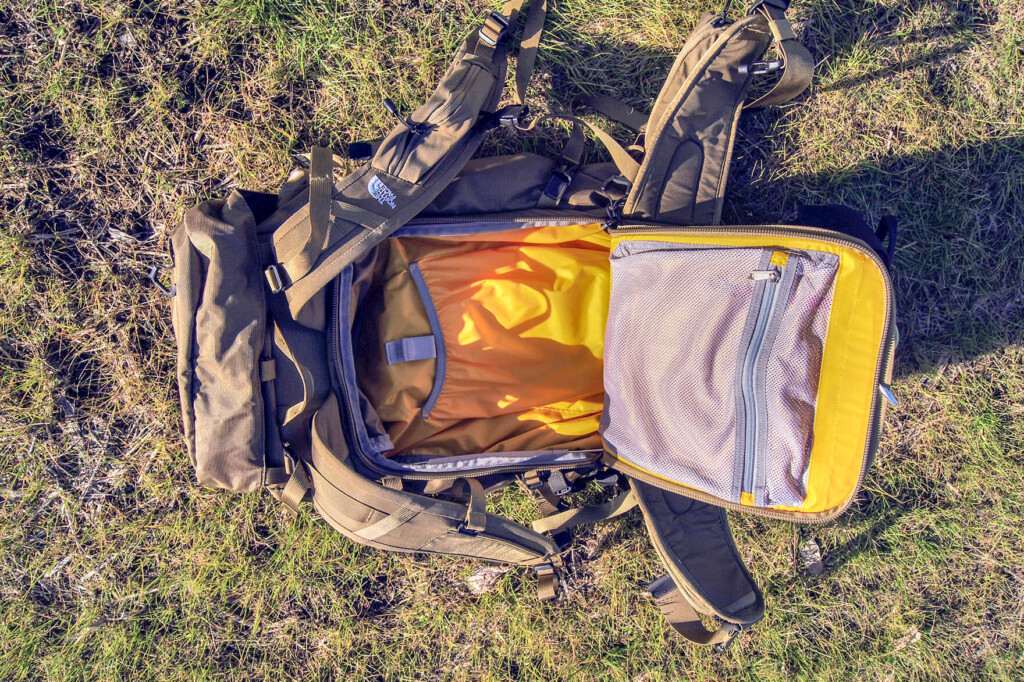
So, the first one I'll talk about the BCA STASH . I've always loved this series from BCA for its comfort and storage capacity. Not only can you attach skis in multiple styles and store avalanche tools, but the main compartment, which opens wide with a zipper on the back, offers the usual space plus space for hydration and a transceiver, a small mesh pocket with a key clip, and of course, a helmet holder and a fleece-lined goggle pocket. It even has a daisy chain that can be used to attach crampons, so it's truly packed full of storage options. The only downside is that it's a bit heavy.
Best Backcountry Ski Backpack with Great Storage Capacity: Haglofs Sensate Pro 32

The Sensate Pro 32 from Haglofs, another brand I personally trust for snow gear, offers similarly above-average comfort, lightness, and durability, while also offering excellent storage capacity. The bottom of the main compartment has a side-accessible crampon pocket, which is particularly nice. There's enough space to fit not only crampons, but also climbing skins and ski crampons, allowing for quick access when changing gear.

Affordable Backcountry Ski Backpack: ARVA RESCUER 32 PRO
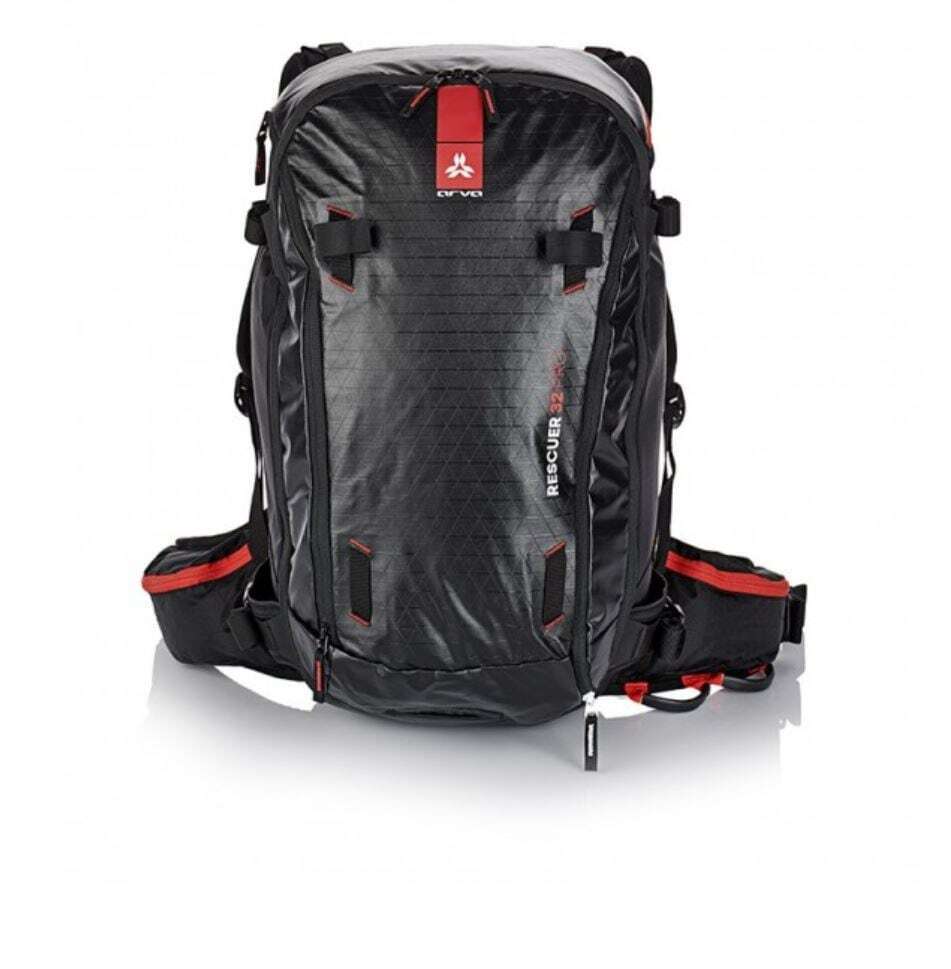
The ARVA RESCUER 32 PRO is just as functional as a high-end BC backpack, but at the time of writing it offers amazing value for money, coming in at under 20,000 yen for a size of 30 liters or more (helmet holder sold separately) . Its light weight of just over 1kg is also not to be missed.

Lightweight Backcountry Ski Backpack: ORTOVOX Switchback 27
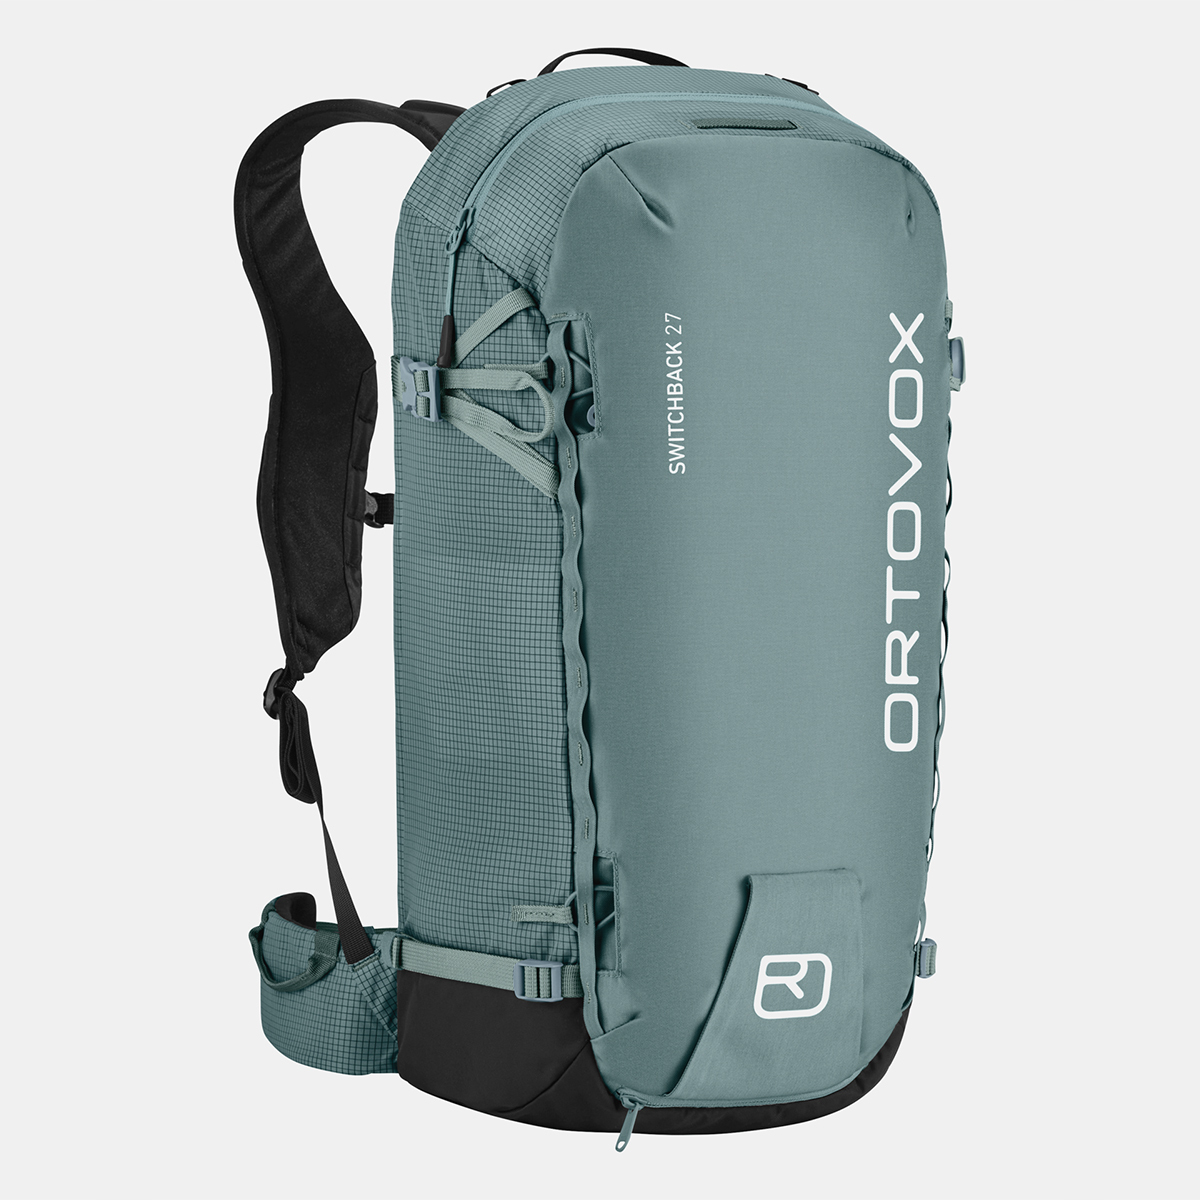
Unlike storage freaks like me, some people prefer to travel light with as little equipment as possible when touring backcountry skiing. Or, from March onward, when the weather calms down, you might not need a full set. In those cases, a lightweight, highly functional, and comfortable BC backpack is recommended. In this category, the ORTOVOX Switchback 27 was an outstanding choice. While it might be necessary to cut back on various features in order to make it as light as possible, it uses durable fabric, can accommodate A-frame, diagonal, and snowboard skis, has back zip-open access, and even includes a helmet holder. It's a one-day size and weighs less than 1kg, yet still offers plenty of functionality.

Large Backcountry Ski Backpack: Osprey Soleden 45
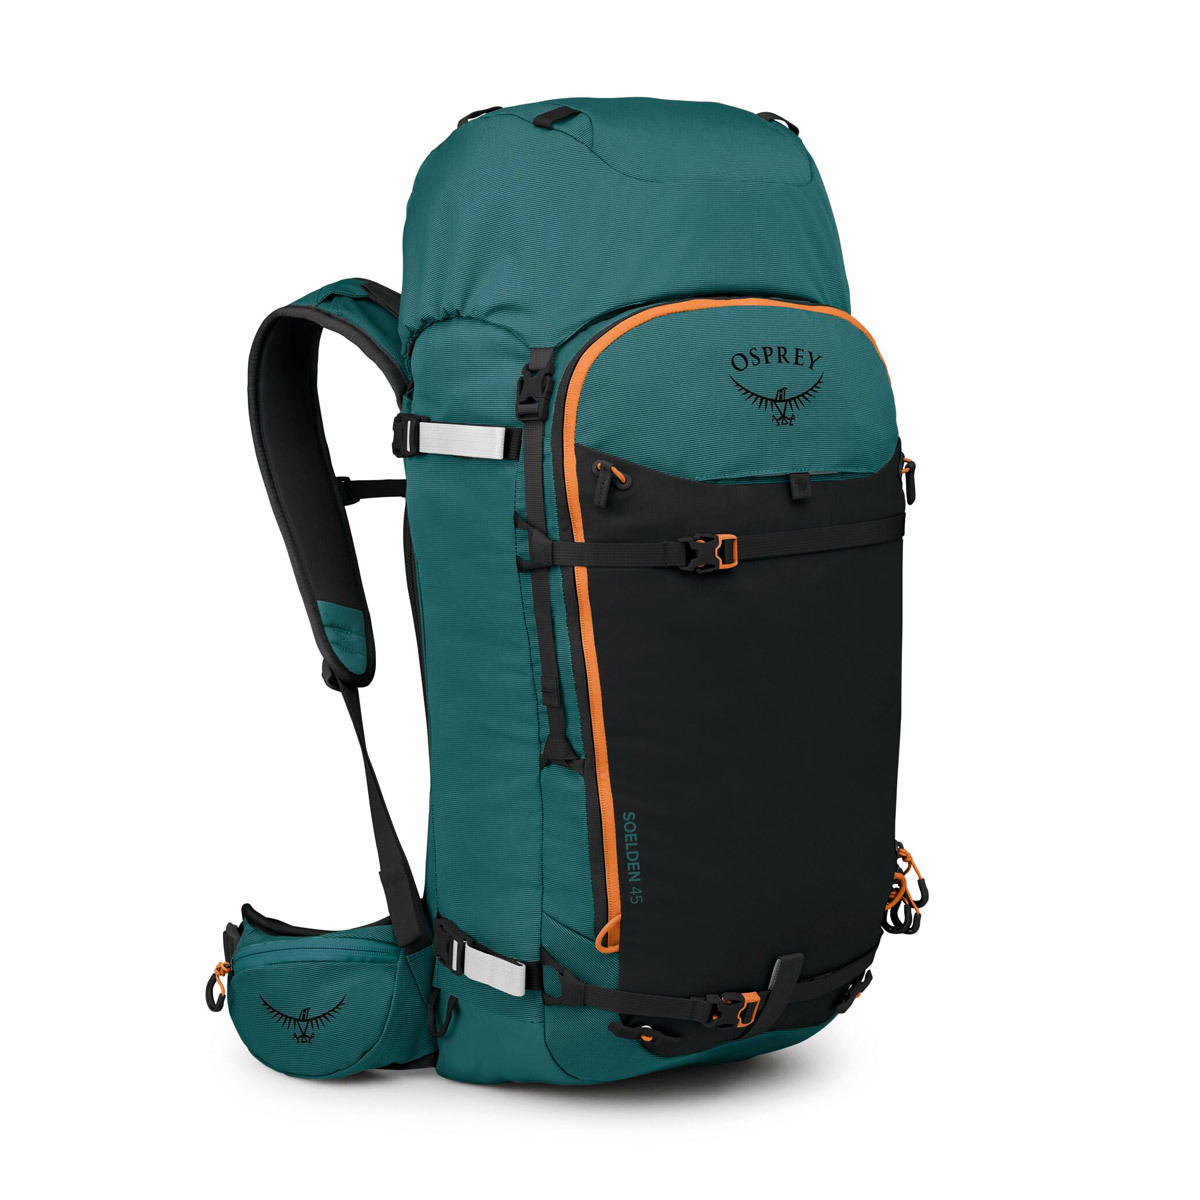
Multi-day ski touring, connecting ridges and valleys with multiple hikes and runs, is something many aspire to. A backpack large enough for such a long ski trip is essential. While there aren't many options in this category, the Soleden by Osprey , remains excellent. What's most undeniable is its excellent comfort and ease of carrying, even with heavy loads, as it evenly distributes the load evenly and makes it a valuable addition to any BC backpack market, where comfort is often overlooked.

Avalanche airbag for backcountry skiing: bca FLOAT E2 35L
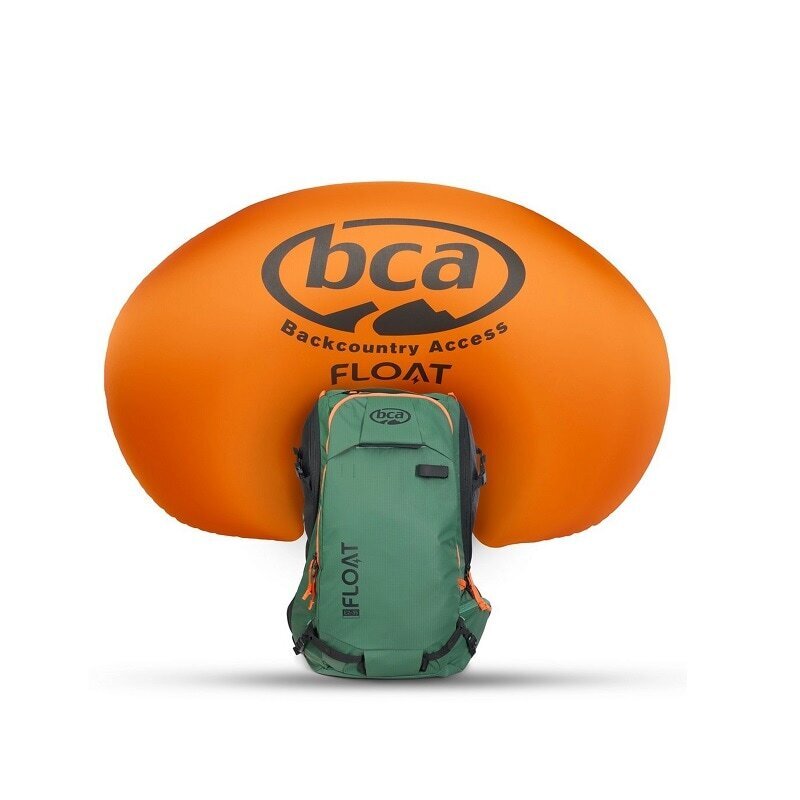
A backpack equipped with an avalanche airbag, which prevents you from being buried in an avalanche while backcountry skiing, has become an essential piece of gear for me when backcountry skiing in January and February. Due to its price, it's not recommended for everyone, but if you consider it the price of your life, it's a backpack you definitely want to have.
A new noteworthy model has been released this season for the avalanche airbag. As mentioned in the STASH article, bca FLOAT E2 35L , which is equipped with the lightweight and easy-to-use Alpride E2 . The back structure and storage are based on the STASH, so the backpack's high quality is guaranteed. And with an airbag that's even lighter and more compact than the previous generation, this is definitely the one.
In addition to the above, you can read all the recommended models picked out and a comparison list of all 169 models, including backpacks for snowy mountains, in the paid membership article.
How to Choose: What is a Backcountry Ski Backpack? How is it Different from a Regular Backpack?
Generally, backpacks developed for backcountry skiing and snowboarding have many different features compared to backpacks designed for non-snow seasons in terms of structure, storage, and attachments
The obvious thing is the storage. For example, there is a dedicated compartment for easy access to avalanche rescue equipment such as a shovel and probe (another avalanche essential, a beacon, is worn on the body rather than inside the pack). Also, the back opens wide, making it easy to access items on snowy mountains
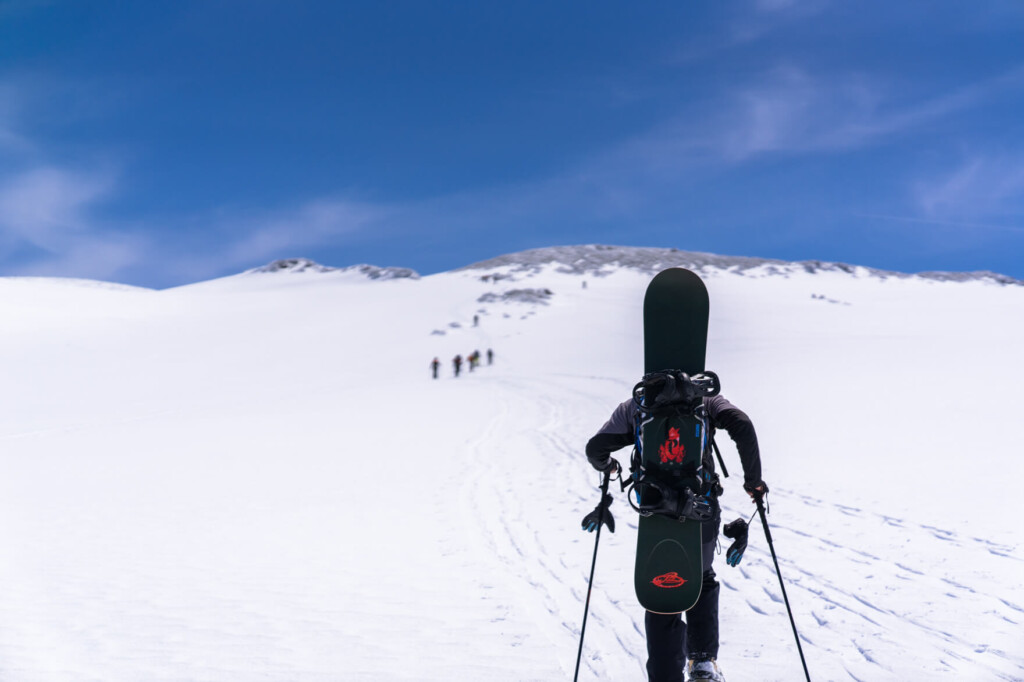
Another major feature of these packs is that they come with carry parts that make it easier to secure skis, splitboards, and snowboards to the backpack. Of course, this can be done with a regular backpack using side compression straps, but the dedicated packs come with a variety of attachment methods to secure them securely
Furthermore, they are equipped with numerous pockets and attachments for efficiently storing the gear you often use in the backcountry, such as a lined pocket for goggles, sleeves and covers for hydration and walkie-talkies, helmet holders, etc. Each manufacturer's model has some with and some without these types of detailed storage, and there are also simple models for people who don't need this extra storage, so this is something you should choose based on your preferences
On the other hand, the materials and parts are also designed with the assumption that the glove will be worn in low temperatures, with durable fabrics used, buckles that are easy to operate, and parts made from freeze-resistant materials
10 things to look for when choosing a backpack for the backcountry
To ultimately choose the perfect backpack for you, you need to decide what type of ski touring you want to use it for. Are you just going to climb a small uphill slope behind the ski resort, or will you spend a whole day from the trailhead heading to the summit? Will you be using crampons and ice axes near the summit? Will you be camping at base camp? These are just a few examples, but the optimal model for backcountry skiing will vary depending on the specific purpose
In any case, there is a certain theory about what points to consider when choosing the optimal model. I have summarized these points in the following 10 points based on my actual experience
Point 1: Size (capacity)
When it comes to backcountry skiing in powder during the peak season in January and February, most people will focus on half-day to full-day activities
If you're mostly doing half-day backcountry tours like this, the main items you'll pack in your backpack will be the essentials (shovel, probe, water, warm clothes, spare goggles and gloves, seals/cooters, and snacks), and depending on the route, ice axe and crampons. For this reason, the backpack size should be just large enough to fit all of these, and in my experience, a size between 25L and 35L is about right. Unless you're doing lighter courses or skimo races, or you're very confident in your packing skills, it's best to avoid backpacks under 20L if possible
On the other hand, as you become more accustomed to the experience and start aiming for a variety of routes, such as slightly more difficult routes or courses that take up the entire first day, you'll need more equipment, including ropes, harnesses, lots of gear, and larger water bottles. Considering the size to cover all of this, you'll want a more spacious 40L or larger bag. This capacity is also reassuring for those carrying unusual luggage, such as a large camera or drone. In my case, since I also carry a DSLR camera, I end up finding that around 40L is best. Excluding these unnecessary items, and taking various possibilities into account, I'd say the average size is around 35L
Related articles
Furthermore, a capacity of 40L or more will allow you to consider overnight trips in the backcountry (such as staying in huts), but if you are considering a serious ski tour that will involve camping in snowy mountains, it would be wise to consider an all-around model in the 70L class that can also be used in snowy mountains, rather than a model specifically designed for backcountry
Point 2: Avalanche airbag or no?
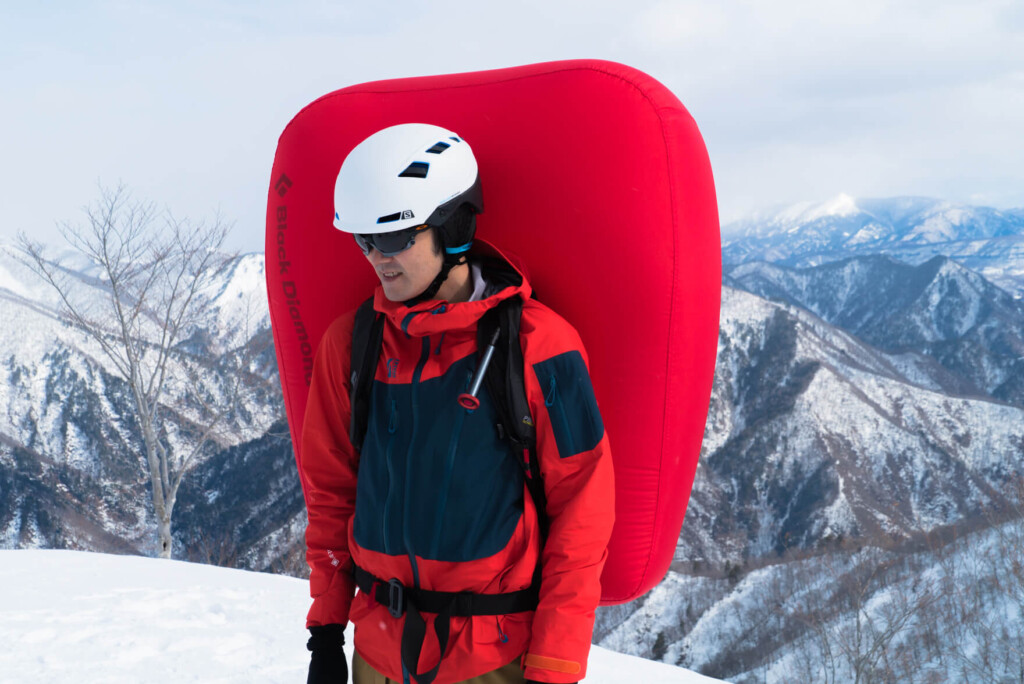
An avalanche airbag is a large airbag that instantly inflates to prevent skiers from being buried in the event of an avalanche. Since the most common cause of death in avalanches is suffocation, keeping the body afloat with an airbag above the snow can significantly increase the chances of survival (although it is not 100% safe)
In recent years, many manufacturers have released backpacks equipped with avalanche airbags, and while it would be best to use one of these models, they are still expensive. Also, depending on the terrain and weather, there aren't many areas where you absolutely must have one, so (although I personally recommend it) it's up to you to decide based on your needs and budget
Related articles
Point 3: Comfort and stability when carrying
Even if you're mainly carrying luggage for a day trip, you'll still be climbing and descending with a certain amount of weight on your back, so if the backpack is uncomfortable to wear or unstable and sways from side to side, it's dangerous and, above all, not fun
If you're carrying a relatively large backpack (over 30L) and around 10kg of luggage, you're bound to get quite tired if you're out and about for a long time. For this reason, it's best to choose a model that's comfortable to wear and won't tire you out as much as possible, and won't cause pain in your shoulders or back. What's important in this case is that the backpack has a sturdy back structure
The back structure refers to the overall construction of the back frame (panel) and shoulder straps/hip belt. A comfortable back structure requires a rigid back panel or frame that won't distort under load or pressure, so we recommend a model that has this in place. Otherwise, the pack won't fit snugly against your back, which can result in uneven weight distribution or uneven loading
Shoulder straps and hip belts should be as sturdy and well-cushioned as possible to withstand the weight, but if they're too bulky, they'll get in the way when you're moving vigorously downhill. With that in mind, choose a model that's as wide and well-cushioned as possible without sacrificing lightness and ease of movement
Point 4: Ski/snowboard attachment method
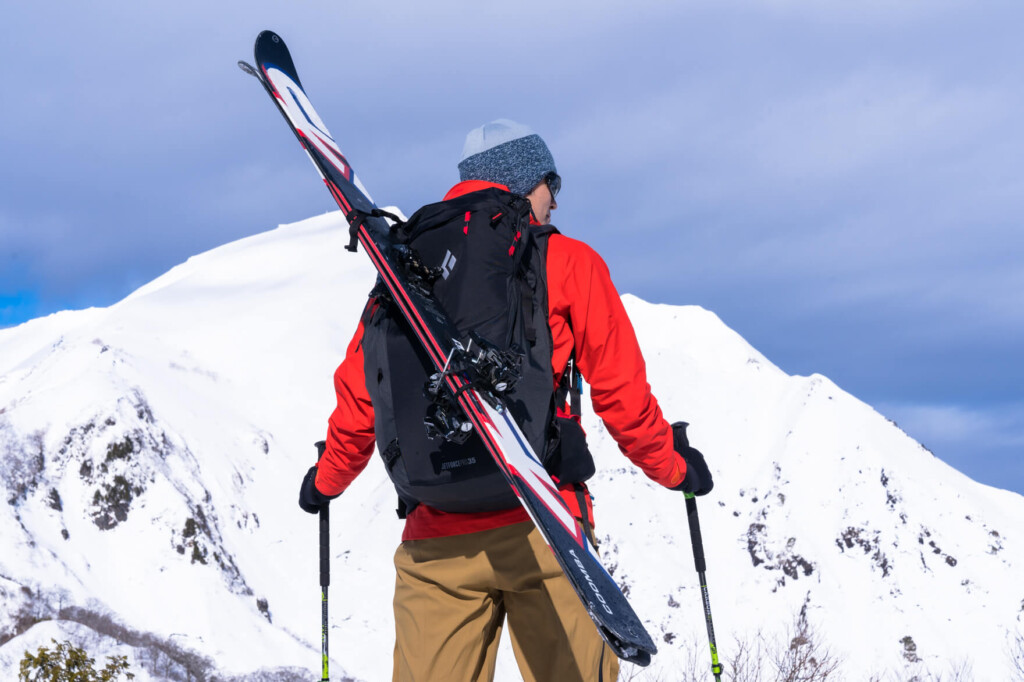
One of the major features that sets backpacks for ski touring apart is that they are equipped with mechanisms and parts for carrying skis (snowboards)
Generally, skis (or splitboards) are either A-frame type (see photo below) or
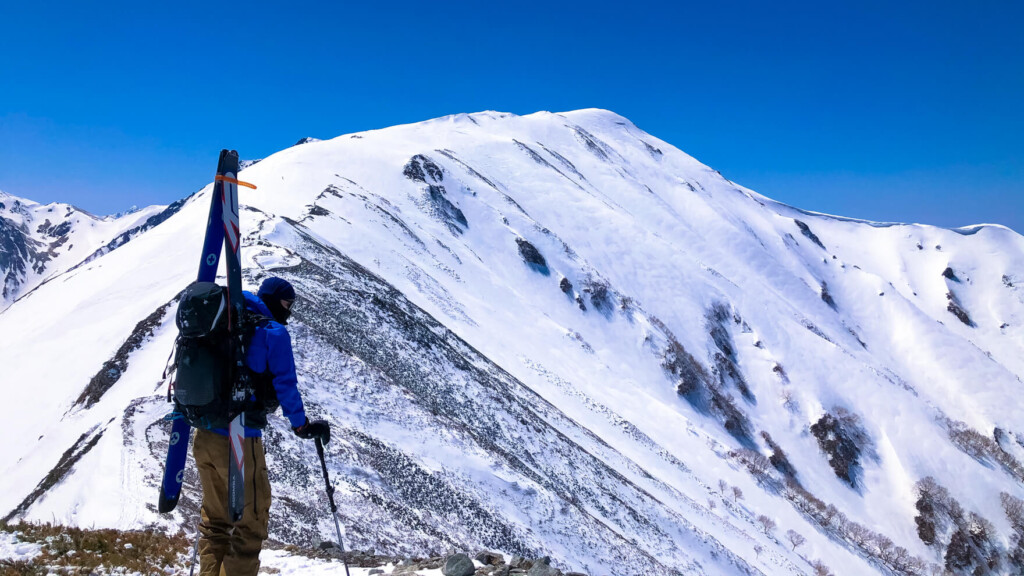
Alternatively, it can be attached to a ski pack in a diagonal fashion (see photo below)
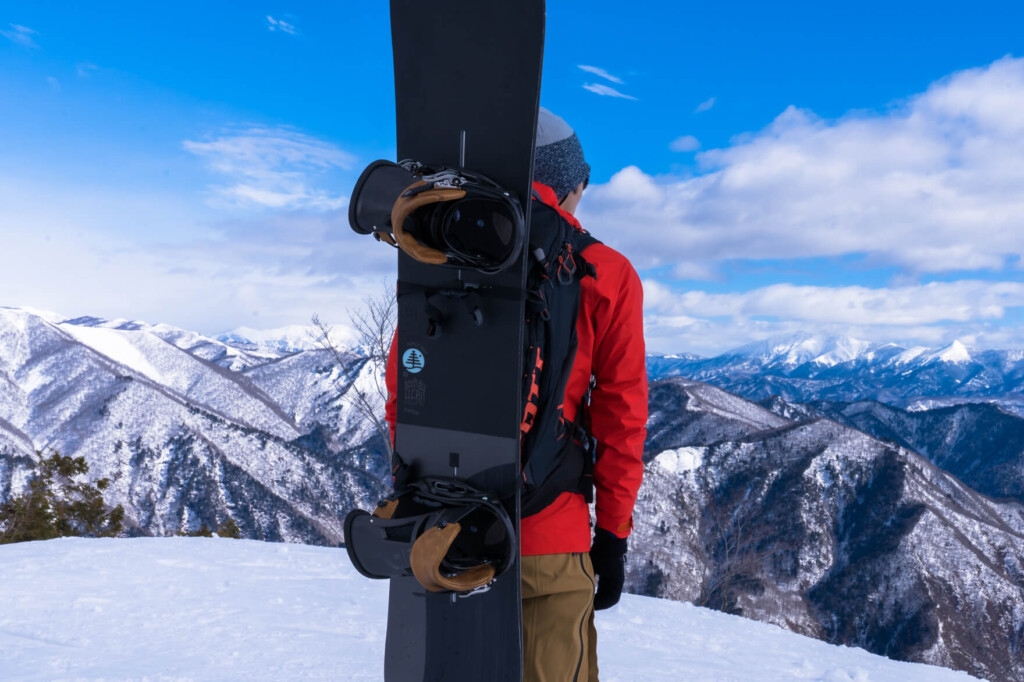
On the other hand, for snowboarders, it is important to have a mechanism for attaching the snowboard or snowshoes vertically or horizontally to the front of the backpack (see photo below)
Some backpacks offer all of these styles, while others only allow you to secure skis with an A-frame, or are not designed to accommodate snowboards at all. When choosing, be sure to check which styles are available
Incidentally, in most cases how you attach your skis is a matter of personal preference, but if you had to say, the A-frame is more stable as it is firmly fixed to the side of your backpack, but it takes a relatively long time to attach, while the diagonal is easier and quicker to attach to your backpack, but it is more likely to be blown around by the wind and is less stable
In any case, before heading out into the backcountry, it's important to practice strapping your skis, splitboard, or snowboard to the bag and make sure you understand how the strap arrangement works. In the snow, any hesitation can be very dangerous
Point 5: Dedicated storage for avalanche tools
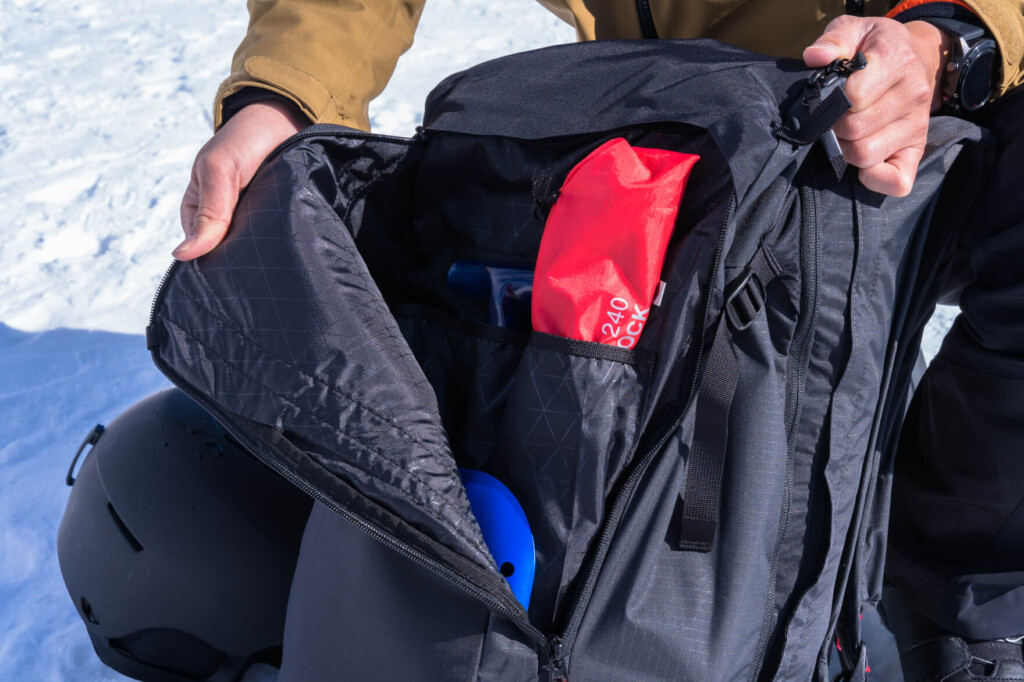
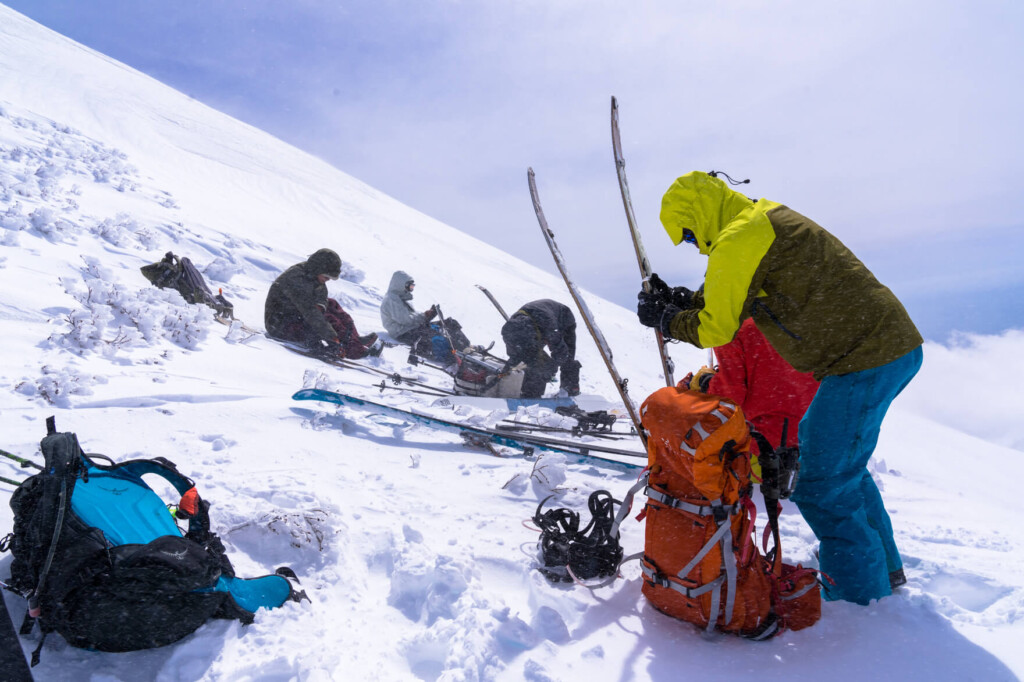
Another great feature of BC ski/snowboard packs is that they have compartments for avalanche equipment (shovel and probe)
Once an avalanche accident occurs, every minute and every second counts, so it is essential that your backpack "can store these tools safely" and "can you access them quickly in case of an emergency." Rather than worrying about the small details, make sure that the above two points are taken into consideration
Point 6: Access to the main storage
Many BC backpacks have zippers that allow access to the inside from the back (or side) of the pack
There are several main reasons for this, including the ability to access the contents of the pack without having to take the backpack off completely while your feet are fixed to the skis, and making it easier to access items deep inside the pack (without spilling small items out), but it is certainly convenient, so this feature can be considered essential for BC packs
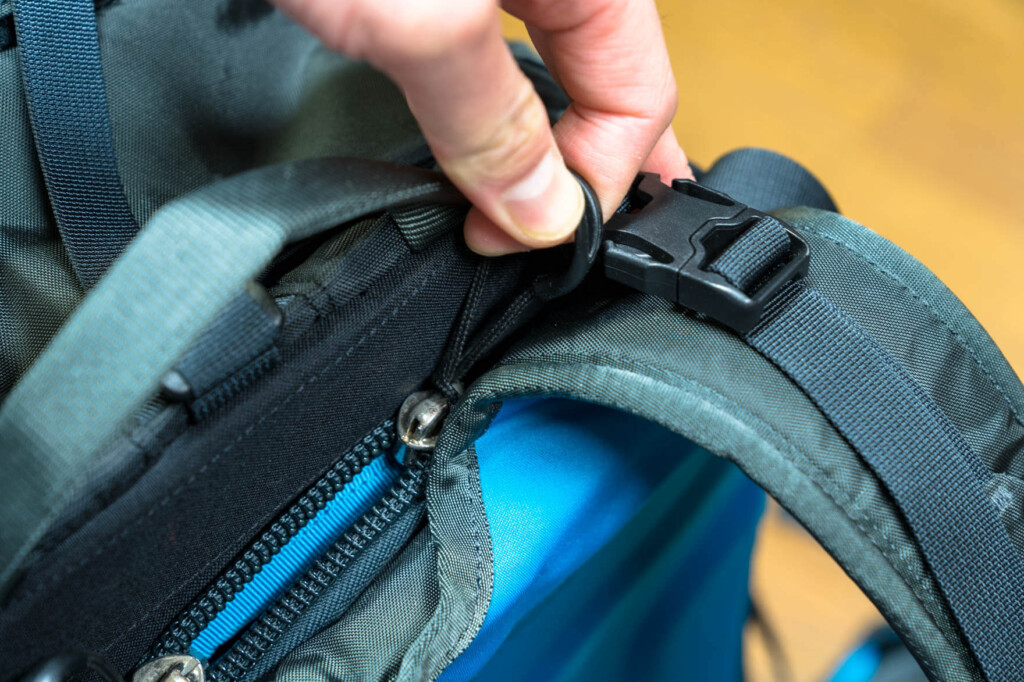
The problem is the design. If the zipper that opens the back panel in a U-shape is located under the shoulder strap, you can easily open the back panel without thinking, but if the zipper is located above the strap, you can't open the panel without first undoing the shoulder buckle (see photo below). It's a bit of a hassle, but it's a bit annoying (lol)
In summary, the best way to access the main compartment is to have access from both the top and back. And for back access, the zipper should be able to be fully opened with one action. Of course, other specifications are not unreasonable
Point 7: Helmet holder

In recent years, wearing a helmet while skiing has become almost commonplace, and an increasing number of backpacks for backcountry skiing now come with parts for attaching a helmet to the pack. These carry systems usually come with a storable and removable cover fabric, which you can clip your helmet into and attach it to a designated location. When choosing, be sure to check whether it has one. Of course, even if it doesn't have one, you can still secure it in some way, so it's no problem if you buy or make your own holder
Point 8: Storage for other special tools
There are several other storage and functions that are not necessarily necessary but are very useful to have, so I will list here some of the storage and attachments that I personally like to have in addition to the above
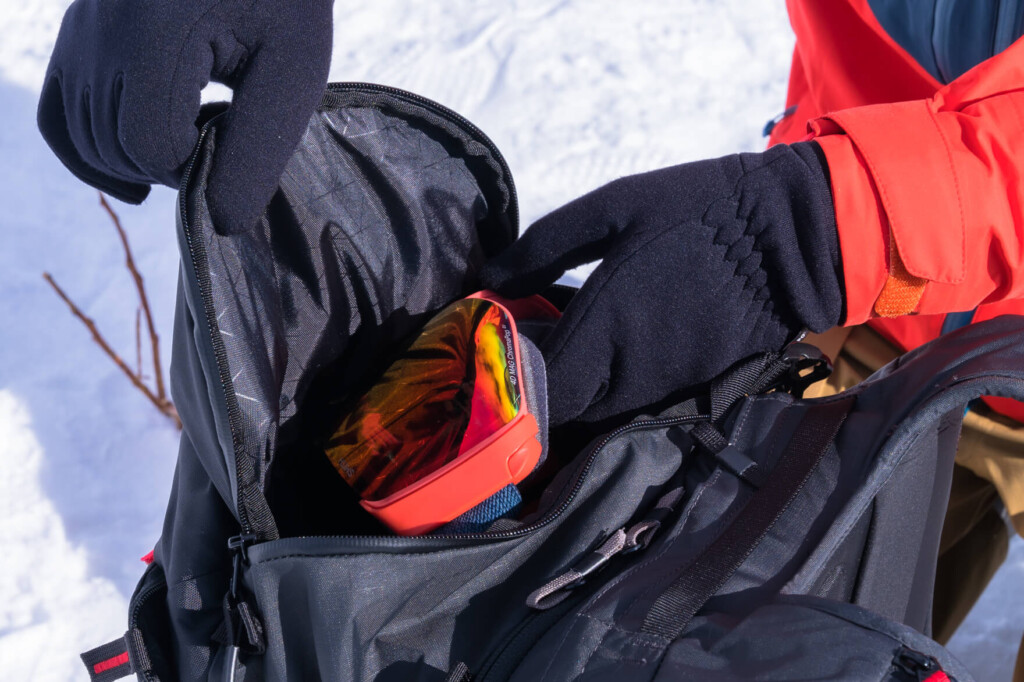
Goggle storage
The storage method for goggles, an essential piece of gear for backcountry skiing and snowboarding, is a small detail that should be considered. It's true that not having one doesn't dramatically change the usability of the pack. Of course, some models don't have this pocket, either to reduce weight or as a matter of policy. However, having a place to safely store goggles, a delicate item, certainly makes packing easier. Some bulkier models have brushed fleece fabric, allowing you to toss them directly in. Such packs are a testament to the careful attention to detail
Hydration storage and hose hole
In the backcountry, where it's a pain to take off your backpack every time, using a hydration pack to stay hydrated may be more convenient than in the summer. For this reason, having a backpack that's compatible with hydration can be very useful while you're out and about
However, hydration containers and hoses can freeze in the cold of winter, so it's important to keep them warm. Place the tubes and containers in an insulated case, or choose a backpack with hose covers on the shoulder straps
Walkie-talkie and speaker microphone storage

While there aren't many uses for them in the summer mountains, in the winter mountains it's common to carry a walkie-talkie for communicating with friends, or even a radio that can be used to call for rescue in an emergency. While you could simply put it in your jacket pocket, it's quite bulky, so you'd want to store it in a smart way if possible. The smartest solution at the moment is to store the transmitter and receiver in your backpack and then attach the microphone speaker to your shoulder (through the hydration hose hole, for example). This way, it doesn't take up much space and you can have a quick conversation when necessary. While there are only a limited number of models that are designed with this in mind, backpacks that are this well thought out are among the most user-friendly
Ice axe, poles, crampons, and rope storage
Many backpacks should have attachments for securing ice axes and poles to the rucksack. Even if you don't need them now because you're a beginner, you'll likely need them in the future depending on the season and route, so make sure the backpack has some kind of mechanism for storing these ice tools. On the other hand, if a model doesn't have this, it's likely not designed for serious BC use, so be careful
In addition, some European manufacturers, where there are many glaciers, also have systems that allow for smart storage of crampons, ropes, etc
Point 9: Comfort of the shoulder straps and waist belt
This may also be a matter of personal preference, but for me, the fit and ease of use of the shoulder straps are important points. Even if your luggage isn't that heavy normally, once you attach skis or a board to the pack, you'll be carrying a lot heavier than usual, and you'll start to feel the weight digging into your shoulders. Having thick, comfortable shoulder straps makes carrying a little easier in those situations
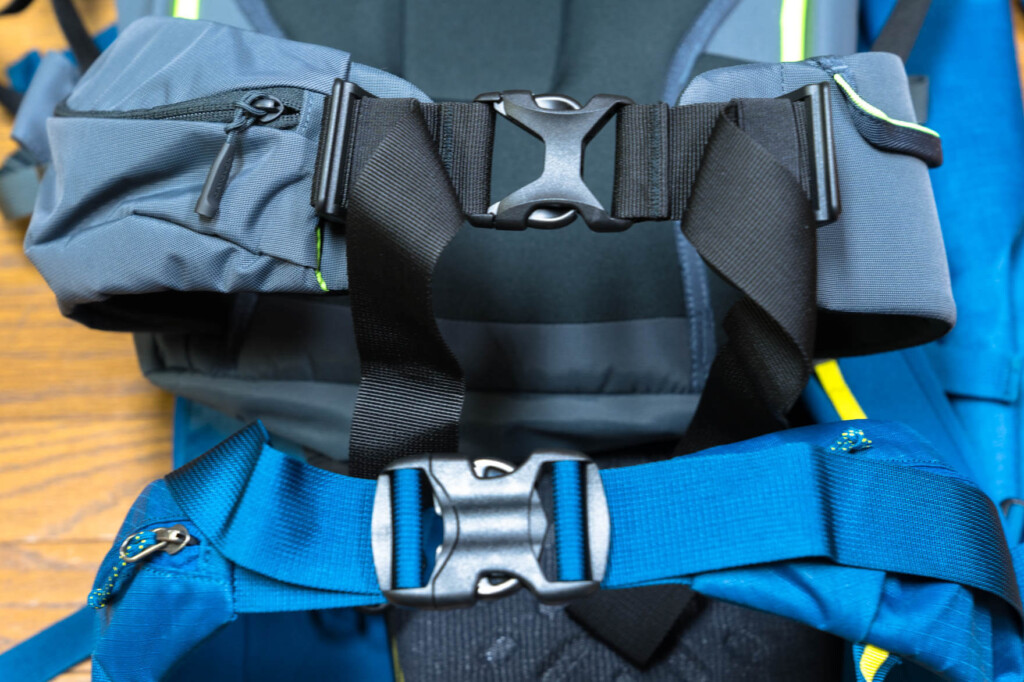
Also, maybe I'm being too picky, but I'm actually quite concerned about how the waist straps are fastened. The type that you tighten by pulling it forward (top of the photo below) is by far the easiest to fasten and use, so I'd be a little disappointed if it was the type that you pull it back (outward) (bottom of the photo below)
Point 10: Easy to use zippers and buckles
What I personally care about when it comes to backpacks for snowy mountains, rather than for BCs, is the size, durability, and operability of the zipper. Bearing in mind that you will likely be wearing thick gloves or mittens, a zipper with a larger tab will reduce stress while you are out and make your life more comfortable. Try opening and closing the zipper several times to make sure it is easy to hold, moves smoothly, and doesn't seem strangely small or weak
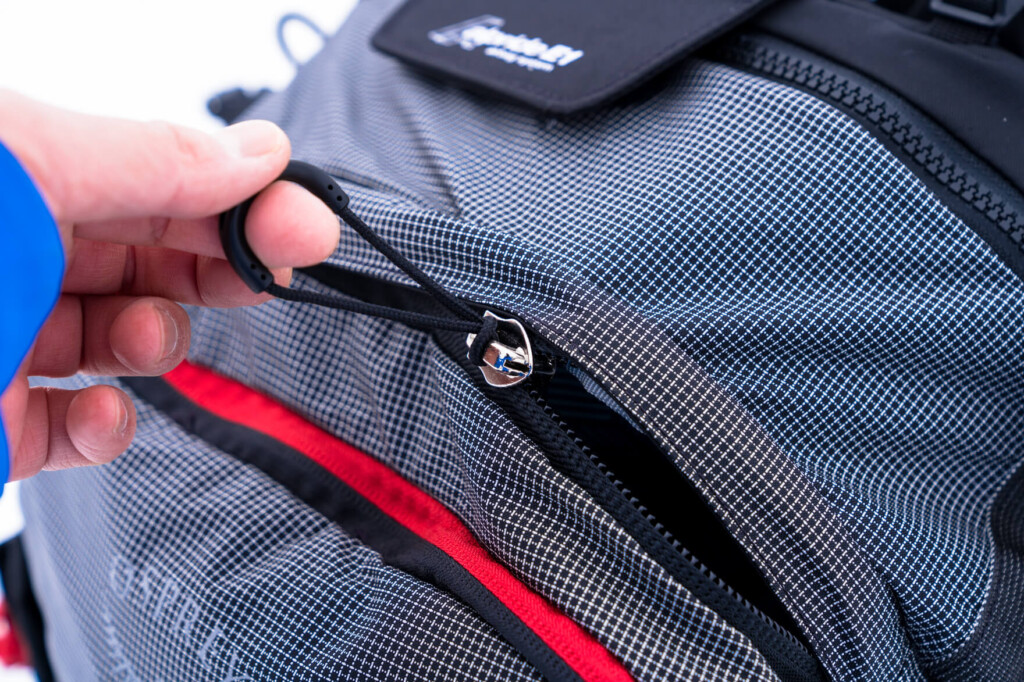
Also, when it comes to buckles, well-designed models have been carefully considered to ensure they have a smooth shape that can be operated with the pads of your fingers even when wearing gloves, whether they are resistant to snow clogging, and whether they have parts that make it harder for the straps to loosen, so be sure to check these things as well if possible
Finally, check here
Finally, although this is not specific to BC, I would like to add some points that you should always check when choosing a backpack
The back length is correct
Back length refers to the length from the most protruding bone at the back of the neck (the seventh cervical vertebra) to the top of the hip bone, and for backpacks of 30L or larger, if the size is not right it will have a big impact on how comfortable it is to wear, so it's important to make sure that it fits your back length before purchasing. There may be variations in back length such as S/M/L within the same model, so be sure to check and choose the size that's right for you
→For more information on back length, please refer to How to Choose a Backpack
Durability and weight
Winter backpacks are generally made of durable fabrics, and generally, the more durable the fabric, the heavier it tends to be. However, no matter how lighter a backpack may be, the benefits of lightness are often outweighed in the winter mountains by the disadvantages (risks) of things breaking or a lack of functionality, so unless you're a beginner or someone who is clearly aiming to keep your backpack lightweight, you don't need to worry too much about weight, and it's best to focus on comfort and ease of use
summary
As I mentioned at the beginning, backcountry backpacks tend to have a wide range of quirks depending on the manufacturer's concept, from the kind-hearted older brother type who accommodates the user's every whim, to the meticulous craftsman type who is very confident in their own style and beliefs and won't accept (or allow) any other use. With this in mind, I think users will be able to use and love their gear more comfortably if they choose one based on which attitude suits them best. Finding a backpack, your closest companion, can be quite a daunting task, but let's think it through together as we head into the snow season in earnest
Please consider a paid membership to support the website while enjoying exclusive articles and events!
Related reading
 [Fall/Winter 2025] Snowy mountain climbing, backcountry skiing, alpine climbing. The best backpacks for extreme winter activities, categorized by purpose and preference.
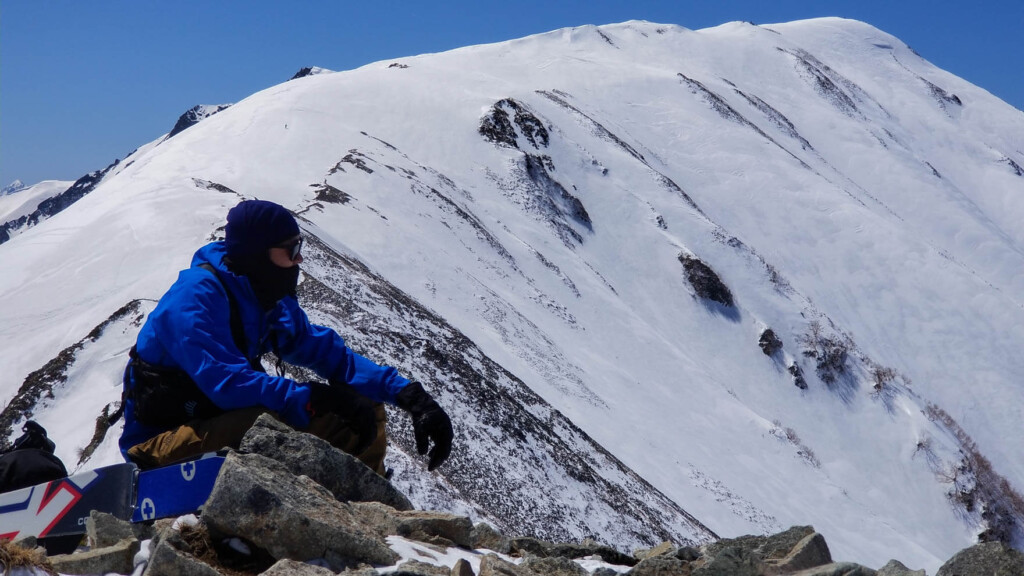 [Fall/Winter 2025] A hidden necessity for snow sports: the best balaclava models for different uses and preferences, plus tips on how to choose one without regrets
 [Fall/Winter 2025] Recommended base layers for this season and purpose, selected after comparing over 200 items, and how to choose the perfect one for you
 [Fall/Winter 2025] We've selected the best synthetic insulation for fall/winter outdoor activities from approximately 200 models, and here are some tips on how to choose the right one