The one and only FIELD RECORD FR-shelter, a tarp shelter that can be freely combined and transformed, is so playful
Written by Yasushi Hisatomi
There are many manufacturers in the world that make good tools, but when it comes to manufacturers that create products with original concepts that can only be made here, it is not easy to find them, even if you search the whole world
FIELD RECORD , a new brand that was just launched in 2018. introduced an outdoor chair to be used in combination with trekking poles on this site
Today I'd like to introduce a representative piece of gear from this brand that I've been interested in for a long time: the FR-shelter, a unique tarp/shelter tent that can be connected to multiple tarps, allowing for various setups depending on how they are connected
Before using it, I had no idea what was so great about it, but after using it for a while last year, I was captivated by its unique charm. Seeing is believing, so let's take a look at how this shelter feels to use
table of contents
- Detailed review: 4 great points about the FR Shelter
- Materials selected with a balance of durability and weight in mind, and high-quality stitching produced domestically
- It can be used as a comfortable shelter for serious hiking
- Connect two or more panels to create a shelter that can accommodate even more people
- You can hang it however you like, depending on your imagination. The fun of arranging it however you like is addictive
- Summary: A unique tent that allows you to enjoy the act of pitching it
Detailed review: 4 great points about the FR Shelter
The FR Shelter is a connectable, transformable shelter tent that can be used as both a tarp and a shelter by connecting multiple tent pieces together using 10 waterproof zippers and 12 strong Velcro fasteners to create various shapes and spaces
The market is already flooded with UL brand lightweight shelters and luxury tarps for family camping. In contrast, the aim of this model, according to the shelter designer, is to create "a shelter that allows you to enjoy the spectacular views in the most comfortable way possible, and that is highly versatile enough to be used for both serious hiking and family use depending on how it is used." The FR shelter is the result of repeated trial and error to achieve this
Materials selected with a balance of durability and weight in mind, and high-quality stitching produced domestically
A quick look at the materials and construction reveals that this concept is clearly reflected. The 30-denier ripstop nylon is durable enough to be used as both a shelter and a tarp. However, it is not as thick as UL models, and the construction has more zippers and Velcro than usual, making it a little heavy. However, considering that it can accommodate three people, 1,500g is by no means too heavy
The fabric is treated with a water-repellent and stain-resistant coating, and all seams are sealed. All tents are produced in a sewing factory with a rich track record in Japan, and the quality of the stitching and other processing is impressive. You can see that attention has been paid not only to the appearance but also to the contents
It can be used as a comfortable shelter for serious hiking
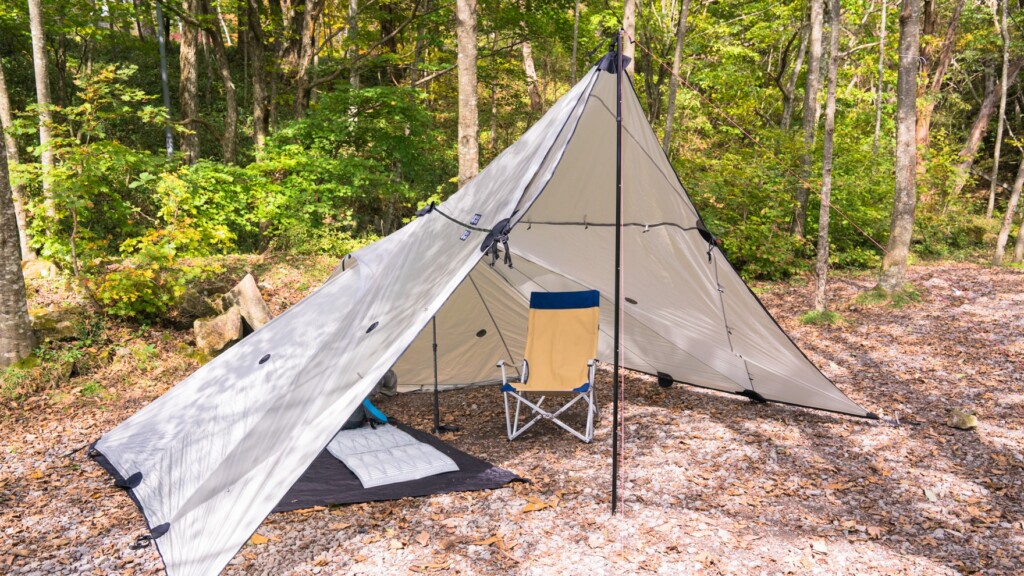
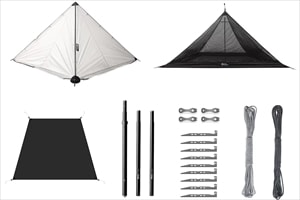
I immediately tried setting it up on the grass in the park. This time, I tried setting up the full set, which included the FR shelter itself, inner mesh, ground sheet, guy lines, poles, and pegs (Photo 1). I used trekking poles that can be extended to over 130 cm as poles, and omitting the mesh minimized the amount of luggage, but the full set was quite bulky
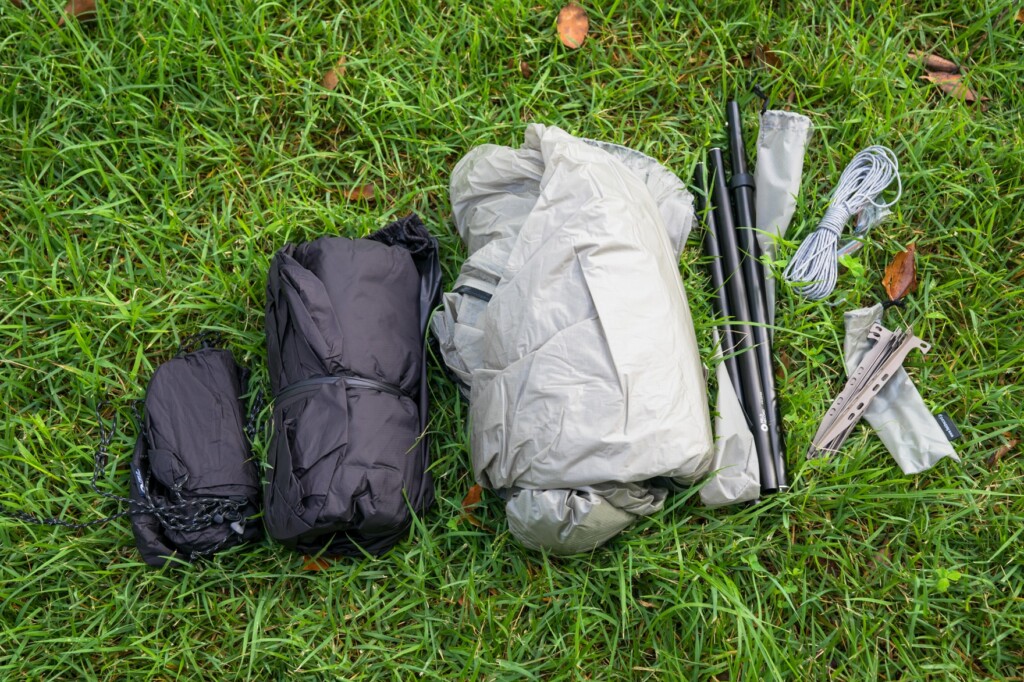
Photo 1: From left to right: ground sheet, inner mesh, shelter body, poles, guy lines, titanium pegs
Spread out the shelter body, which also serves as a tarp, into a rectangle, excluding the entrance, as shown in Photo 2, and secure the four corners with pegs. By the way, there is already a ground sheet underneath
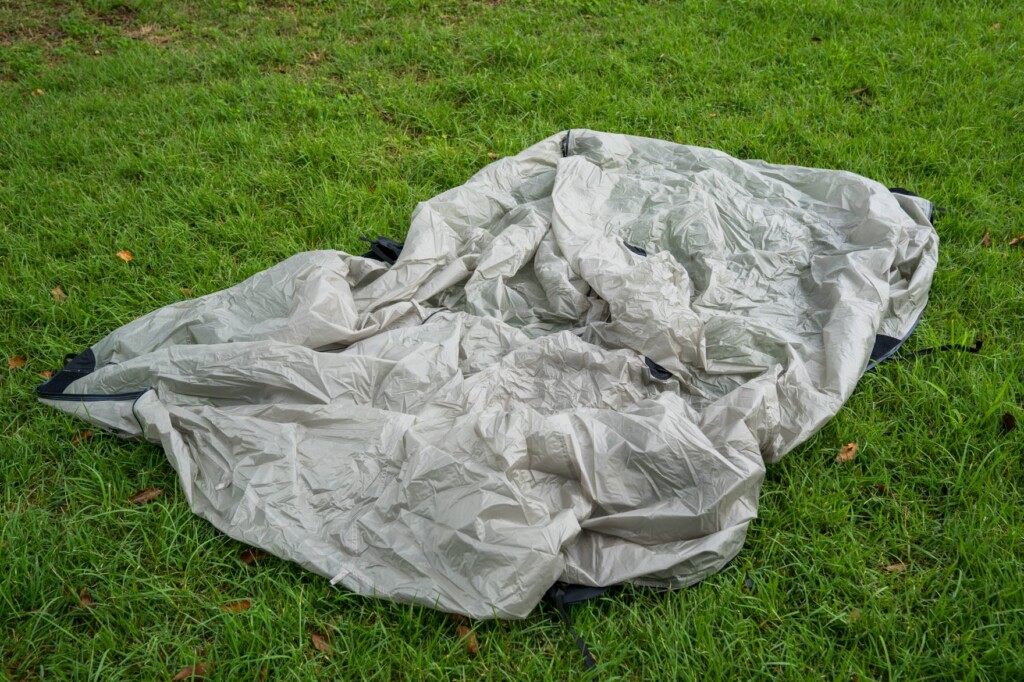
Photo 2: First, lay down the ground sheet, then spread the shelter body on top of it and secure it with pegs
Next, place the pole at the top, secure it with Velcro, and then lift it up with all your might (Photo 3)
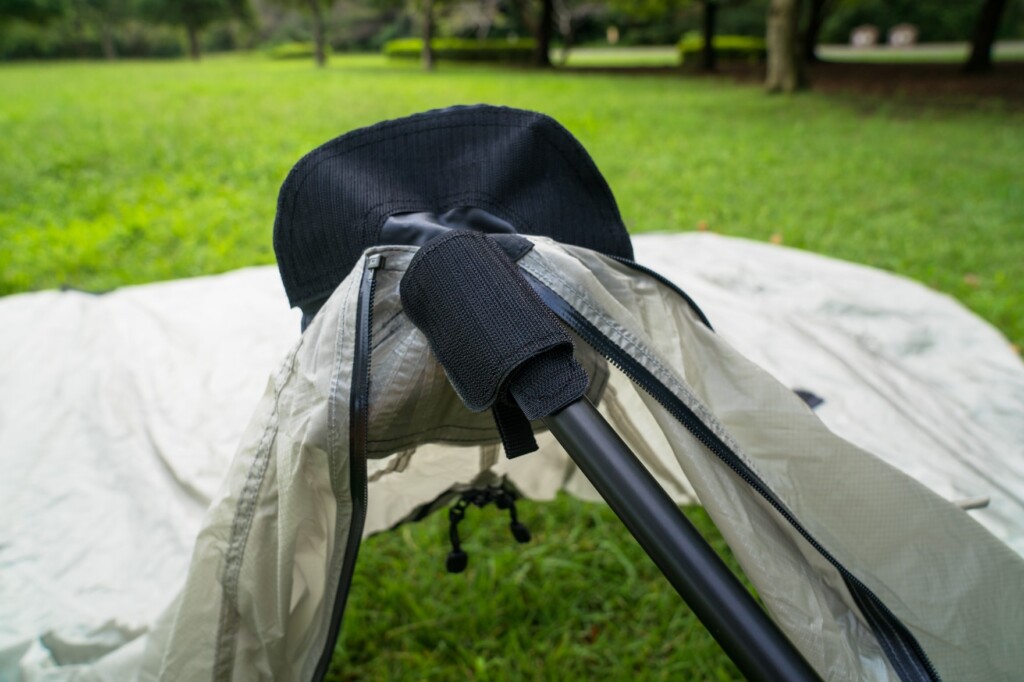
Photo 3: The Velcro that secures the poles is thick, so there's no need to worry about it slipping off. It's also reinforced and durable
At this point, the tent is starting to take shape (Photo 4). All that's left is to secure the entrance and other necessary parts with pegs and string up the guy lines
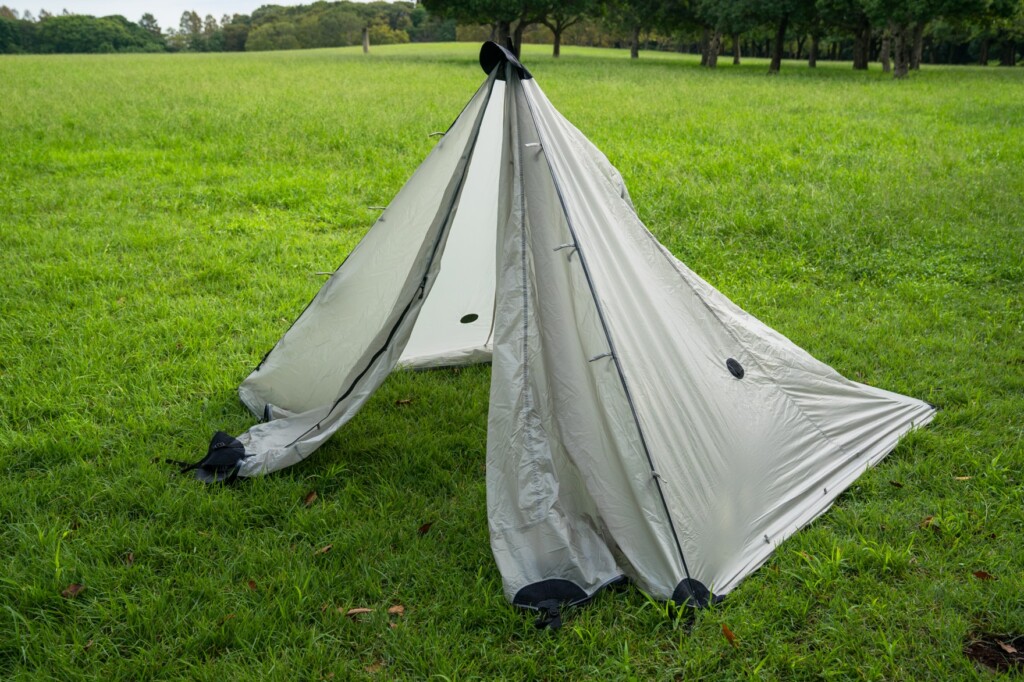
Photo 4: The state immediately after it was set up. From here, the entrance is set up and the pegs and guylines are used to secure it
Finally, tighten the slack at the four corners and the shelter is complete in no time (Photo 5). Although only the bare minimum of guy lines are used, I personally like the dignified look with no slack
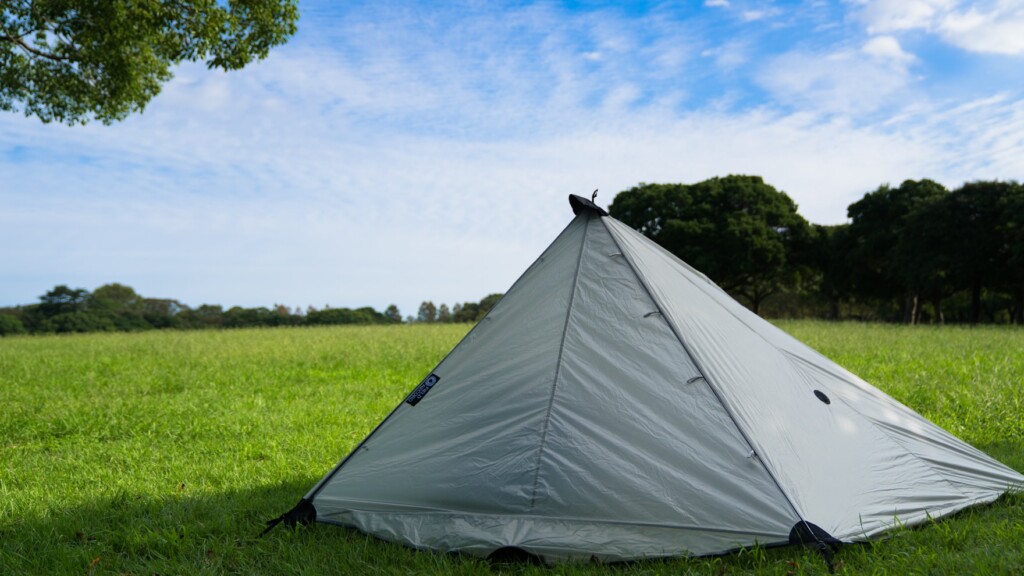
Photo 5: An example of building one shelter using one pole
In fact, at this point, there was what seemed like extra slack in the parts of each side that touched the ground, which made me a little confused as to whether it was being built correctly. When I checked later, I found that this was not only a necessary part when connecting and transforming, but also served as a skirt that could be rolled in or out to prevent wind, rain, and snow from getting in. Of course, if you want to circulate air, you can just roll it up and leave it open when it's not needed. No matter what shape it's built in, a lot of thought has gone into making sure that every part can be used efficiently
When I went inside, I found that the cabin was very comfortable and not oppressive, thanks to its high height and wide opening entrance (Photo 6)
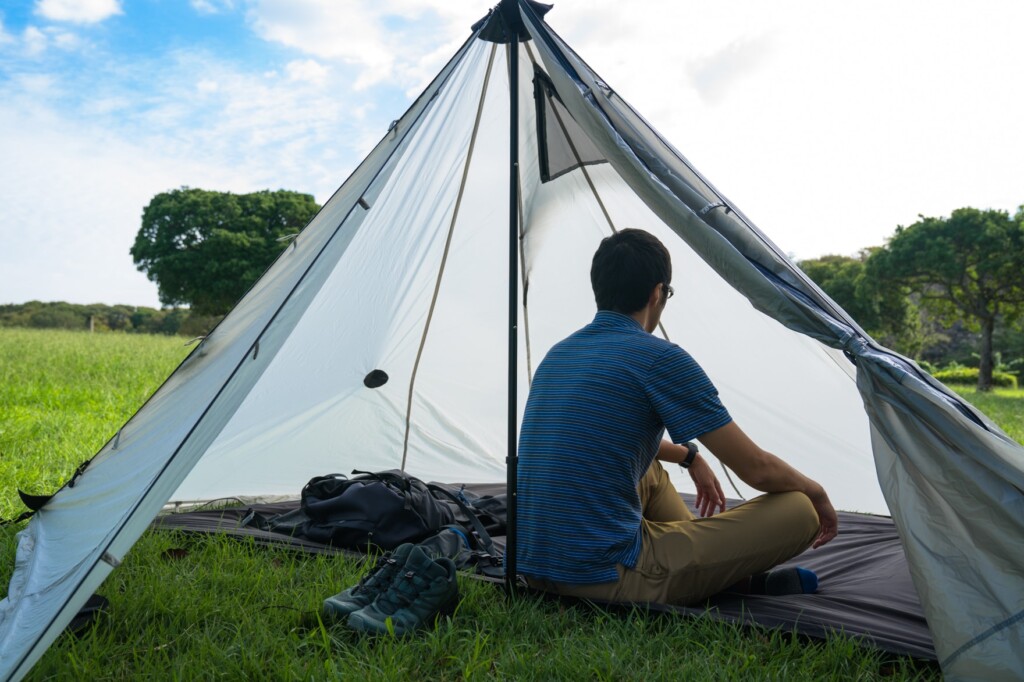
Photo 6: Spacious interior and wide entrance
If you are using it with one or two people, you can use the space in front of the entrance as a spacious vestibule. You can also easily cook in front of the tent (Photo 7)
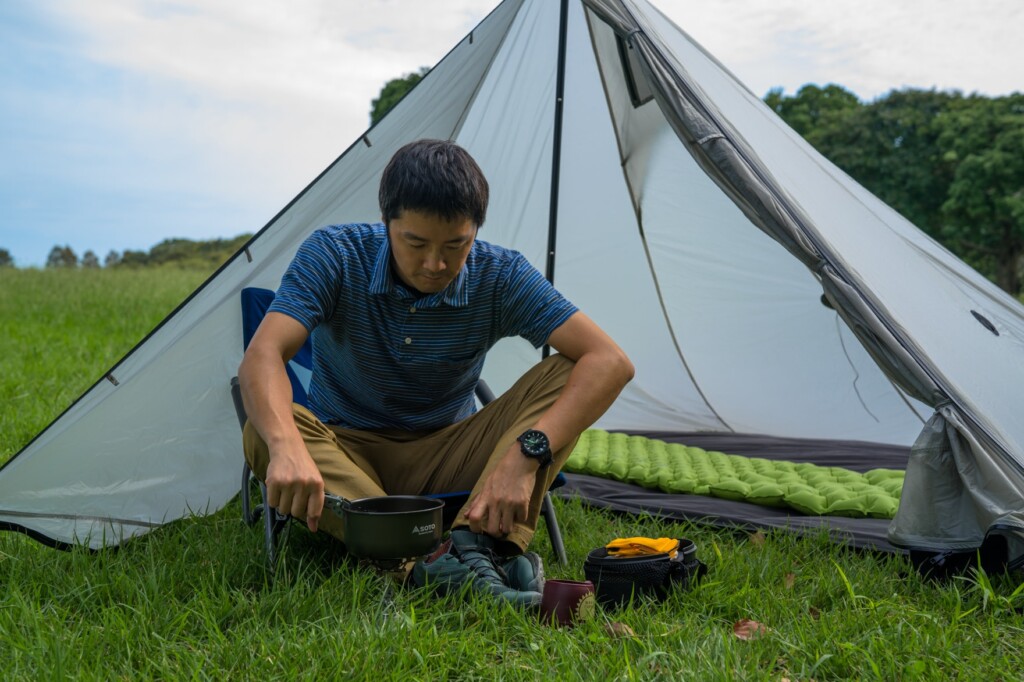
Photo 7: By opening the entrance halfway, you can cook comfortably in the vestibule while avoiding the wind
By the way, it can be used even without a ground sheet (Photo 8)
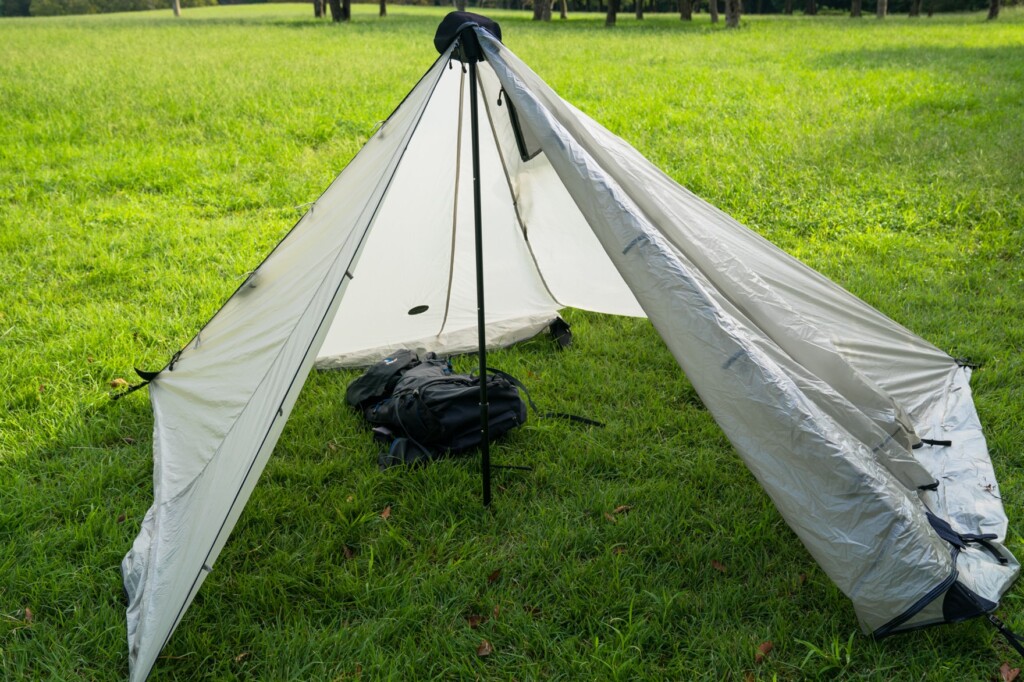
Photo 8: Remove the ground sheet and use it
I added inner mesh (Photo 9). This maximizes breathability while preventing the entry of insects, which are a major summer enemy, so it's actually very important when traveling deep into the mountains
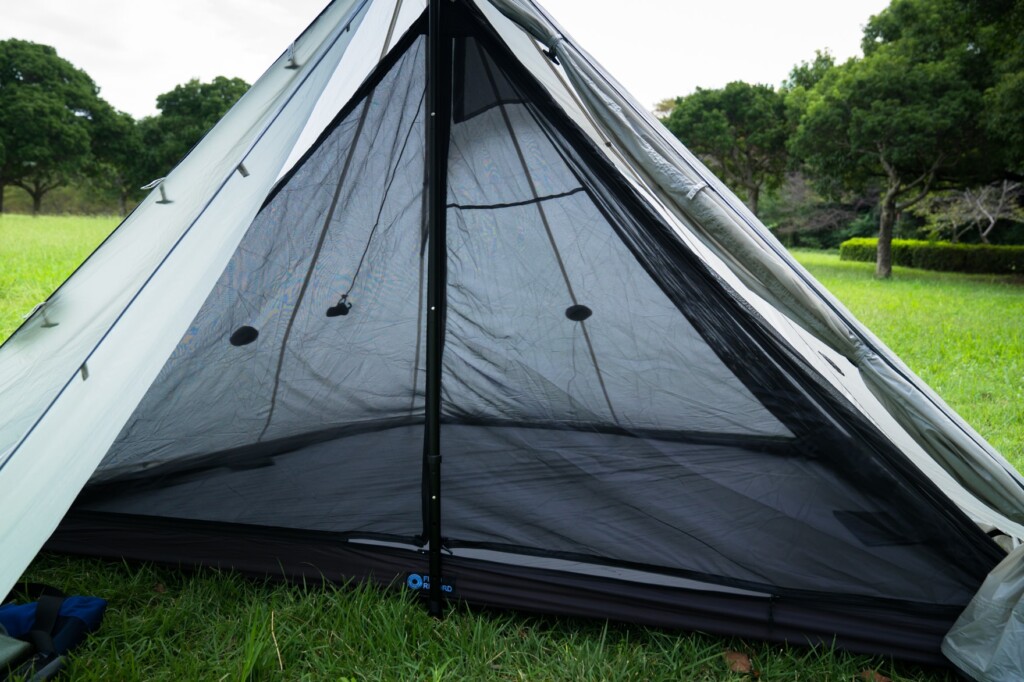
Photo 9: The inner mesh is attached
There is a mesh ventilation hole at the top of the opposite side of the entrance (Photo 10). It also has a brim to keep out the rain and ensure airflow, so it's perfect for ventilation. There is also a zipper on the inside to seal it up, so it can be adjusted
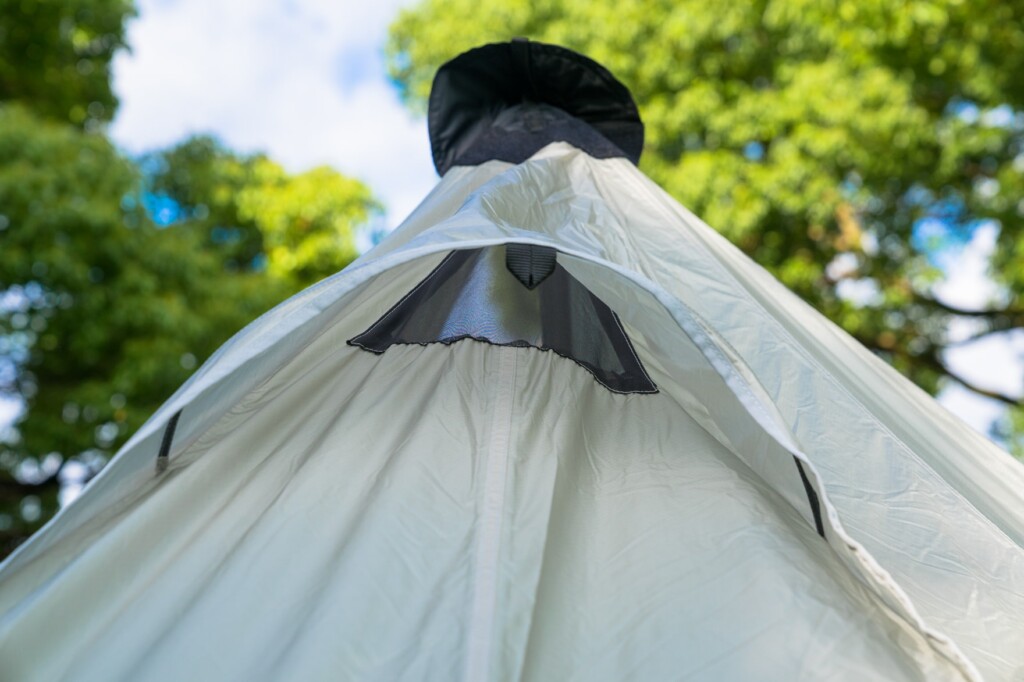
Photo 10: Mesh ventilation at the top opposite the entrance
The interior space (Photo 11) is spacious enough for one person, just large enough for two people including their luggage, and even large enough for three people to sleep comfortably if they organize their luggage and try hard
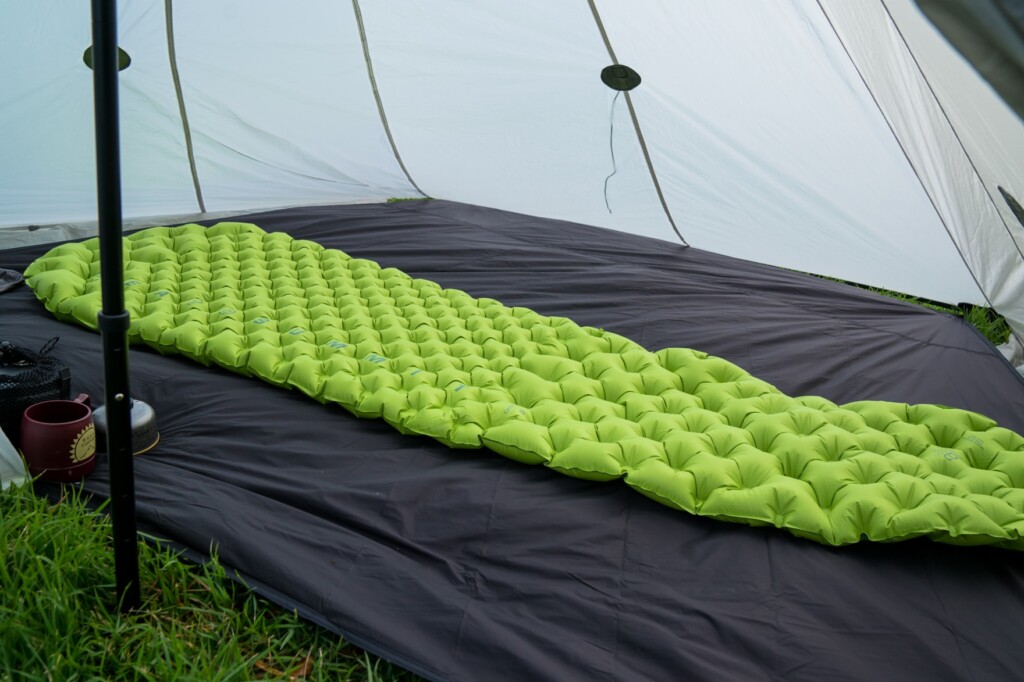
Photo 11: A 180cm mat has been laid inside
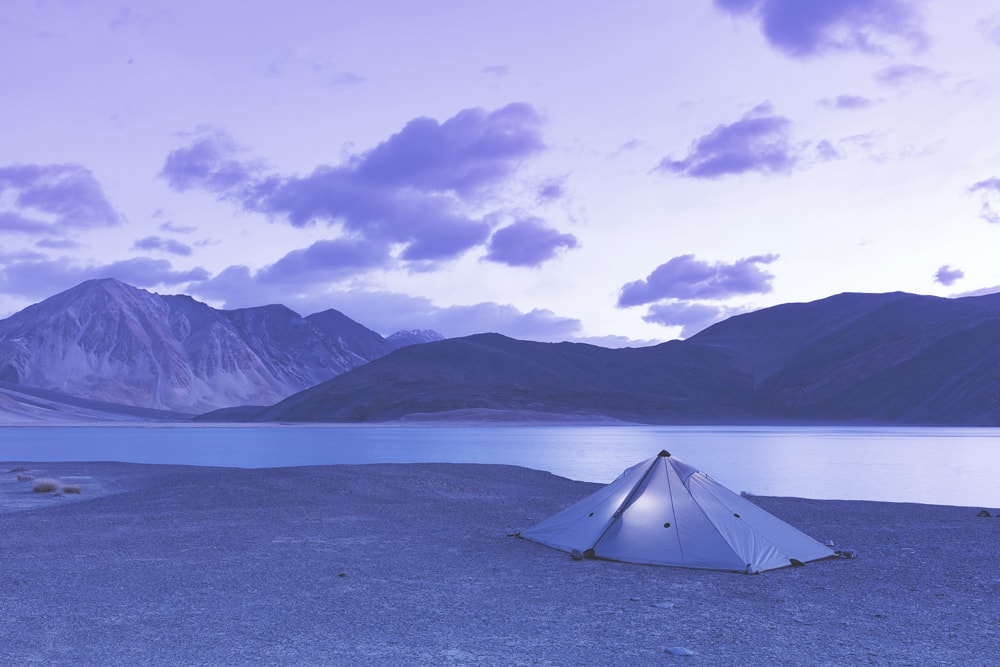
When using a single sheet, it can be set up like a completely airtight shelter as shown above, or it can be set up like a tarp using three poles (Photo 12)
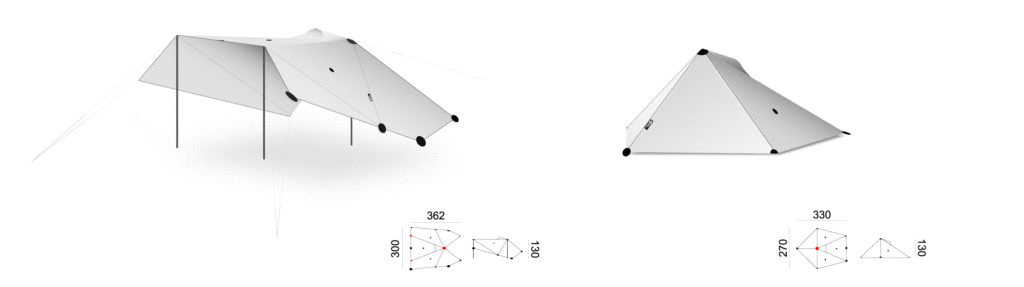
Photo 12: Example of how to use one sheet (from the manufacturer's website)
Connect two or more panels to create a shelter that can accommodate even more people
This alone makes it a very capable tarp shelter, but that's only half of its appeal.The real appeal begins here, as we tried connecting the pieces together and arranging them in various shapes
First, create a large, completely enclosed shelter, just like when using a single tarp. To connect the tarps, start by connecting the zippers located in various places on the tarp (Photo 13)
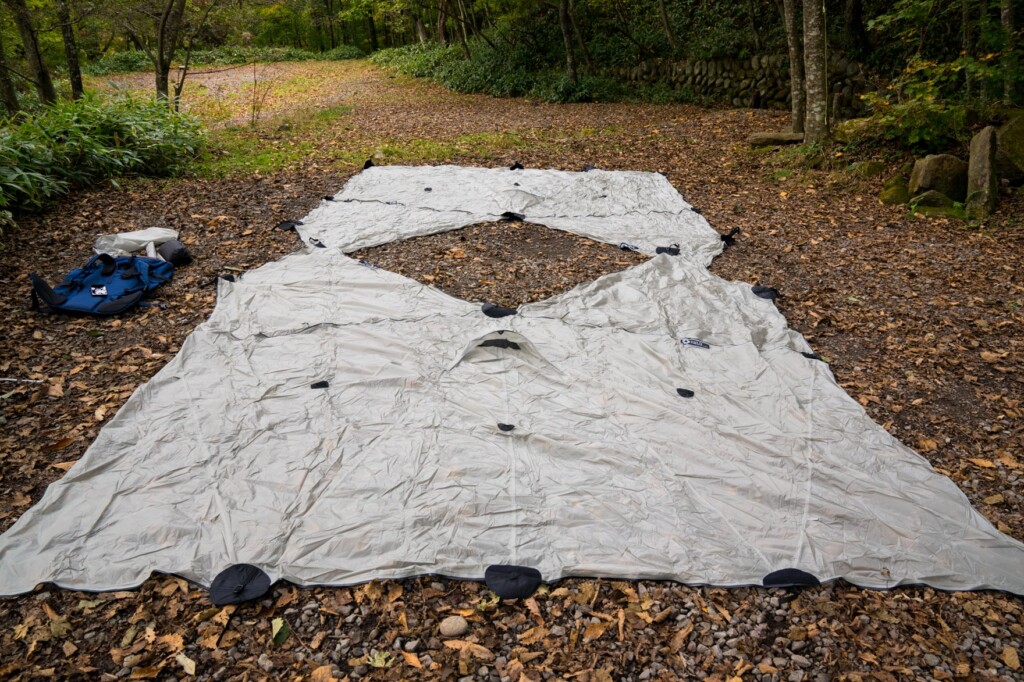
Photo 13: Two shelter bodies lined up vertically facing each other
From this state, the two tarps are connected in the center with a zipper, and one large inflated tarp is created (Photo 14)
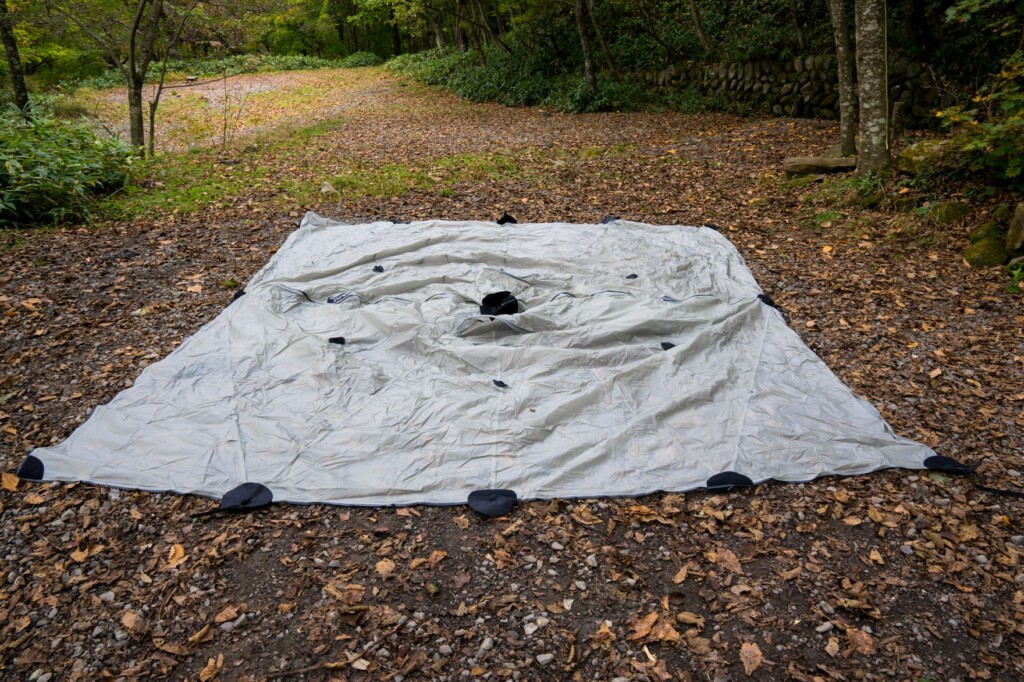
Photo 14: Connecting fasteners attached to both ends of each other
From here, just like when using one piece of fabric, secure the pole to the Velcro part in the center and lift it up (Photo 15)
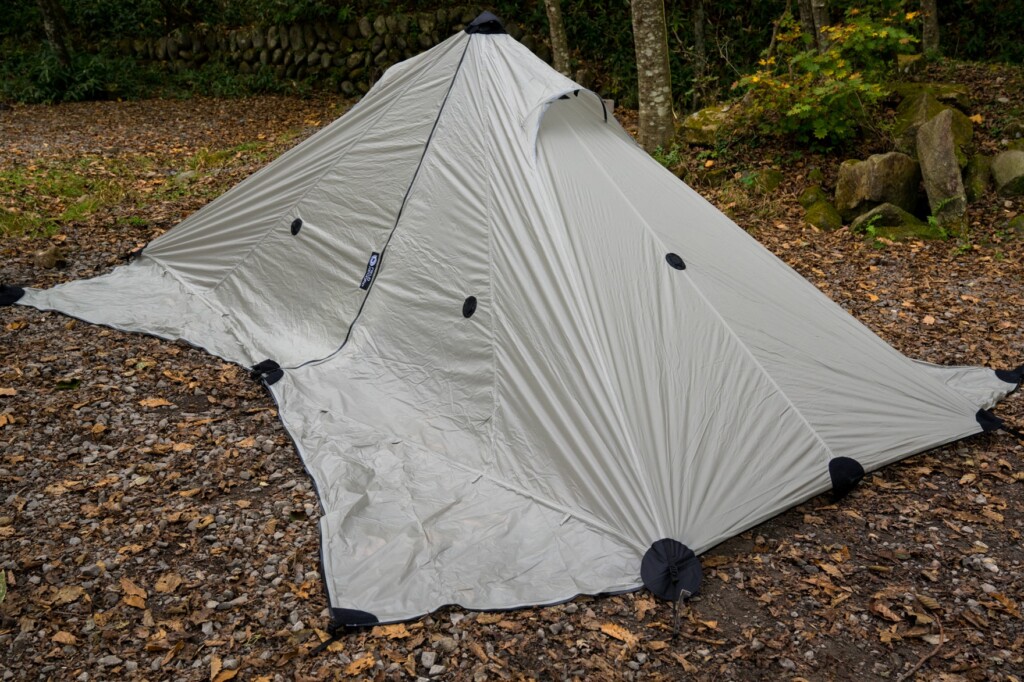
Photo 15: Fix the pole in the center and stand it up. You can either tuck the remaining part in as a skirt or leave it outside
Fold the skirt part and tuck it inside, then tighten the four corners to adjust the tension, and you'll have a large one-pole shelter made by connecting the two pieces together (Photo 16)
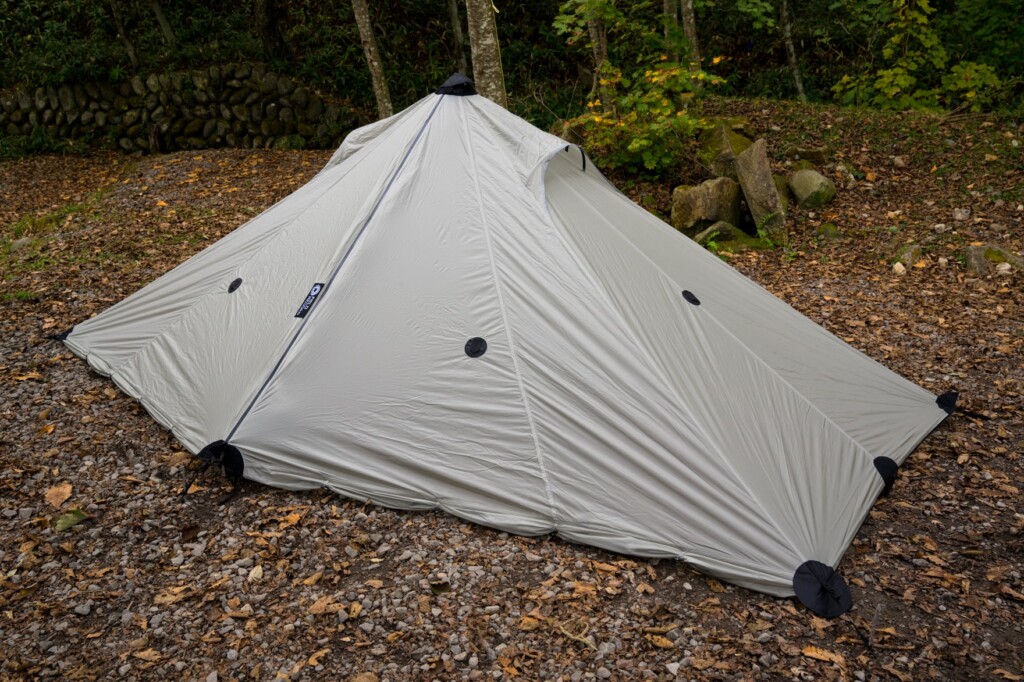
Photo 16: The two connected shelters are complete. The entrance is in the center
This is what it looks like inside when you open the central entrance (Photo 17). You can lay a ground sheet on the right half, or use it as a spacious kitchen. With so much space, you can use it however you like

Photo 17: Inside the tent. Depending on how you set it up, there will be some excess material, but there are loops in various places, so if you can roll it up and store it, it shouldn't be a problem
The ceiling is still high, and if two are connected together, it is spacious enough for 5-6 people to sleep comfortably (Photo 18). There are ventilation vents on both sides of the ceiling, so it has excellent breathability. Of course, two inner mesh panels can also be installed inside
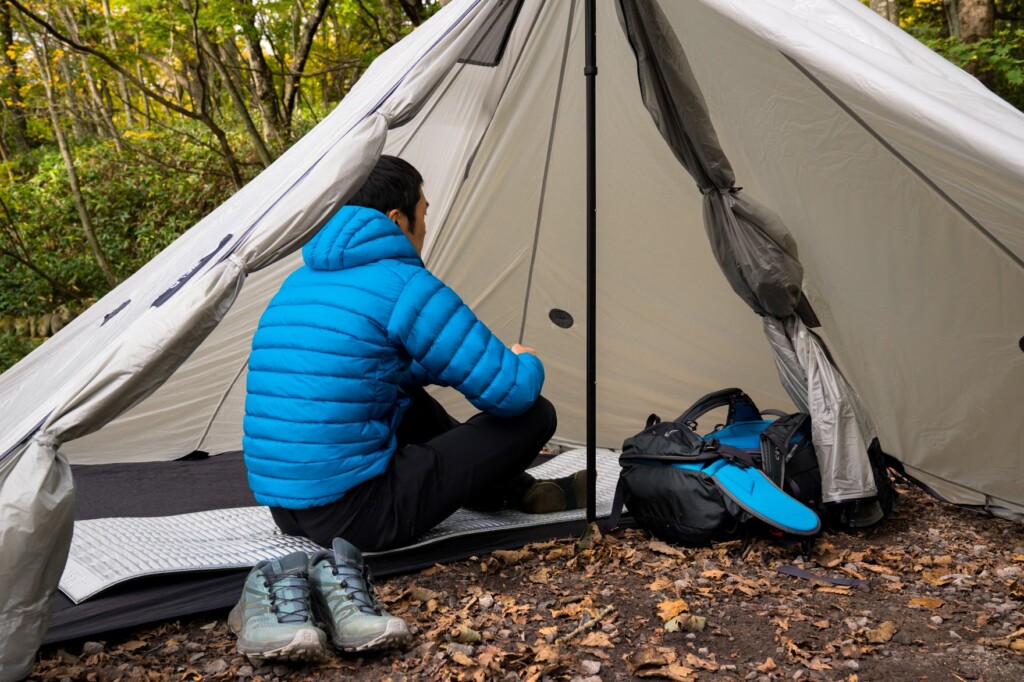
Photo 18: The inside of the tent is still spacious
You can hang it however you like, depending on your imagination. The fun of arranging it however you like is addictive
Although a standard one-pole shelter can be used comfortably, there are many variations possible depending on how the zippers are connected and how the tarp is set up. For example, you can set up poles at the front and back to use it as a large sunshade (Photo 19)
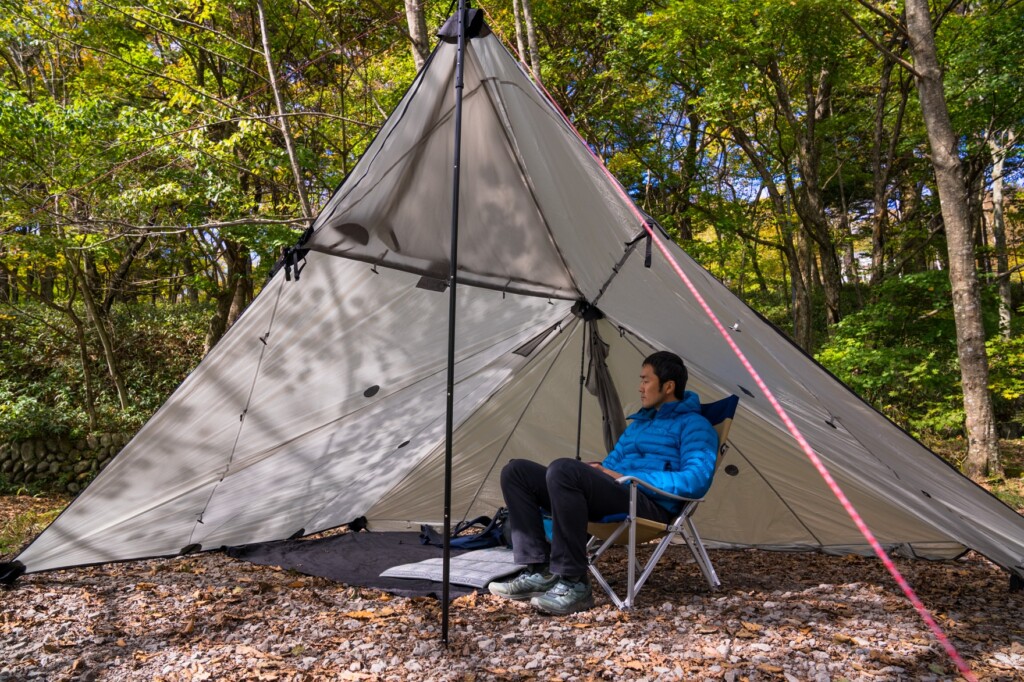
Photo 19: An example of an arrangement with two panels connected together. Perfect for relaxing at the beach or camping by the lake on a clear day
Once you get used to pitching it, you can easily set up a complex pattern that combines a shelter and a spacious vestibule by lifting the entrance with trekking poles (Photo 20). It's bright and comfortable on sunny days, easy to work in even when it rains, and can be fully closed if the wind is strong. You can also leave the lifted part in place and close only the shelter on the sleeping side, making it flexible to suit any situation

Photo 20: By making full use of poles and guy lines/pegs, it is possible to arrange the tent into unique shapes that are both weather-resistant and comfortable to live in
Using two mats allows for more complex and functional ways of hanging them than are possible with just one mat, and depending on the ideas of the person hanging them, you can enjoy an endless amount of comfort (Photo 21)
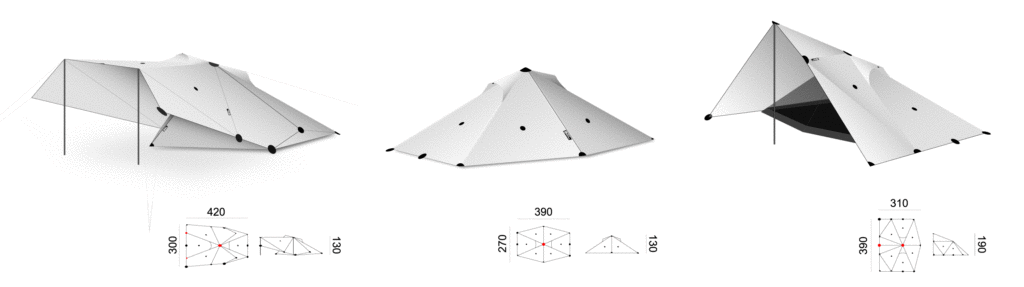
Photo 21: Example of how to use two sheets (from the manufacturer's website)
Summary: A unique tent that allows you to enjoy the act of pitching it
Who would have thought that the "task" of setting up a tent or tarp, something we do every day when hiking or camping, can actually be such a fulfilling experience? This shelter will remind you of the simple joy of building your own home with your own hands, something you felt when you first got into the outdoors
For those looking for a "normally good tent"—a lightweight, durable tent that's easy to set up—or beginners who have never set up a tent before, this tent may not be a good fit due to its intimidating and cumbersome setup. On the other hand, for those looking for a unique tent that no one else has (yet one with solid quality that's not just a gimmick), or for those who have some money and are starting to aspire to enjoy the outdoors more deeply and on their own terms, this tent will undoubtedly provide a new and exciting experience that you won't find anywhere else. It's especially great if you can use two or more tent sets. The joy of figuring out how to set it up and finding your own comfortable style will endlessly expand the infinite possibilities of the outdoors
Of course, this shelter is not just a novelty; it also offers many practical benefits not found in other tents, such as the ability to flexibly pitch it to suit the weather, temperature, style, and mood, and the ability to carry individual parts for large parties. From hiking in the forest, low mountains, or mid-mountains, to enjoying a relaxed camping experience, everyone can enjoy it in their own way. This is a rare product that addresses the insatiable desires and creativity of such people
NEWS: It seems that they will be exhibiting at the outdoor exhibition " Off the Grid 2019 " to be held on April 6th and 7th, 2019. If this tent is exhibited, it will be a once in a lifetime opportunity. Be sure to check it out!
Related reading
 Review: FIELD RECORD FR-chair carbon A completely new lightweight chair for elegant coffee time anywhere
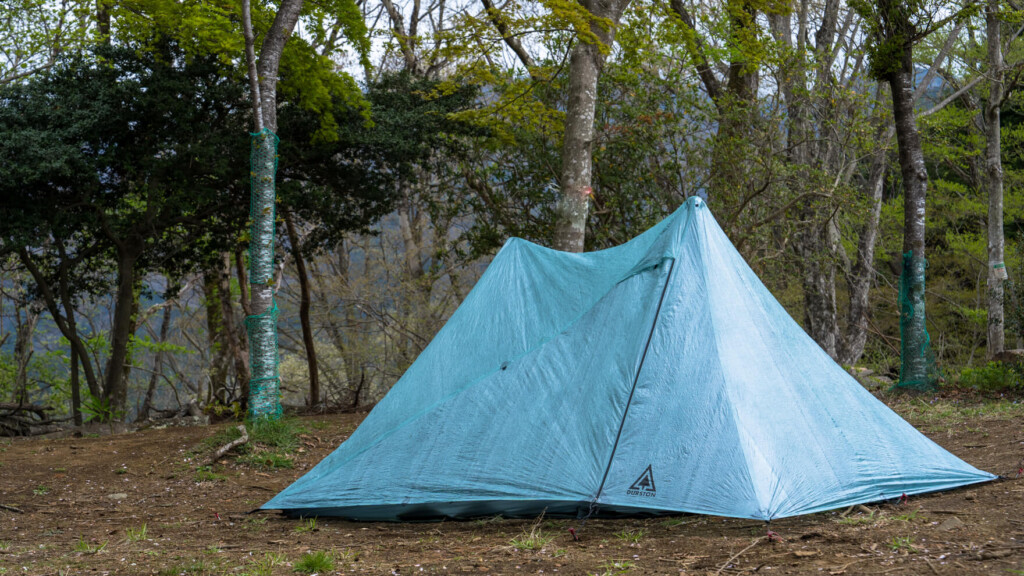 [Unbiased, Self-Funded Review] Durston X-Mid Pro 1: Five or More Reasons Why This Next-Generation Lightweight Tent (Shelter) Is So Revolutionary, It's Getting Praise Around the World
 Review of the "FR-chair carbon triangle (high/low)" folding chair for all outdoor enthusiasts who don't want to compromise on comfort while still being lightweight and compact
 [Backpacking Shelter] CLASS EXPOSITIONS and Takeshi Kitamura [Garage Brand Visit]