An outdoor enthusiast who used a sewing machine for the first time in about 30 years made an original cylindrical stuff sack [Outdoor activities you can do even during the COVID-19 pandemic]
Written by Yasushi Hisatomi
These frustrating days when we can't go to the mountains continue. In times like these, why not try making your own outdoor gear?
Nowadays, even in fairly niche areas of mountain gear, specialized equipment is developed and sold by some manufacturer. However, in the outdoors a few decades ago, even for fairly well-known activities, it was almost impossible to easily choose and obtain equipment suited to your purpose and style. If you didn't have what you needed, you had no choice but to make it yourself or substitute it with something else
For example, I apologize for always talking about mountain stream climbing, but at the time, there were no light, durable, and compact mountain stream (hiking) tarps to use when camping. For this reason, guidebooks boldly showed a method of cutting a blue construction tarp to the desired size and punching holes in it to use. It was a crude method that would be hard to imagine today, but of course it was also a fine piece of outdoor equipment
Or the world of "Make Your Own Gear (MYOG)," which arrived with the boom in ultralight hiking about a decade ago. With the emergence of garage brands that handcrafted ultralight backpacking gear, ordinary hikers also began to present and discuss various DIY ideas based on their own ingenuity, with the motto of reducing the weight of their luggage
Fast forward to 2020, and in an age where mountain gear is overflowing with a wide variety of needs from a variety of brands, big and small, it could be said that the need to make your own mountain gear has diminished. However, the appeal and value of having your own unique gear never fades
table of contents
I started by making a stuff sack, something I had been thinking about back then
So, this time, especially in times like these, I'd like to try making my own tools for the first time, something I've been meaning to do for a while but have given up on
What we'll be making is something that even beginners can easily tackle, and that for some reason seems like it doesn't exist anywhere in the world. It's a slightly unusual "double-sided, extra-long" stuff sack
The inspiration for this item came from a talk event with Arai Yusuke at the offline event "Outdoor Gearzine Trailhead" three and a half years ago, where Arai showed us a handmade stuff sack. To find out how convenient it is, please refer to this past article or watch the video of the event below. This time, instead of the slightly smaller (medium size) for storing clothes that was introduced there, I'd like to try making a long size with the same concept that can also store tents, flies, tarps, and hammocks.
The stuff sack itself is actually quite easy to make, and makes a great first DIY project to hone your sewing skills before tackling more advanced projects like sacoche bags, pouches, or backpacks
By the way, let me start by saying that I have honestly never made my own tools. I haven't even touched a sewing machine since elementary school. So this is more of a personal account than a tutorial. To be honest, in several ways, making this tool was a complete failure..
For this reason, what I'll be introducing here is merely a report of what I believe to be the easiest method I've researched. There are many other ways to make a stuff sack, and if you search online you'll find countless tutorials, both in Japanese and other languages, so please feel free to read this as just one reference. I hope that by sharing my mistakes and stumbling blocks, I can help lower the hurdles you may have when it comes to making your own tools
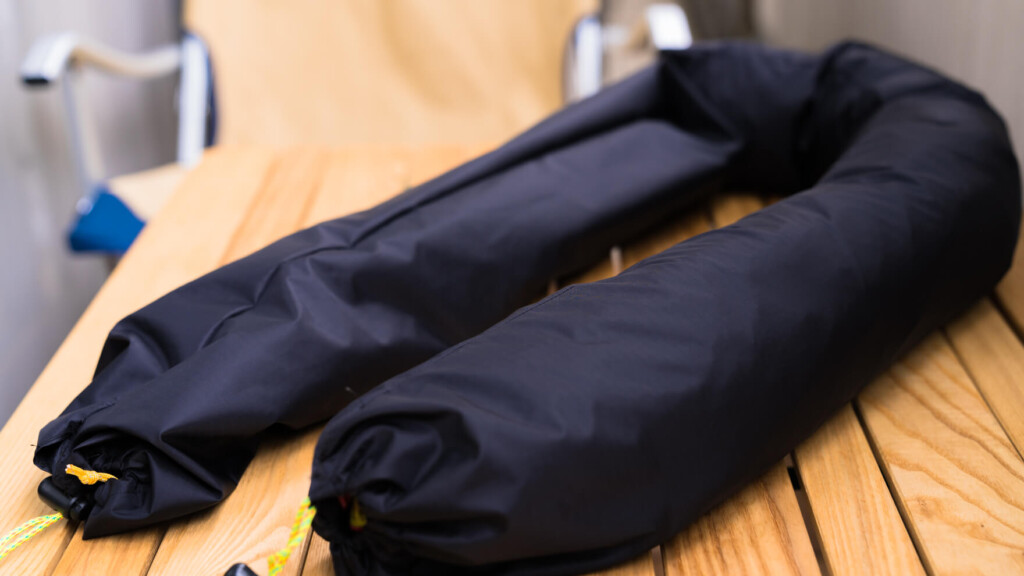
I made a super long, double-sided stuff sack
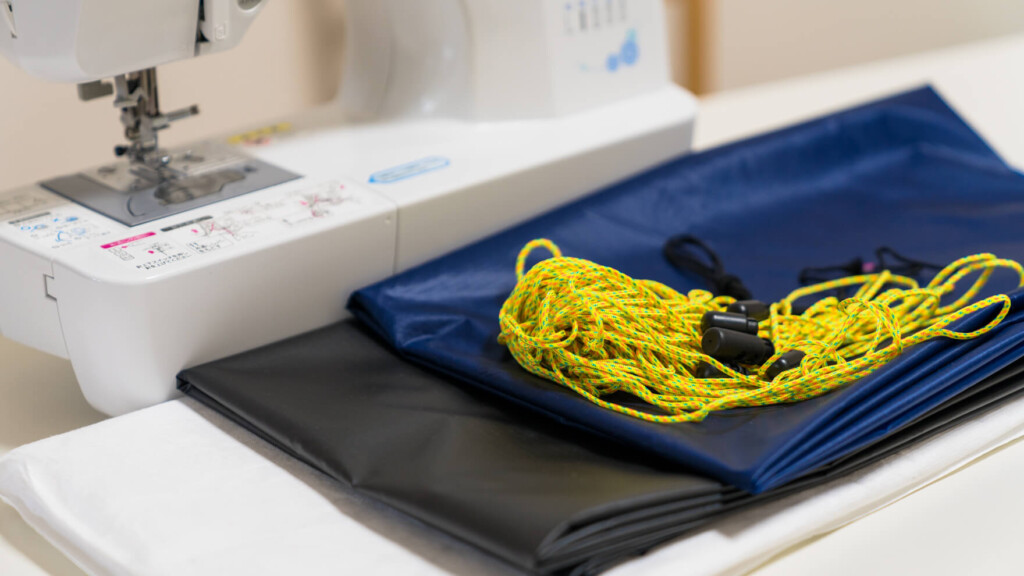
Here's what I have to get you started (there may be more to choose from):
- household sewing machine
- Sewing thread (polyester #50)
- Sewing needle (size 9)
- Teflon presser foot to prevent stitching misalignment
- cutting scissors
- long ruler
- iron
- Discipline tape
- Chalk pen
- Fabric according to the size of the stuff sack
. (Ripstop nylon is a good choice for outdoor durability, but any type of fabric will do, at least for the first sewing session.) For complete water resistance, you'll need to use a specialized fabric such as PU-coated nylon, Silnylon, or XPAC. - 2 x cord locks
- Drawcord (thin cord 3 mm x approx. 100 cm x 2)
Step 1: Cutting the fabric
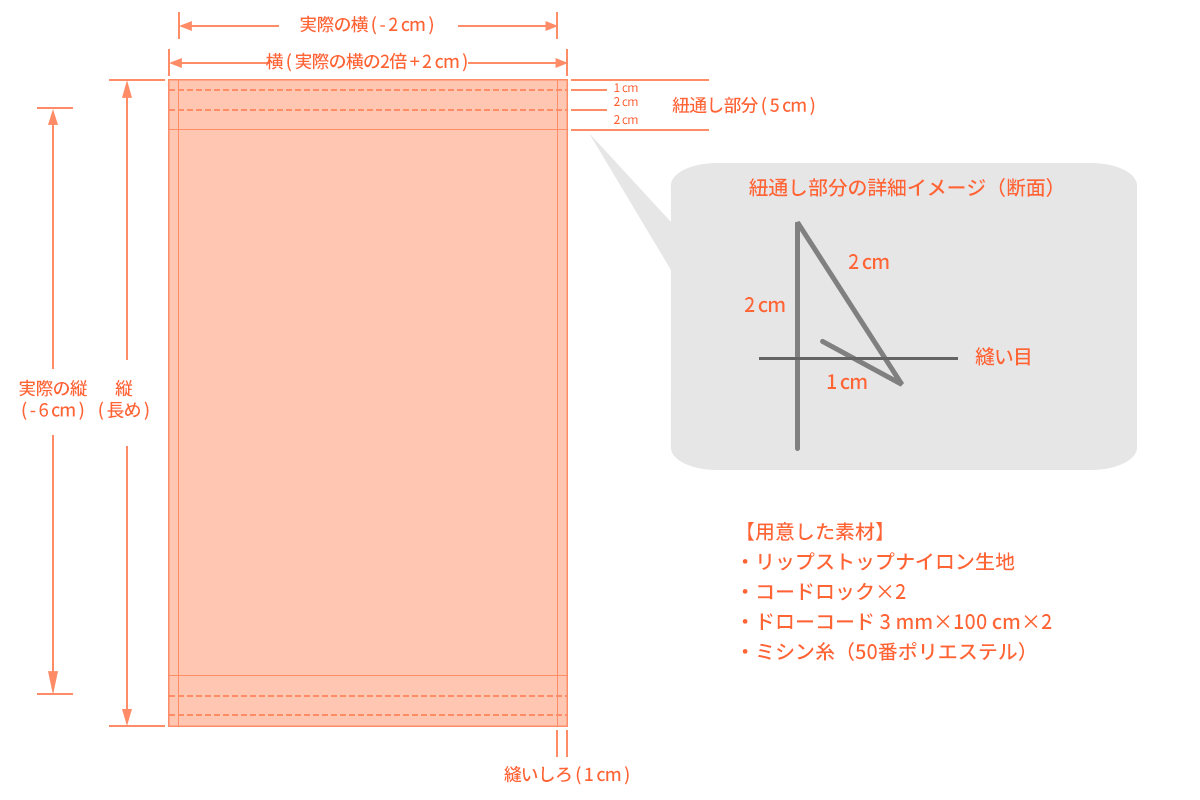
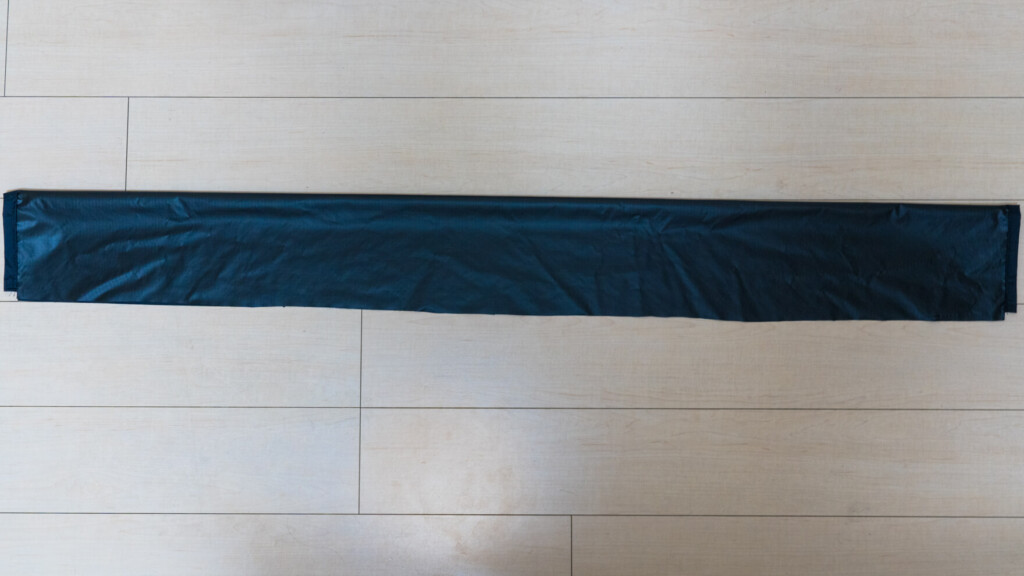
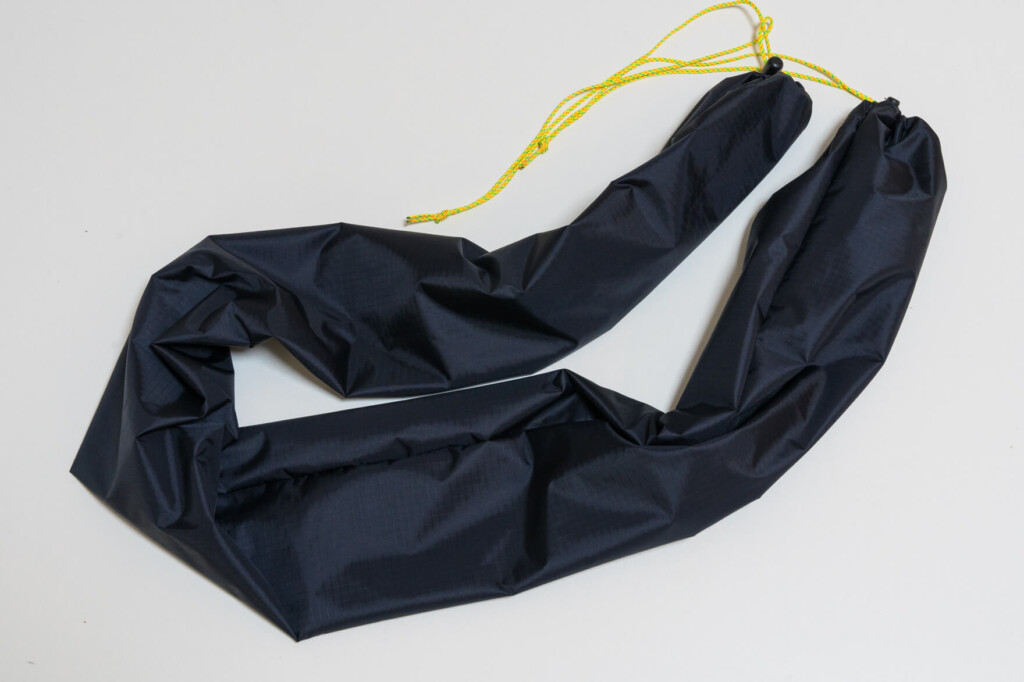
First, cut out the fabric for the stuff sack. As shown in the diagram above, to make a double-opening stuff sack, cut out a rectangle that is twice the width of the size you want + 2 cm and + 6 cm in height. Actually, this time I just wanted to make a really long and skinny stuff sack, so I made it with extreme dimensions of 18 cm wide and 150 cm long, but to be honest, it was way too long. I'll explain that mistake later
Regarding the type of fabric, I was originally thinking of using water-resistant ripstop nylon, but since this was my first time, I decided on PU-coated ripstop nylon simply because it seemed easier to sew. However, this also ended up causing me some trouble later on
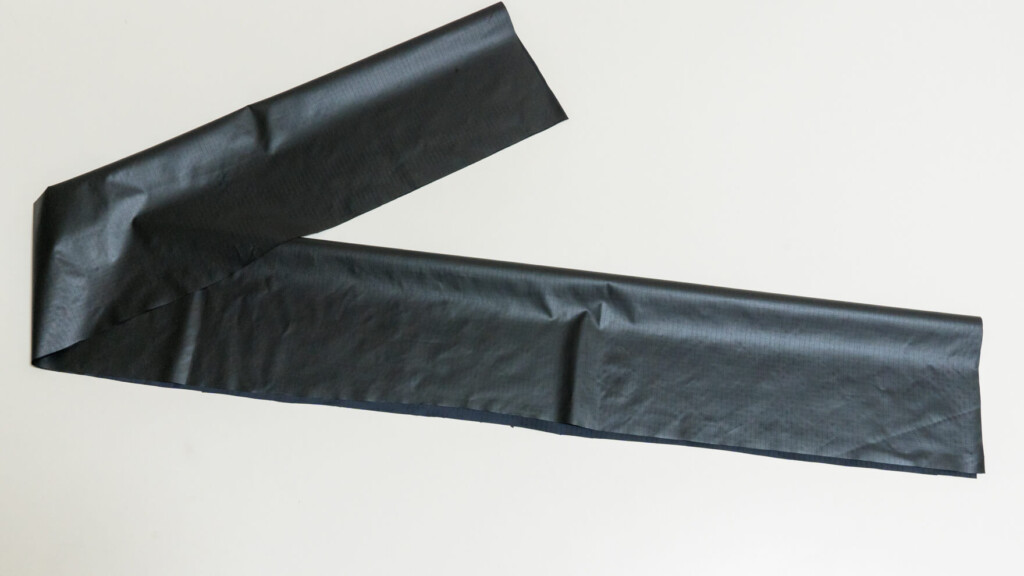
The cut fabric (folded image) turned out to be too long
At this point, if you just hold the fabric in your hands and cut it, it will slip and you won't be able to cut it straight. When cutting, I clamped the fabric to the table as much as possible (maybe a large clothespin?) and cut it while it was taut, which made it easier to cut in a straight line. Well, even if you can't cut it exactly straight, it's manageable to a certain extent with a stuff sack, so I cut with scissors as hard as I could
Even if you think you're cutting straight, the cut will inevitably become misaligned without you realizing it. When cutting, you have to stretch the fabric as much as possible and go all out, intending to even it out at the end
Step 2: Eyelet opening
Make 1 cm cuts on both sides of the fabric, 5 cm from the top and bottom edges (where the stuff sack will open) (see photo below).
*In this case, there are openings on both the top and bottom, so do this on both the top and bottom.
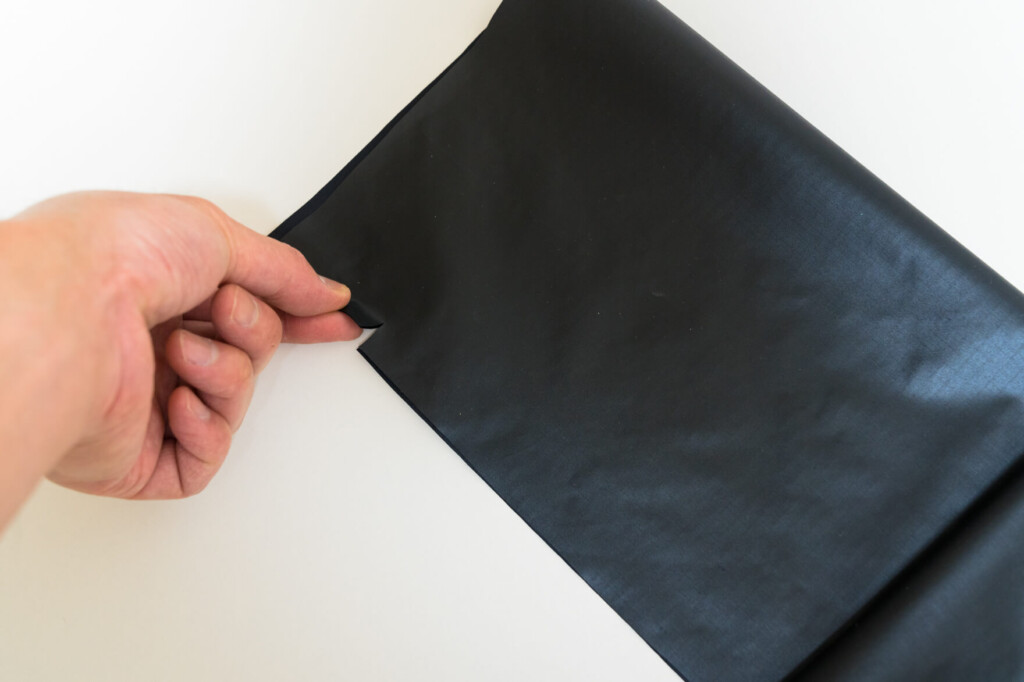
Make a 1cm cut 5cm below the long edge of the dough
Prepare an iron, fold the cuts you made earlier inwards and iron them (see photo below). This is the part you will be sewing later, so it's fine if it just sets in shape. Be careful not to set the iron too hot, as the PU coating will melt from the heat
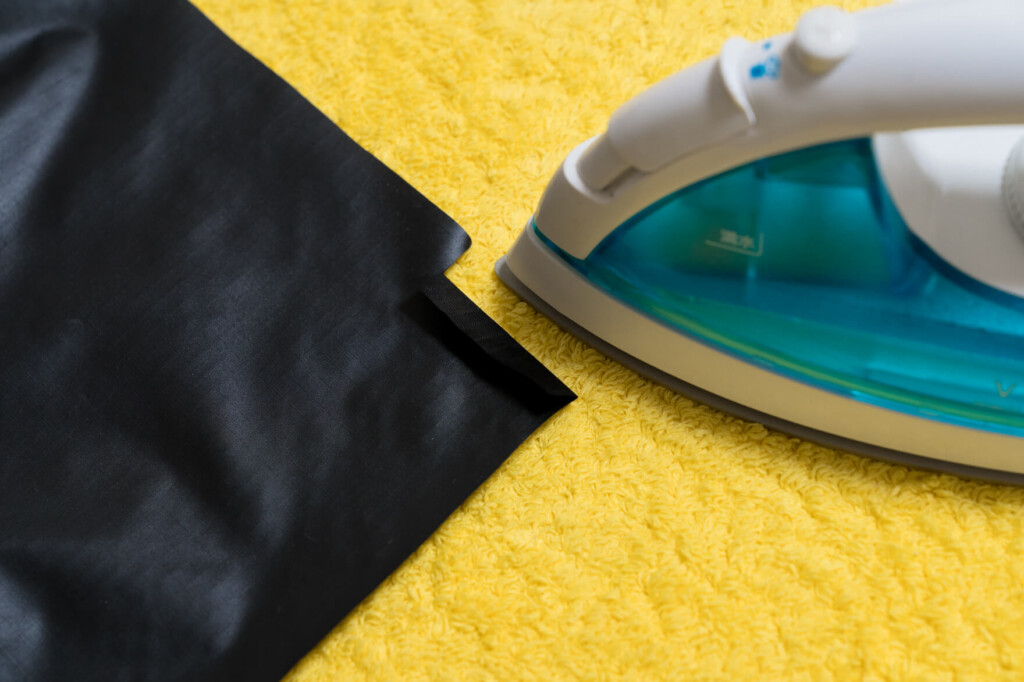
The lining melts easily when ironed, so iron gently at a low temperature
Step 3: Basting the eyelets
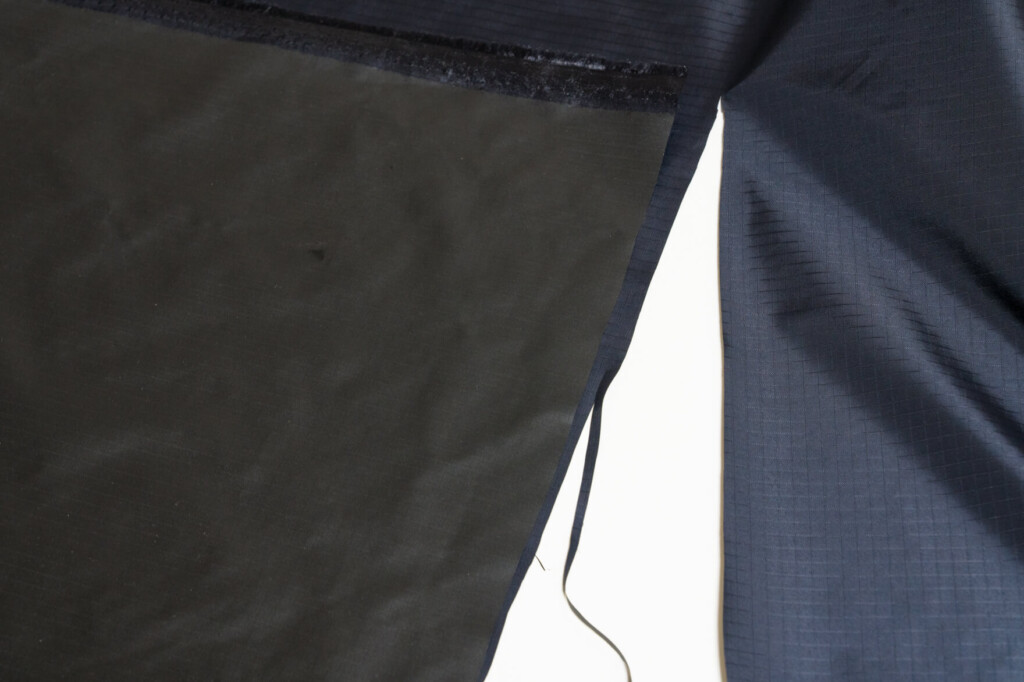
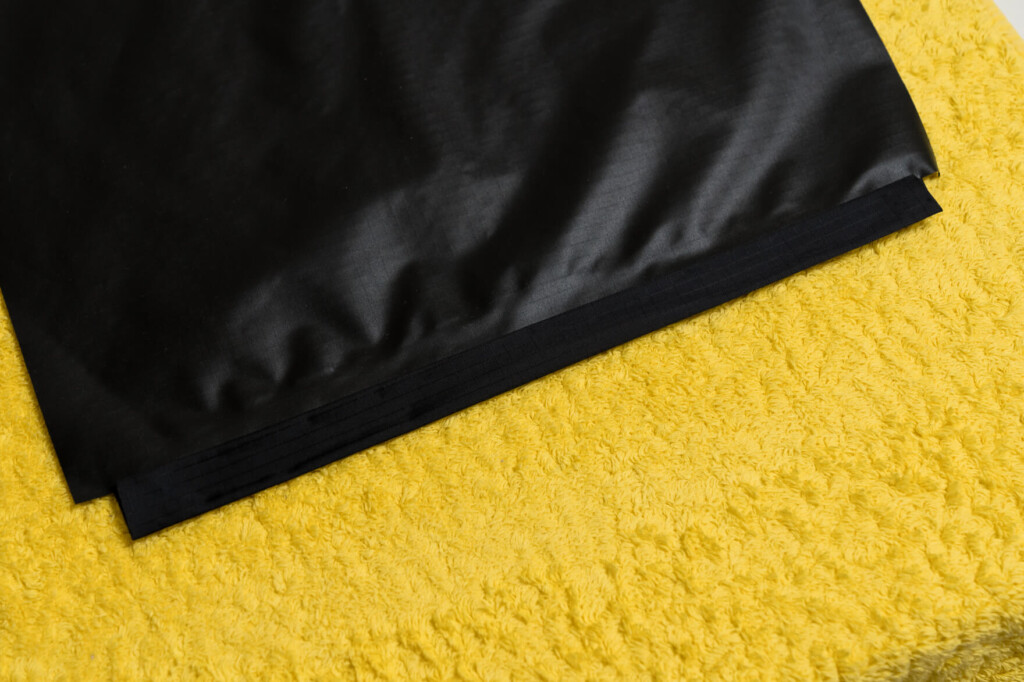
Fold the top and bottom edges back 1 cm and iron them (see photo below)
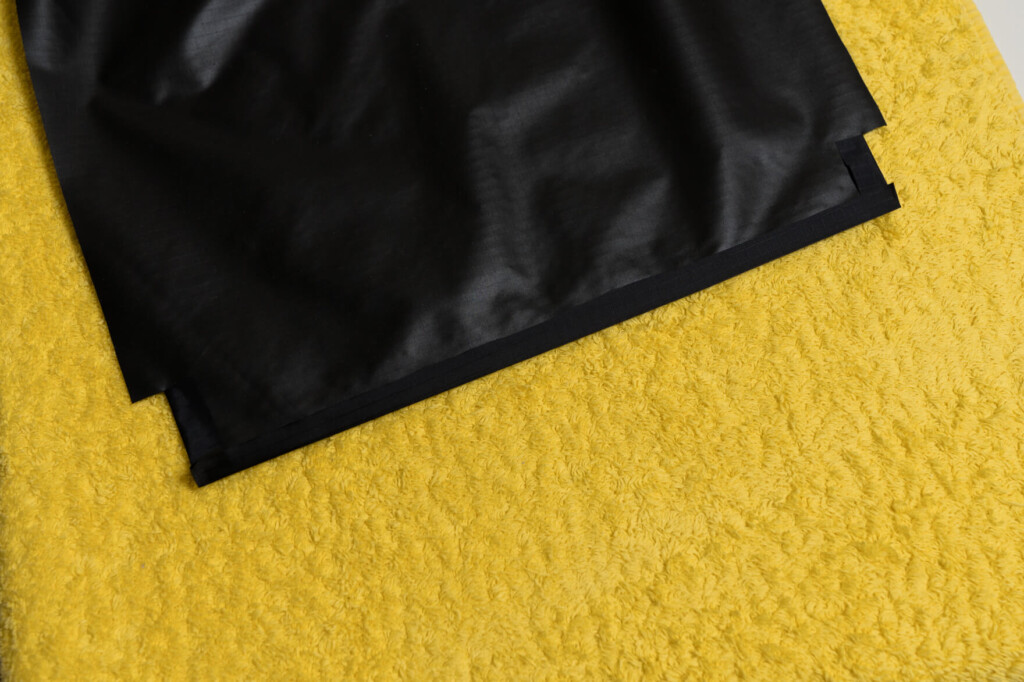
Then fold it back up to the notch and iron it (see photo below). Please refer to the image shown at the beginning to get an idea of how this fold and the seam position will look
Step 4: Sew the lace holes
Once you have finished basting, it is time to actually sew the eyelets. First, sew where you made the slits (see photo below)
As I mentioned at the beginning, it's been about 30 years since I last sewed, since elementary school, so I basically don't know anything beyond the instructions. I read somewhere on a blog a long time ago that when sewing outdoor gear, you should use as thin a sewing needle as possible because the fabric is thin, and the thread should be as strong (thick) as possible, so this time I got a new No. 9 sewing needle and No. 50 polyester thread and set them up. However, after making something, I realized that if you're making something like a stuff sack, you don't actually need to be so particular about it
Use a straight stitch as usual, with backstitches at the beginning and end
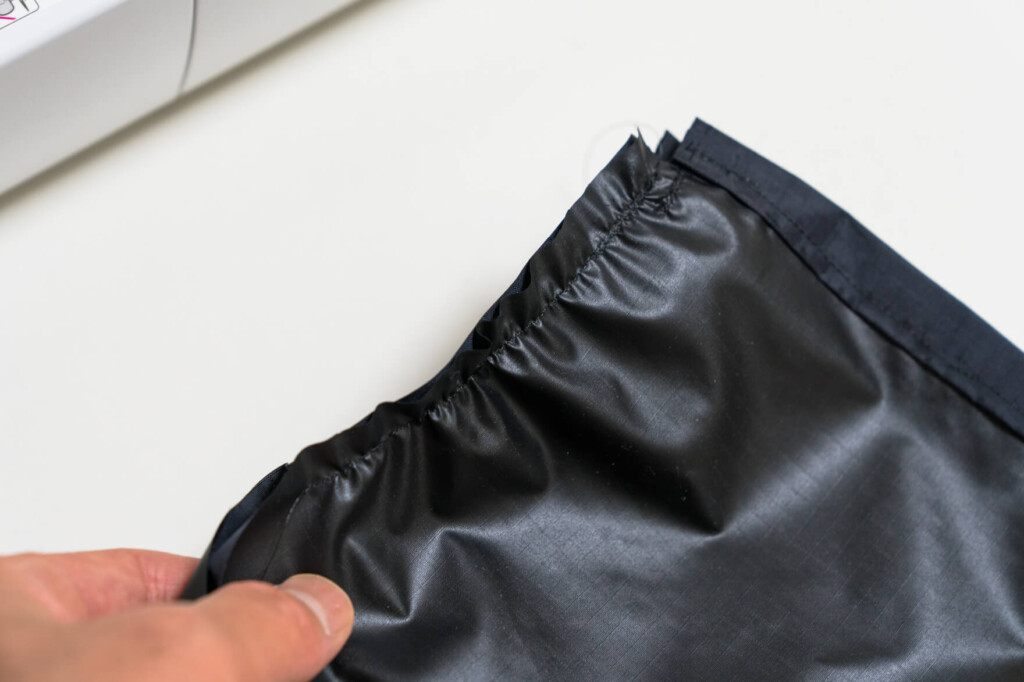
Next, sew the folded part (see photo below). Unlike the previous part, the stitching distance is longer, so it's becoming a little difficult to sew in a straight line
It wasn't such a severe place, so luckily I was able to sew somehow (this is when I started to get complacent and think, "Maybe I can do this!?")
Step 5: Sew it into a tube (failed)
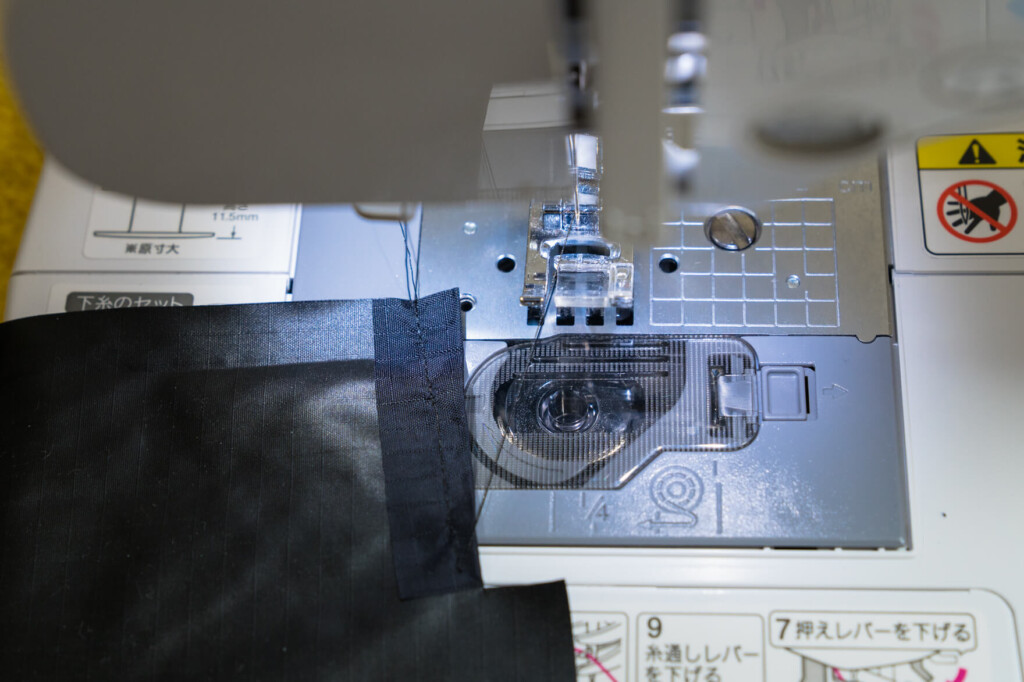
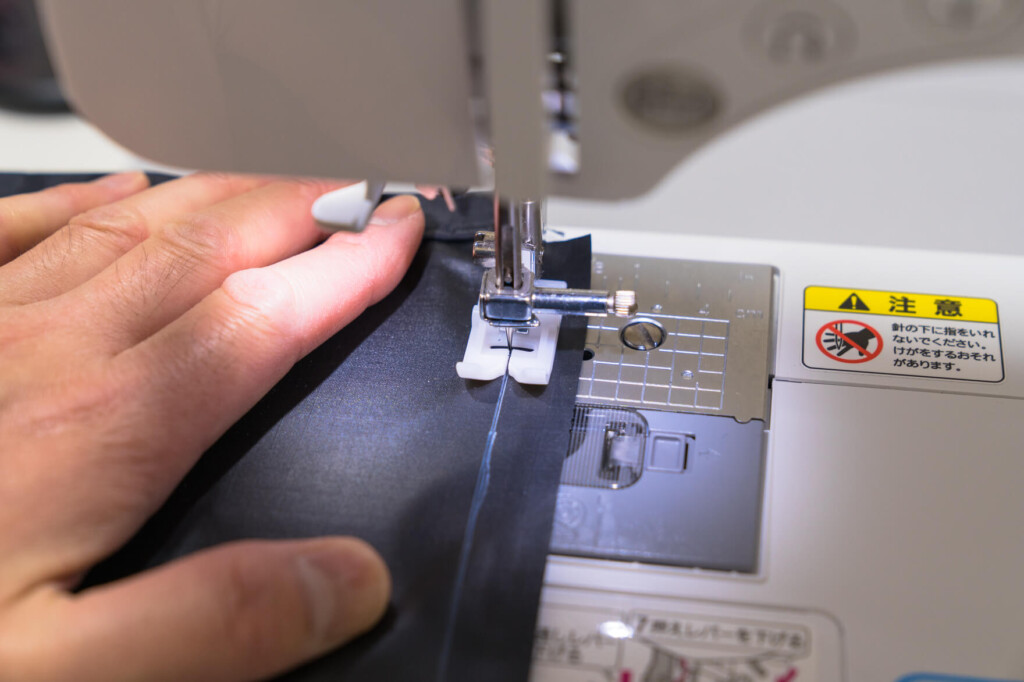
Now that the string holes have been made, the next step is to make the cylindrical storage section. Fold the fabric in half inside out and sew vertically along the edge of the slit (1 cm) (see photo below)
But then a problem occurred. I started sewing using the same normal equipment as before, but the fabric started to wrinkle violently, the PU coating wouldn't slide, and I couldn't sew straight, which was a complete disaster (see photo below). I'd sewed quite a bit, so it was quite a struggle to remove the thread, and with the thin nylon fabric, the needle would make holes in the areas I'd already sewed (it was a blessing in disguise that I'd accidentally sewed further outside the line I should have been sewing...)
Coated thin nylon fabric will wrinkle and slip if sewn poorly. This is a lesson learned: always test sew somewhere!
After a quick search, I found that there are three possible causes (although if you're an average sewer, this would probably be considered "the most basic of basics"...)
- When sewing laminated or coated fabrics, it seems necessary to use a more slippery "Teflon foot" on the sewing machine
- To prevent thin, smooth fabric from slipping, it is said that if you temporarily secure the fabric together before you start sewing, it will be less likely to slip
- It's said that it's a good idea to draw a line along the seam allowance to sew straight (I remember there was a chalk pen for that)
So I quickly headed to Yuzawaya, a mecca for craft enthusiasts. I managed to get the Teflon presser foot that matched my sewing machine model. There are apparently several ways to temporarily fasten the fabric, but I decided to use the double-sided basting tape method, which seemed easier and more reliable. Finally, I bought a chalk pen with water-erasable white ink
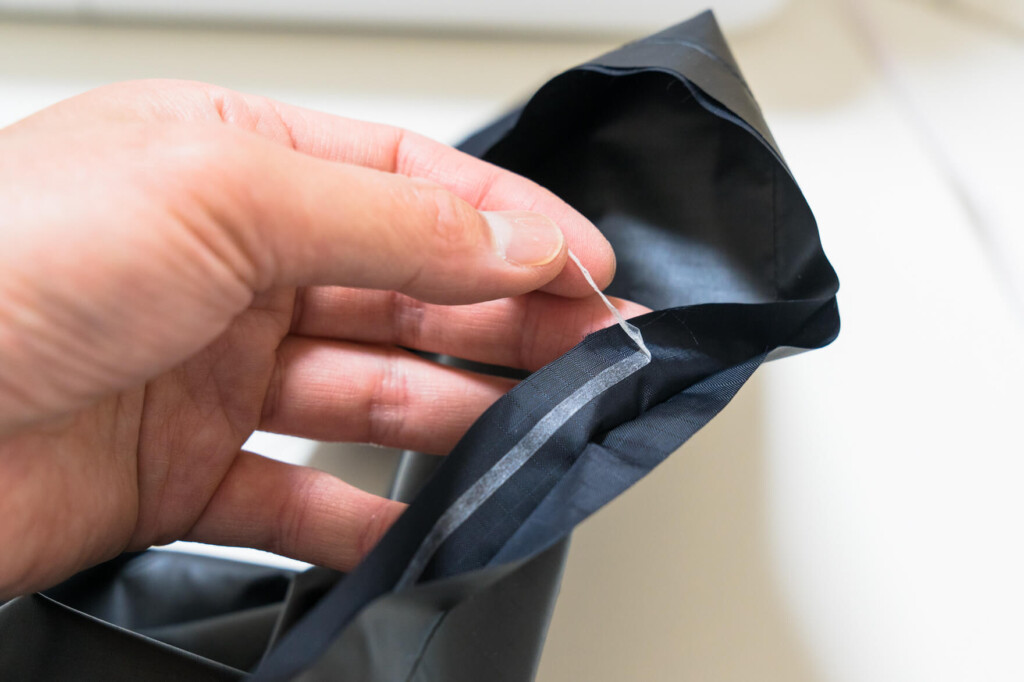
Immediately, carefully secure the folded edges with basting tape, then use a ruler and chalk pen to mark straight seam allowances

Step 6: Sew into a tube (revenge)
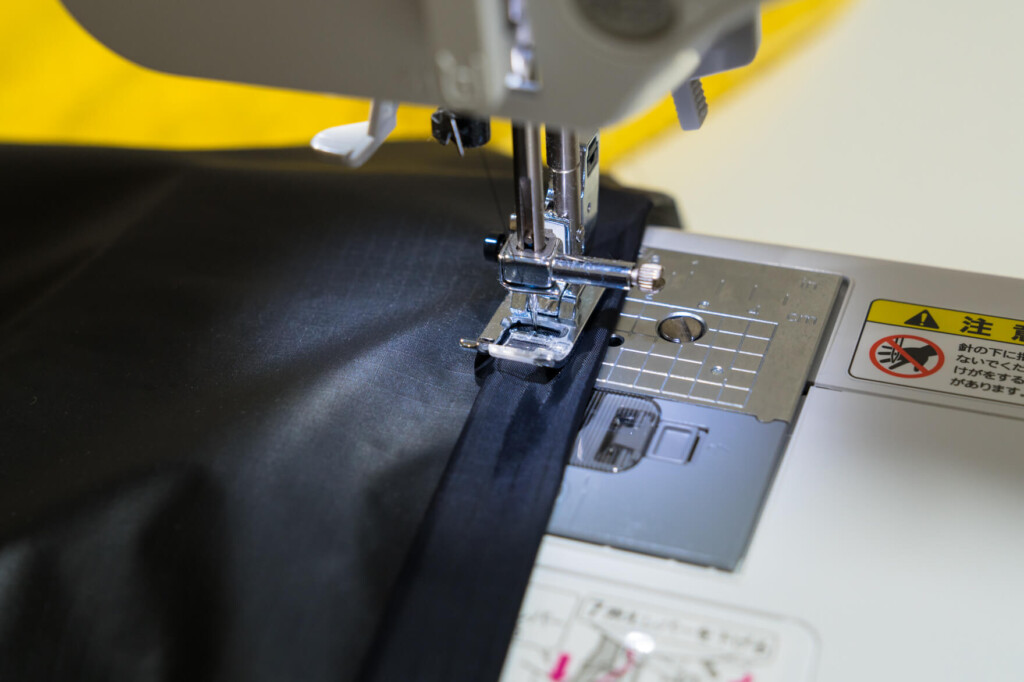
Once everything was perfectly prepared, I started sewing the vertical cylindrical part again. As expected, the fabric, which I had used the Teflon presser foot and basting tape on, sewed smoothly as if nothing had happened (see photo below)
If you start sewing just below the string hole with a few centimetres of slack, you can create some space at the opening. I folded the extra slack part over and sewed it down
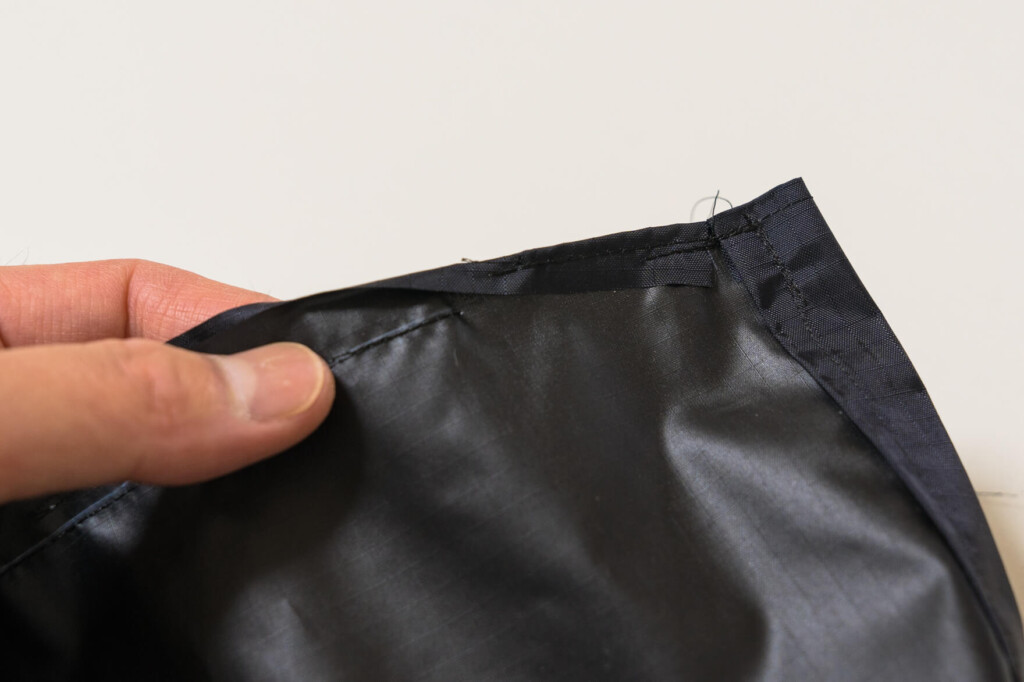
Leave some slack just below the string hole. There must be a better way to do this, but I didn't know how, so I just did it haphazardly
Once you've sewn from end to end, you'll have a cylindrical stuff sack with openings at the top and bottom. Once you've finished sewing, remove the basting tape
Step 7: Threading
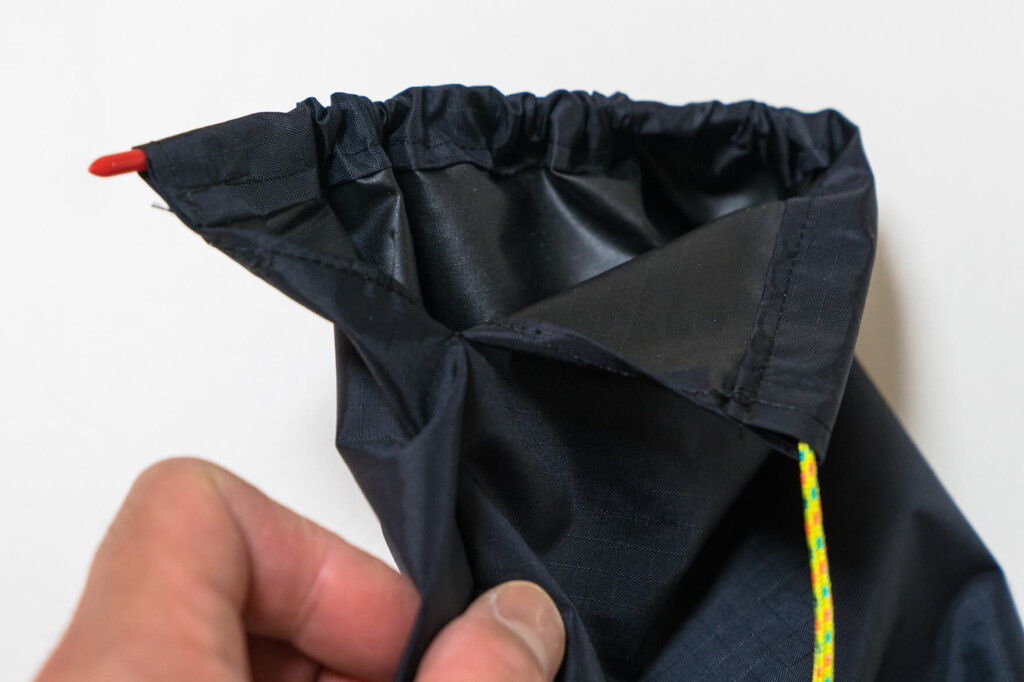
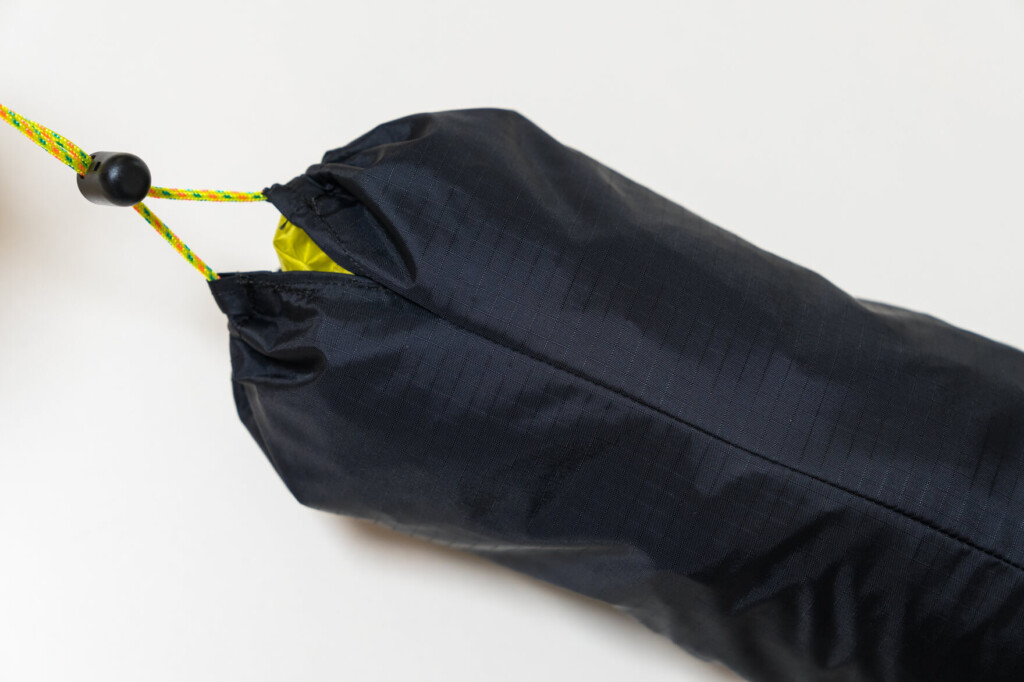
Thread the drawcord (thin cord) through the holes at the top and bottom. A sewing threader is useful for this step. After threading the drawcord through, burn the end with a lighter, then thread a cord lock through
Step 8: Finished!
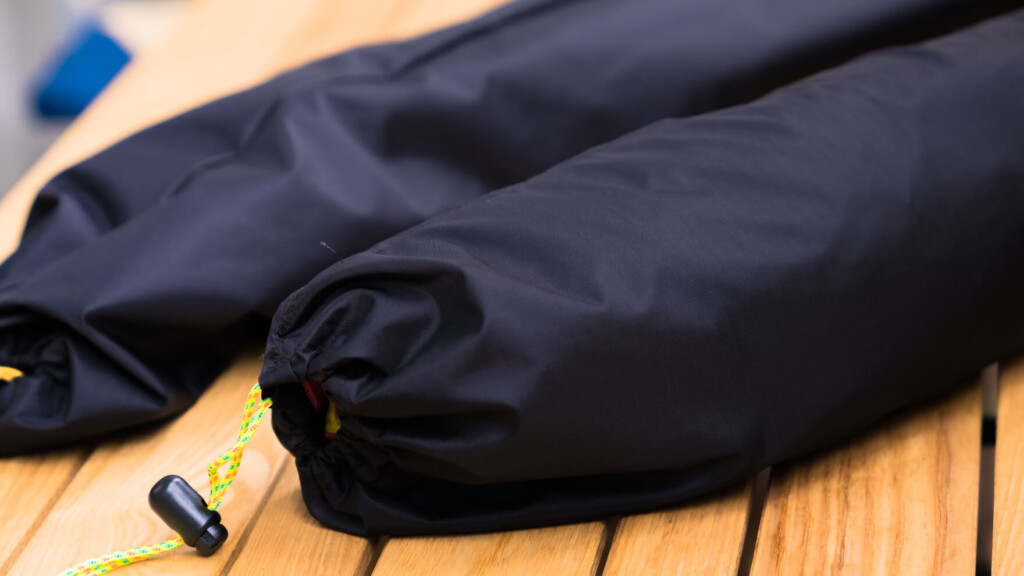
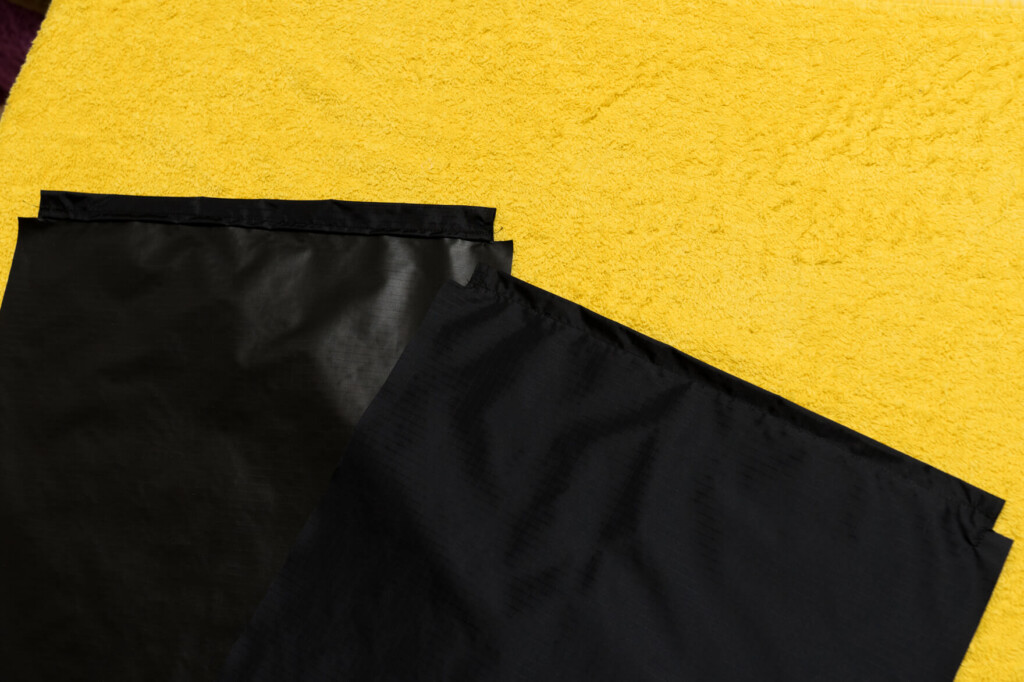
Finally, turn the whole thing inside out to create a cylindrical stuff sack with top and bottom openings
When I look at the seams, I see they're sewn very tightly
I actually tried it
It took a few days to complete due to various unexpected circumstances, but the actual production time was only about 1-2 hours
I immediately put some interesting items I had lying around to the test and discovered a few things I never expected. I'll list some of the things that this stuff sack did as expected and some of the things that were a total disaster
Good points
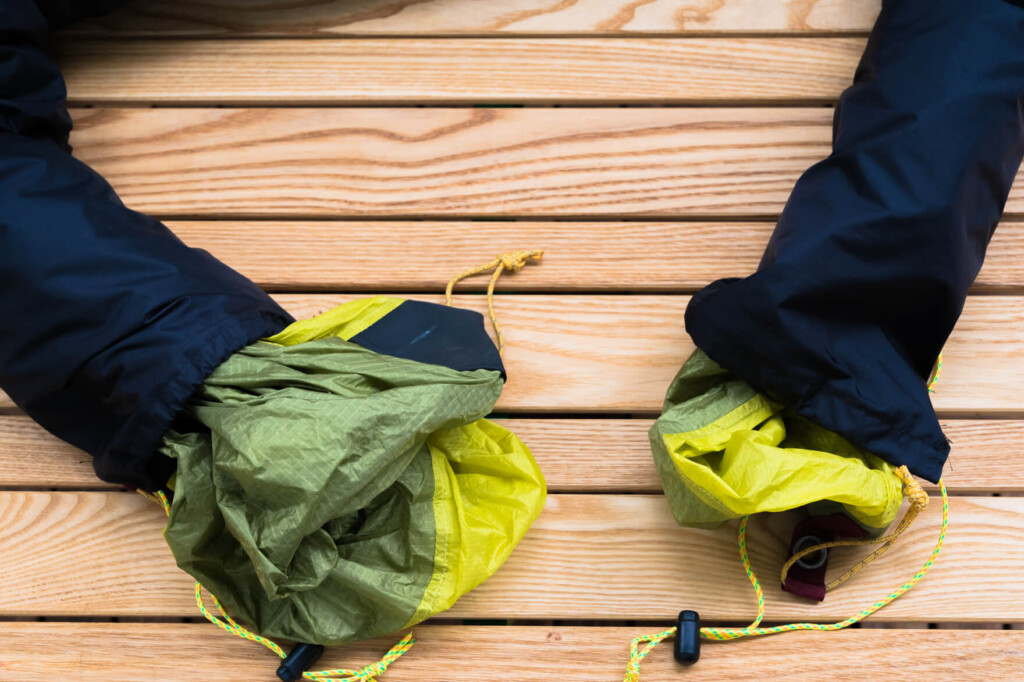
Accessible from both sides
The main purpose of this bag is to comfortably pack large, bulky, crumpled items like tents and sleeping bags, so it's okay if the bottom isn't tightly closed. In fact, it's more convenient to be able to access it from either the left or right side, so you can access the inner tent from the top and the fly or ground sheet from the bottom
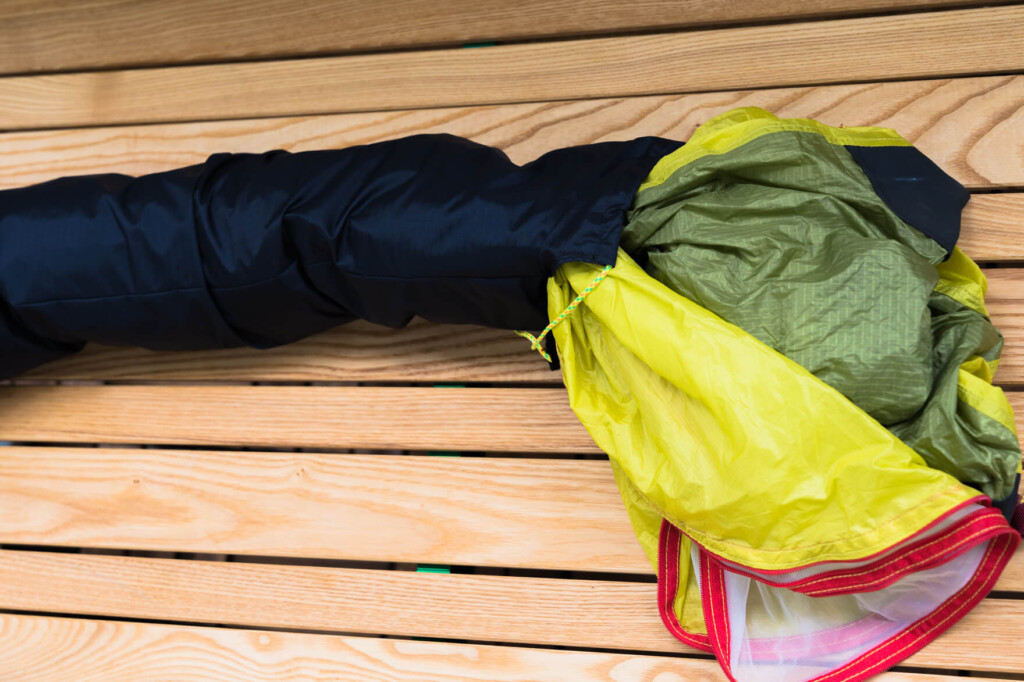
Also, because the top and bottom are open, after setting up a tarp or hammock, you can simply thread this stuff sack through the guy ropes so it won't get lost and is easy to store
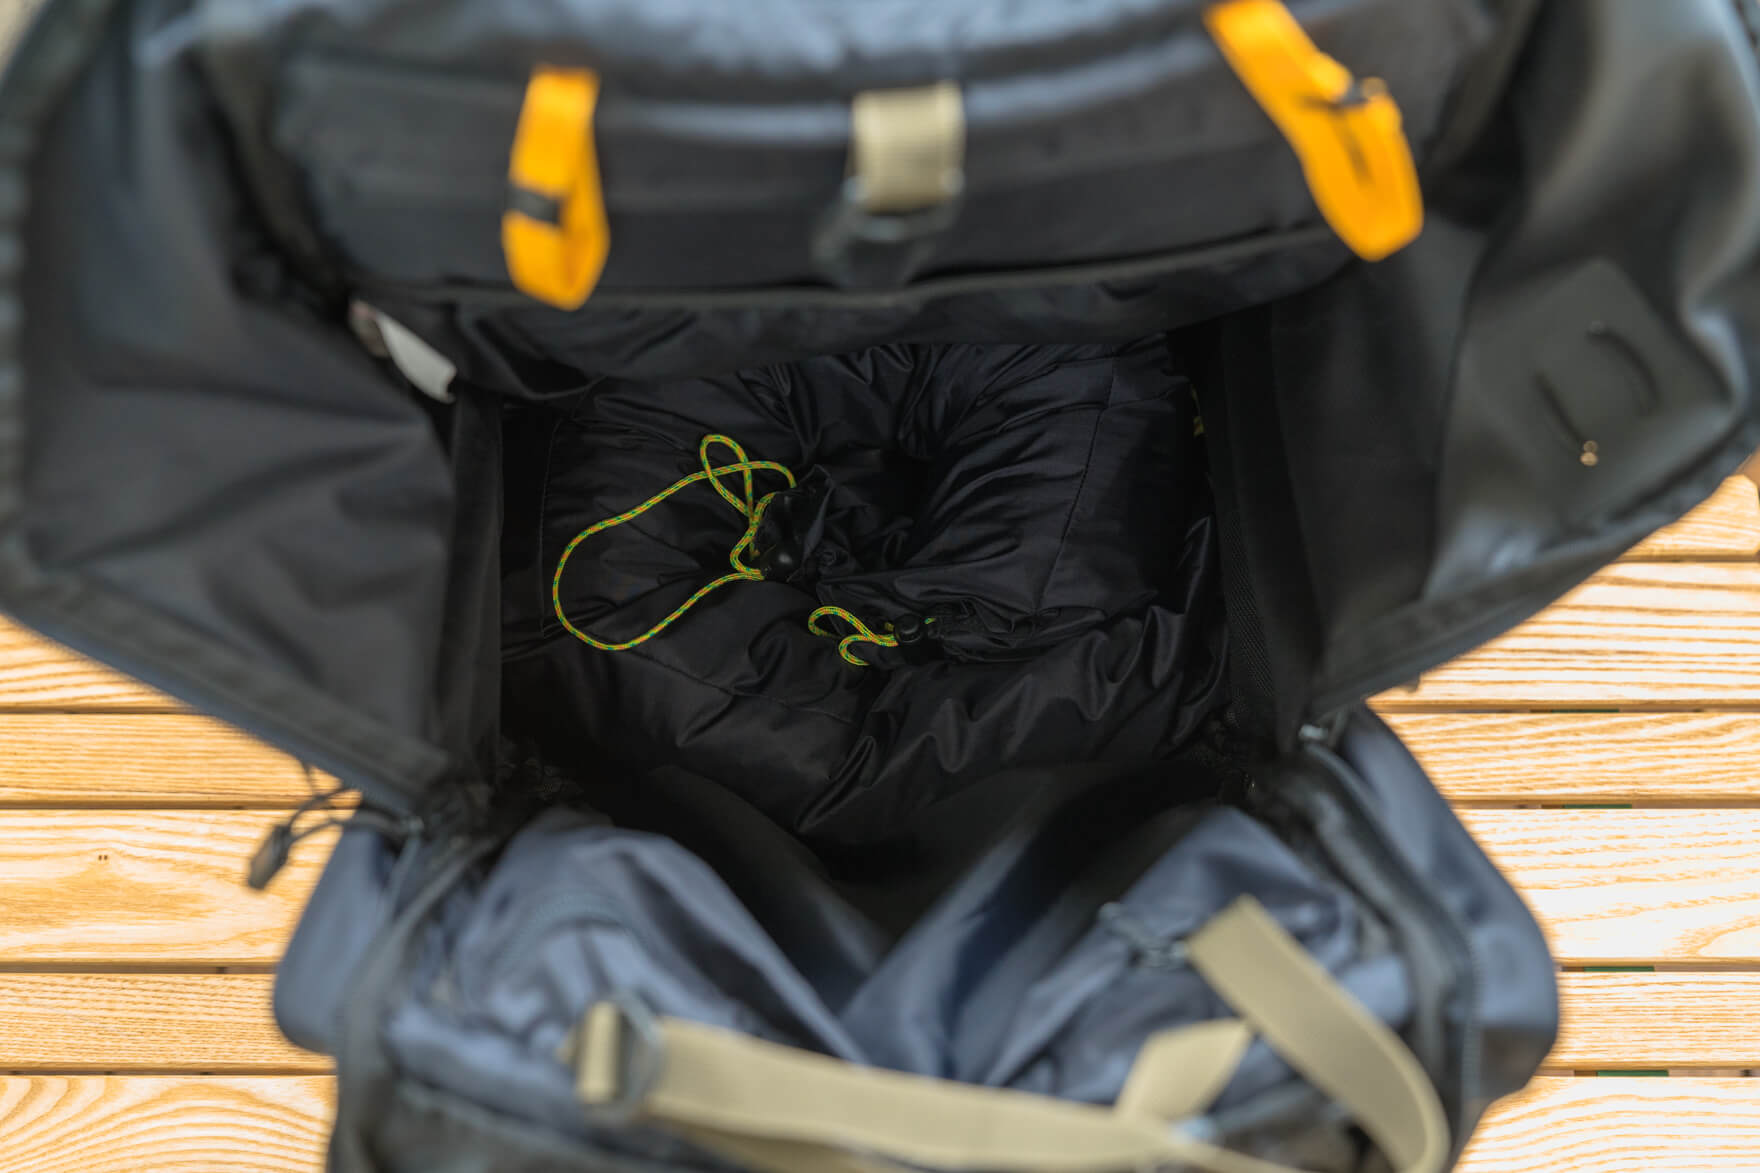
It fits nicely in the gaps in the backpack
Personally, I think the best thing about this extra-long stuff sack is how easy it is to pack. The long, non-compressible stuff sack fits snugly into the shape of the bottom of your backpack, as shown in the photo below. Of course, it also flexibly fits into other gaps, making it extremely easy to pack
What went wrong
The friction is too great and it's difficult to put in and take out!
The 1.4m length was way too long. Furthermore, the PU-coated ripstop nylon was more slippery than I expected, and as I packed my belongings into the thin tube, the friction quickly made it difficult to push them in. What a miscalculation. Frankly, with this material and the tube width, the depth should be around 50cm
The drawstring at the eyelet is also difficult to slide, so you have to squeeze it every time to tighten it

Summary: There is still room for improvement, but making your own tools is fun, even with the failures
As long as you have the tools and preparations in place, the process itself is quite simple - that was my impression of making my own tools for the first time. However, while it may be easy to just make something, I realized that making a tool that is easy to use and exactly how I envisioned it is not as straightforward as I thought, and I once again realized the depth of tool making
I learned that while there are some imperfections that you would notice immediately if you were looking at the finished product, when you actually try to make something yourself, it's not easy to notice even the larger parts while you're making it
Specifically, the material and size made it harder to slide than expected, which made it extremely difficult to use, so we needed to overcome this issue. What we learned is that if we were to make a long, slim stuff sack, we could improve it by using a smooth material like Silnylon that slides easily, making the diameter as large as possible, and shortening the length (to about half the length of this one, around 70cm)
Anyway, I've finally opened the door to making my own videos. I think I'm getting more into it than I thought I would. Now that I've started, I have no intention of leaving it like this, and what's scary is that all sorts of new things I want to make have come to mind. I can't say anything yet, but I hope to continue to post them on this site from time to time, so please look forward to it!
 What is UL packing like for experts? 02 The secret to packing is in how you use stuff sacks