Recommended backpacks for day trips and hut climbing at the mountains this season, and how to choose a backpack that won't make a mistake
Written by Yasushi Hisatomi
Mountain climbing and hiking are activities in which you carry all the tools and food needed for your own life while heading to your destination. In that sense, it goes without saying that backpacks are one of the most important items for carrying luggage. Over the years, with mountain climbing, which saw its efforts to pursue higher and more difficult challenges, backpacks have accumulated over the years of technology and ingenuity to carry many luggage safely and comfortably in harsh environments.
Nowadays, there are countless models of backpacks that have continued to evolve, depending on their capacity, size, and functionality (purpose). In addition to its complexity, it is also difficult to understand your true abilities unless you actually carry it on your back, making it difficult to choose a backpack. It's a shame when the backpack I chose actually tried it out and it wasn't like that, and even started to feel strange pain!
So this time, we have carefully selected the best models for this season, especially the medium size (30-49 liters) that are perfect for hiking and mountain climbing, especially for first-time users, based on their purpose and preferences.
In the second half, we'll also summarize some useful points to know about when choosing the best mountaineering backpack for you. We hope that this will help you find the perfect item for you, without being confused by the name, from the backpacks lined up like bells on the walls of the shop.

table of contents
- [Best of the season's best weekend climbing (30-49 liters) backpack
- Best Balance (Recommended for beginners) Category: GREGORY Zur 35/MILLET Saas-Fee NX 30+5/Osprey Kestrel 38
- Best Lightweight Backpacks category: MAMMUT Ducan 30/macpac Hesper 40
- Best Cost Performance Division: MILLET Welkin 30/VAUDE Brenta 30
- Ventilation Pack Division: Osprey Stratos 36/Thule Topio 30
- Best Toughness & Comfort Division: deuter Air Contact Light 40+10
- Best Storage and Packing Division: MYSTERYRANCH Bridger 45
- How to choose a backpack for mountain climbing: 7 tips to choose a backpack for mountain climbing and hiking
- Point 1: Choose a size that fits your body
- Point 2: Choose the structure and type of backpack that suits your purpose
- Point 3: Choose the right capacity
- Point 4: Choose a weight that is balanced with durability and comfort
- Point 5: Choose the right cushion and support
- Point 6: Choose storage that is easy to pack
- Point 7: Other parts and features that are great to have
- summary
[Best of the season's best weekend climbing (30-49 liters) backpack
Best Balance (Recommended for beginners) Category: GREGORY Zur 35/MILLET Saas-Fee NX 30+5/Osprey Kestrel 38
Of the wide variety of backpacks available to suit the season, activities and preferences, these four models are the most versatile and highly recommended for everyone. The most attractive feature is that it has few drawbacks in general, from comfort to lightness, durability, and ease of use, and is well-balanced at a high level. We recommend everything from beginners to healthy legs for general mountain climbing, including camping and hiking, river climbing and variations. As all of these models are standard models from a long-established backpack specialist manufacturer, all of which are highly complete thanks to their long-standing track record and experience, even beginners can feel at ease. At the same time, it's interesting that each person's ideal backpack image is slightly different, such as "Gregory, comfortable to carry," "Millet is comfortable, stable and strong," and "Osprey for ease of use and practicality."
GREGORY Zul 35

Favorite points
- Moderate breathability due to tension mesh panel on the back
- The ultimate fit and comfortable carrying experience (the back is ventilated, but the pack is not too far from the back and is highly load-stability)
- Various parts such as buckles, drawcords, zippers and other easy to use and durable
- Large waist pocket
Related Articles
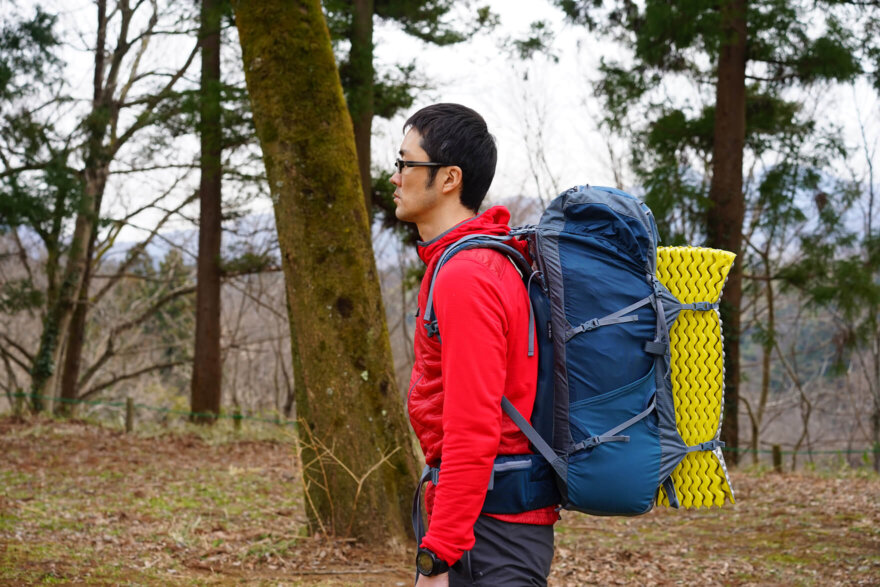
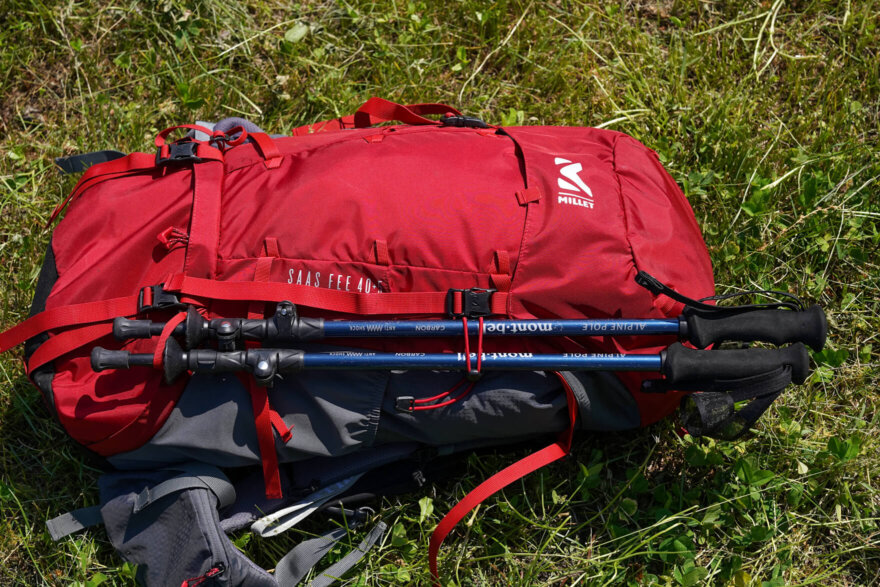
MILLET Saasfai NX 30+5

Favorite points
- The center of gravity sits on your waist and is extremely stable, making it easy to carry around with you, making it easy to wear
- Back, waist and shoulder pads that combine cushioning and breathability
- A slim vertical shape that makes it easy to position the center of gravity at the top
- Rain-resistant fabric so much that it doesn't require a backpack cover
- Large hip belt pocket and mesh shoulder pocket
Related Articles
Osprey Kestrel 38

Favorite points
- The back length is easier to adjust than ever before
- A balanced back structure between comfort and lightness
- Convenient and lean pockets, attachments and parts that take the user's attention to detail
Best Lightweight Backpacks category: MAMMUT Ducan 30/macpac Hesper 40
We have picked out some of the most popular models recommended this season, even among the backpacks that have the overall balance and basic functions that maintain a minimum level of comfort while still taking on the challenge of achieving the lightest possible weight. Both of the two models selected this time are lighter than the average backpack's weight by more than one 500ml plastic bottle. Of course, there are certainly even lighter ultra-light hiking backpacks, but they are often expensive, have some kind of convenience and comfort cut, and are difficult to obtain, so it is undeniable that it is a bit of a hindrance for beginners. In that sense, despite the lightness of these two models, they have not compromised on carrying comfort, as they use a metal back-ventilated frame that provides a stable carrying comfort and comfort even under heavy loads. Although the features are not abundant, they are not irrationally reduced, so even if first-time users use it, they won't find it inconvenient.
MAMMUT Ducan 30
Favorite points
- A back system that combines stability and high breathability
- Fabric material that combines durability and lightness
- In addition to basic storage, small items are also placed on the shoulder strap, making it easy to store even though it is light, but never feels inconvenient.
- Rain cover comes standard too
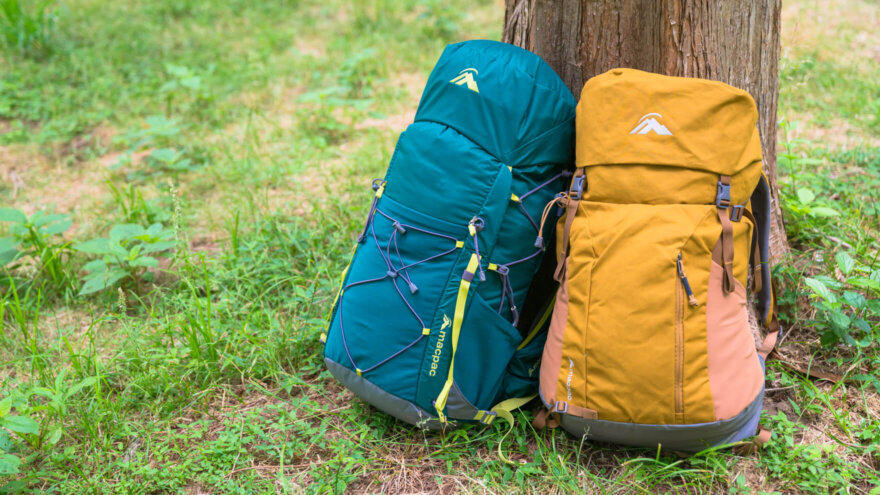
macpac hesper 40
Favorite points
- A rear system that combines light weight, load stability and breathability
- Resistance of bottom fabric, including reinforcement
- A wide range of external pockets and detachable shoulder harness pockets
Best Cost Performance Division: MILLET Welkin 30/VAUDE Brenta 30
This is one of the most satisfying models that offers excellent cost performance, not only all basic functions but also have plenty of comfort to carry, but also affordable prices. Both have the ability to stand out compared to high-end models and are never underestimated.
MILLET Welkin 30

Favorite points
- Excellent cost performance with low prices while firmly grasping lightness, breathability, comfort, durability and basic functions
- Ease of use of basic functions without quirks
- The back panel provides excellent breathability while bringing the center of gravity closer to the back
VAUDE Brenta 30
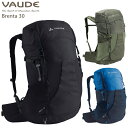
Favorite points
- Excellent cost performance with stable basic performance and rich functionality, low prices
- The stability of the hip belt
- Superbreathable tension mesh back panel
- Adjustable back length
Ventilation Pack Division: Osprey Stratos 36/Thule Topio 30
The backpack is designed to create a space for air to pass between the back and the backpack, and reduce the discomfort of sweat on the back, known as the "ventilation pack" or "tension mesh backpack", and is a model developed by Deuter, a specialist backpack manufacturer, and has become popular since the 2000s. I still can't forget the surprising coolness that I felt when I first carried this on my back, as if there was a fan on my back. Nowadays, every large manufacturer has now added this type of backpack lineup.
However, as time passes, it has become said that the high breathability of the obscure back is a two-sided coincidence with the disadvantages of unstable center of gravity and difficulty packing, and as expected, the temporary boom has felt calm. However, it is still particularly popular in Japan during the hot, sweltering summer. It is undoubtedly a huge presence that can be said to be one of the biggest categories of backpacks. The current cutting edge is the premise of the high breathability on the back, and it can be said that the current state of competition is moving towards a new level of competition, such as how to overcome its disadvantages and adding value such as further weight reduction and comfort.
This season, there are two best models carefully selected from the back ventilation packs. The Osprey Stratos 36 has been one of the most outstanding features recently in terms of its comfort and high level of perfection on the back. the Topio 30 (with 40L) , which was released last year by Thule, which is also available in high quality, which mixes innovation and classical quality . As expected, I was once again impressed by the design, comfort, ease of use and high level of perfection that is not suitable for the product.
Osprey Stratos 36

Favorite points
- The mesh panel integrated from the back to the hip belt gives an exquisite fit
- Adjustable back length
- Small useful features such as Stow on the Go, which allows you to temporarily secure the trekking pole while standing
Thule Topio 30

Favorite points
- The mesh panel has an exquisite fit and high breathability
- Adjustable back length
- A sophisticated design that is easy to use for traveling around town
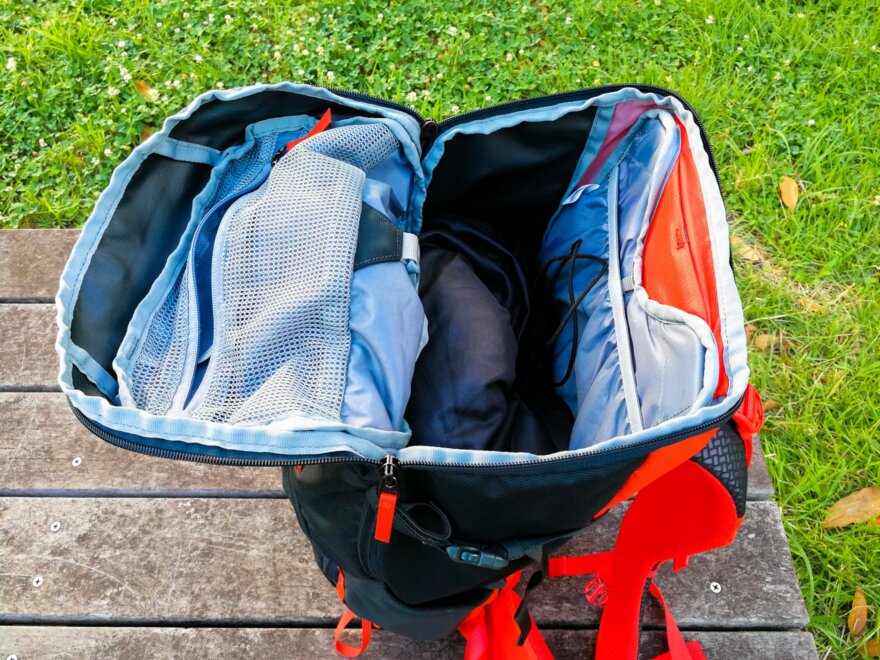
- Zipper opening for easy packing and removal of luggage
Related Articles
Best Toughness & Comfort Division: deuter Air Contact Light 40+10

Favorite points
- The back pad is excellent for stability and has a generous cushion that won't collapse even with heavy loads, but also provides both breathability and quick drying.
- Adjustable back length
- Flexible capacity with up to 10 liters of expandability
Recent new backpacks are undoubtedly the mainstream models that focus on "lightness" rather than "hardness" and "lightness when lighter with lighter luggage" rather than "comfort against heavy loads." However, even in reality, it is often not true that everyone is doing light mountain climbing with light luggage. The luggage is always big and heavy, and there are times when you have to go through hard roads, not just spacious trails, so you don't want to regret having a thin, light backpack.
This is the best model of the season (for beginners in a different sense), perfect for people with a focus on defence, with a focus on defence, and maintaining solid stability and comfort even with heavy luggage.
This is a lightweight model of the traverse backpack from deuter, a long-established German backpack specialty brand that is well-known for its sturdy and robustness. It has a solid stability and a comfortable fit, but is lightweight and compact, so it is not too heavy, and is a masterpiece that offers excellent comfort thanks to its luxurious cushioning and high level of smart functionality.
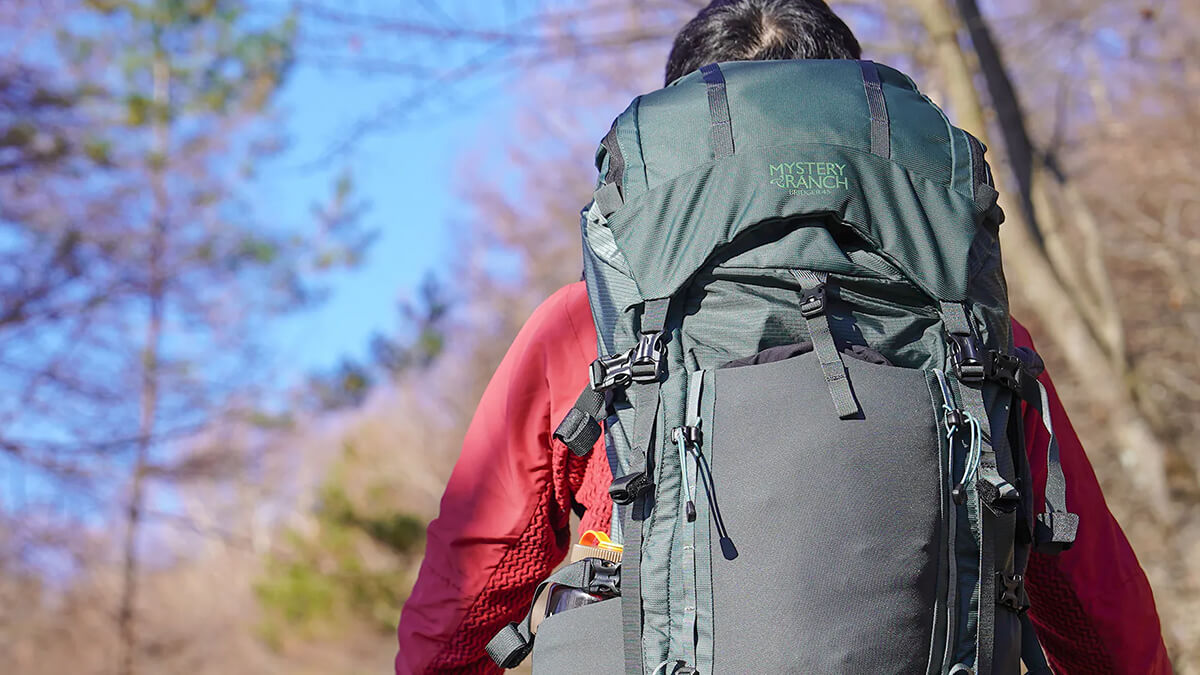
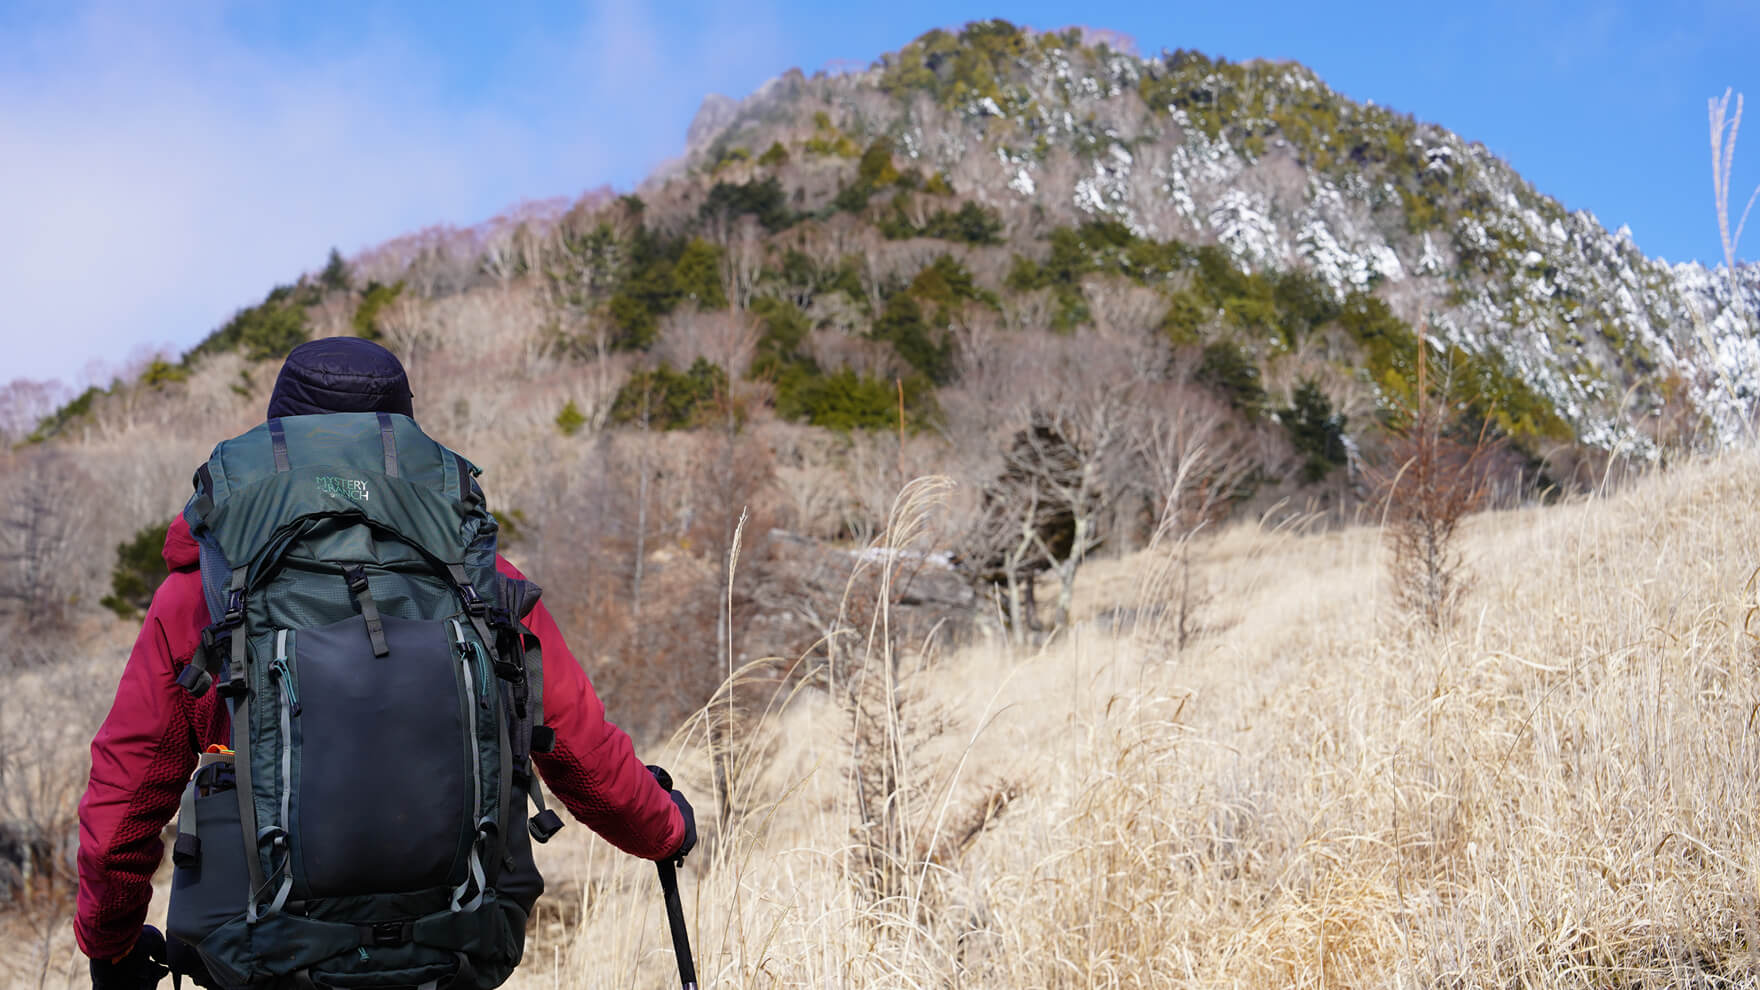
Best Storage and Packing Division: MYSTERYRANCH Bridger 45

Favorite points
- Abundant storage spaces that are easy to put in and take out
- A comfortable back system that can be carried stably even with heavy loads
- Large top lid that can be removed and can also be used as a sacoche.
- Durable enough to resist tearing and wear
Related Articles
As long day trips and mountain hiking trips are over one night, you will be able to put in and take your luggage in and out more frequently, and the need for ease of packing will increase. the MYSTERYRANCH Bridger 45 which offers a unique and easy to use with smart and original ideas . In addition to the zipper structure for the main storage, which makes it easy to put items in and take them out, there are plenty of ideas to make them even more storage, including a wide shoulder harness derived from a vest-shaped pack for running. You will also be able to see the overall quality and quality, with its unique back panel that is comfortable and fit and durable fabric.
How to choose a backpack for mountain climbing: 7 tips to choose a backpack for mountain climbing and hiking
Point 1: Choose a size that fits your body
A spokesman for Deuter, a German pack maker with over 100 years of history, is
First, find the pack that fits you best. Choose your size and activity afterwards.
He says. Needless to take these statements as examples, the absolute must-have thing to remember when choosing the backpack that's best for you is whether it fits your body .
It would be fine if you just walk a step or two with a heavy load on your back, but walking for a long time can cause more damage to a person's body than you imagined. If you carry a backpack that doesn't suit your body, if you walk for 30 minutes or an hour, you will experience more fatigue and pain in your shoulders, lower body, etc. For this reason, especially for beginners who have not yet carried heavy loads, choosing a comfortable backpack that is the most important thing to do.
If you have carried a lot of backpacks on your back, you can predict whether your backpack is right for your body, from a size chart to some extent, but if you want to be sure, you'll have no choice but to actually carry it in the store. In this case, put a weight inside as much as possible to make it close to the actual product, and if you don't have the fitting method yourself, have it tailored to the store staff.
Furthermore, we will check the following points to see how it fits in any way.
Is the length of the back (torso) correct?
The first step to matching the optimal backpack size is to match the length of the back (torso). The back length is the length from the seventh cervical vertebra (the large part that protrudes at the back of the neck when you look down) to the distal end of the hip bone that descends vertically . Most medium-sized or higher backpacks have models with different back lengths, such as S/M/L, even packs of the same capacity, and models with different back lengths, and can be adjusted, so it to check the fit to match your back length before purchasing .
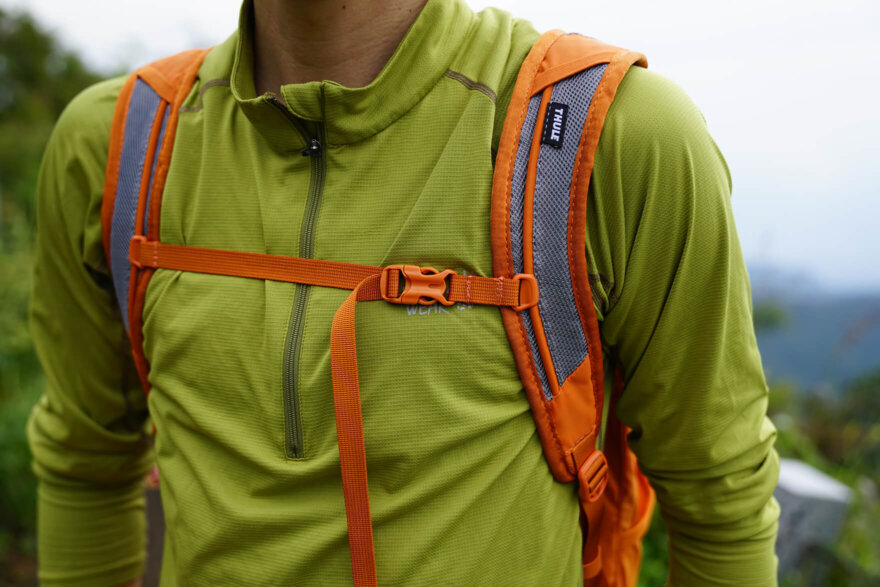
Are the shoulder harnesses the correct width and length?
Ideally, the shoulder harness, which revolves from the shoulders to the armpits, should extend in a direction that matches your shoulder width. In rare cases, it can be too wide or too narrow, causing it to hit strange areas of your shoulders. Make sure you've never done this before and if you're firmly on your shoulder when you carry it on. Also, if the shoulder harness is too long or too short, it can cause inconveniences such as not being able to fit properly or the pads get in the way or not enough, so make sure you have a length that suits your body type.
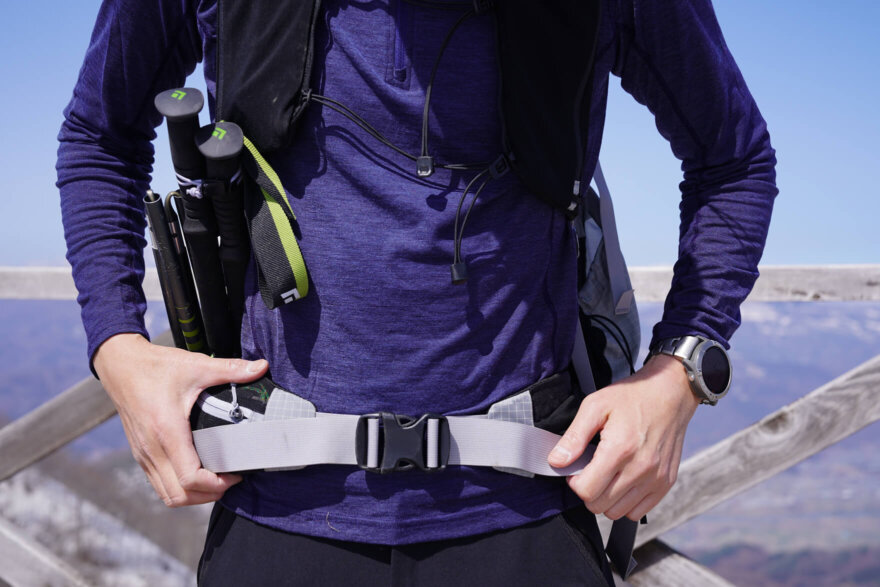
Is the hip belt (waist harness) right?
Many climbing backpacks come with hip belts to cover their waists unless they are ultra-lightweight models. This is an important part of putting the load firmly on your hips, and if there are problems such as a shortcoming that the pads cannot cover your hip bones, or too long and loose when tightened, so be careful as the pack will not fit. Also, even if you tighten it correctly, be careful if you are already worried about the fit or comfort when you try it in a store, such as thin, thin or hard. You should feel this discomfort even more as you start walking.
If you're a woman, try out a female model too
Recently, backpacks have been offering a lineup of women's models that are almost identical in functionality but are designed to fit better for women. These models have a shorter back and a narrower shoulder width than men's packs, and are more curved shoulder straps and short hip belts for a better fit for women's figures. While it's not so much that all women have to be this type, we recommend that women try this version for products available both men and women.
Point 2: Choose the structure and type of backpack that suits your purpose
Classification by Activity Style
In reality, there are many different types of mountain climbing backpacks depending on the detailed activity, and if your purpose is narrowed down, the quickest way to choose the best pack is to choose a model that specializes in them.
Below is a table showing what each of them differs and what characteristics they have. However, if you are only choosing a first-time pack, it is almost certain to choose from a pack for traverse (almighty) one.
| type | For hiking and traversing | For alpine climbing | For ultralight hiking | For trail running | For backcountry skiing and snowboarding |
|---|---|---|---|---|---|
| image | 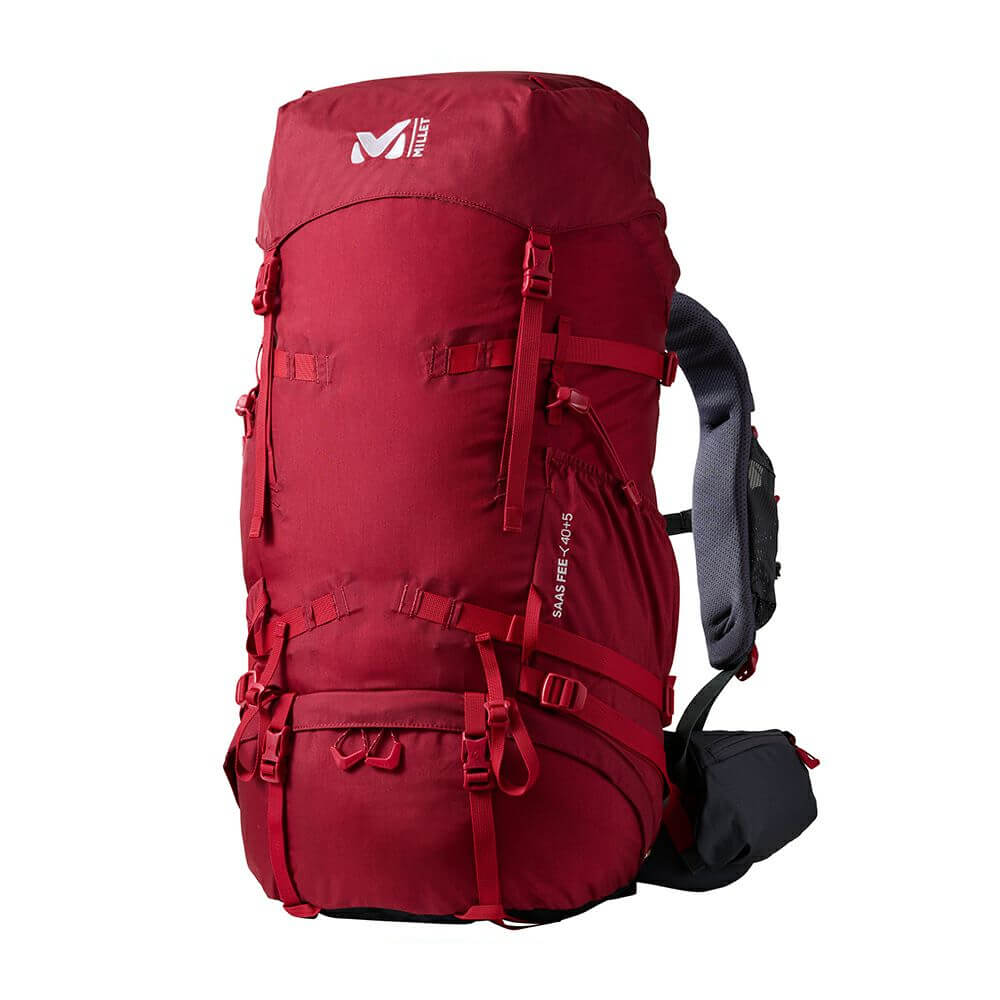 | 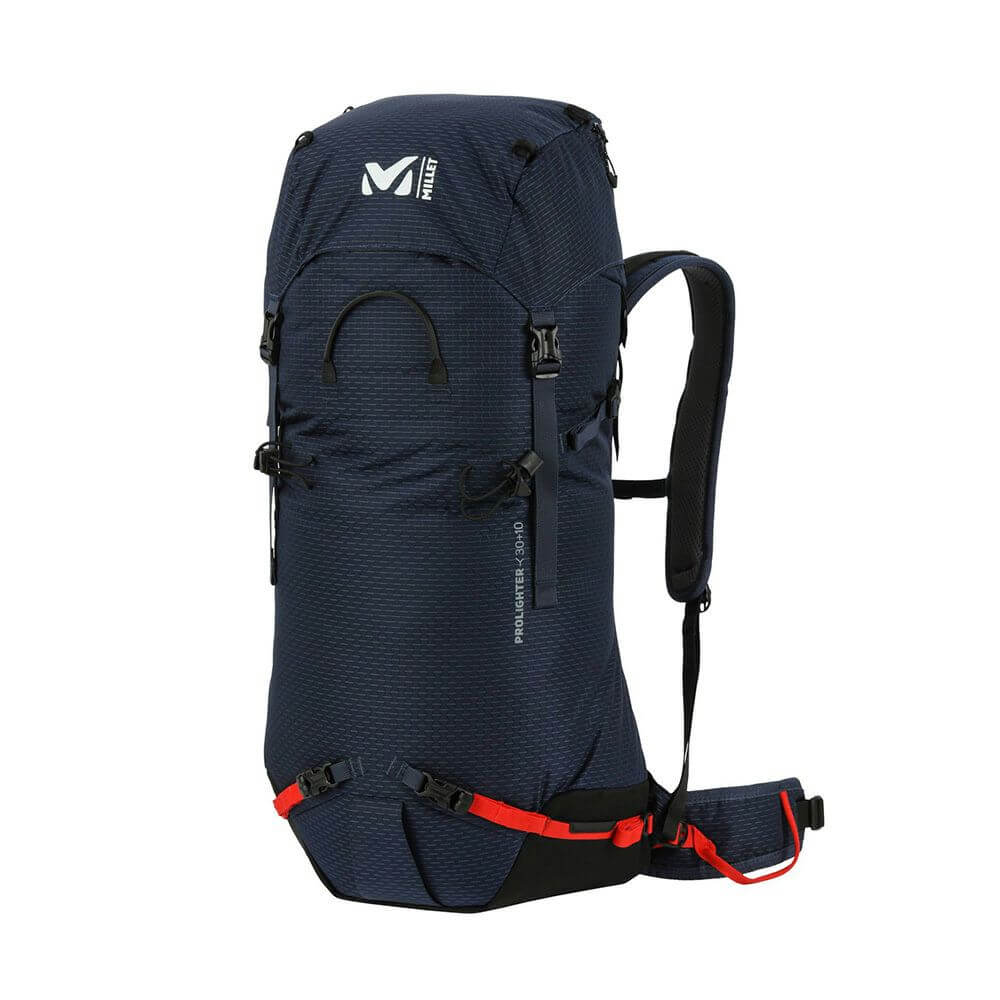 |  | 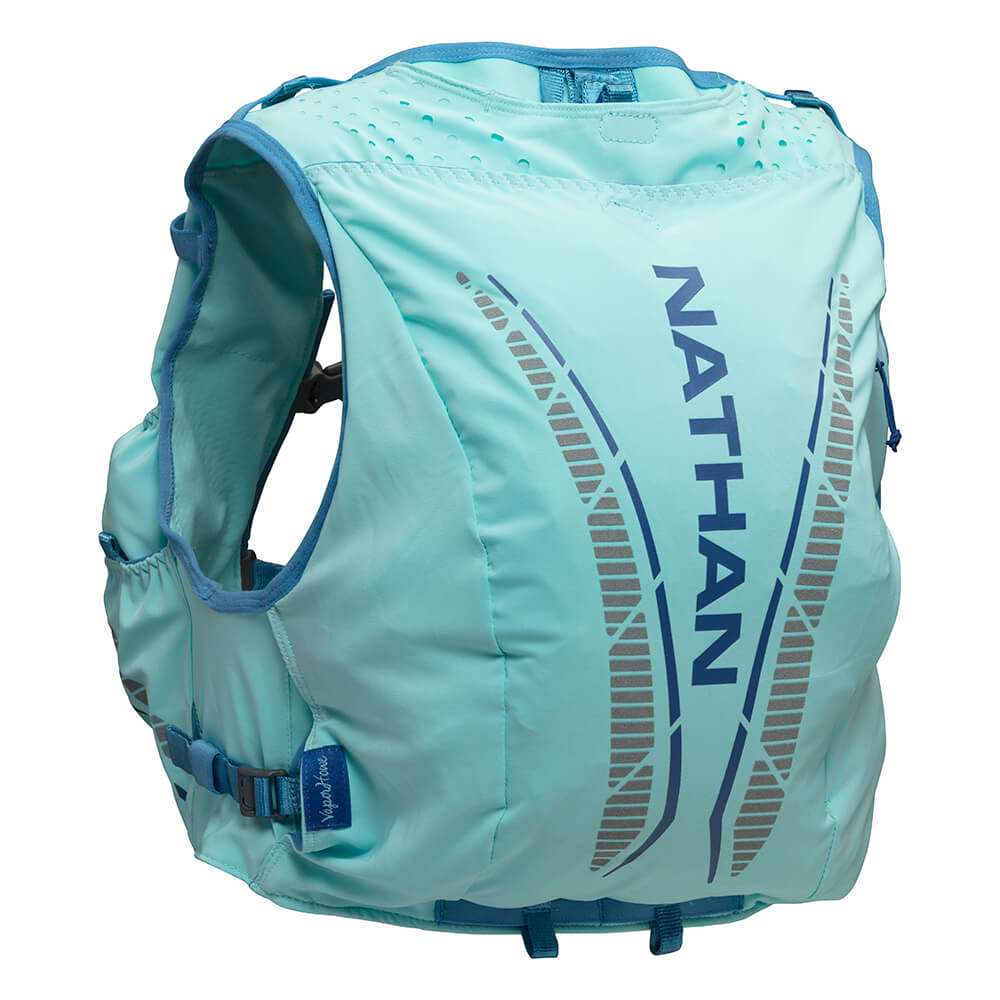 | 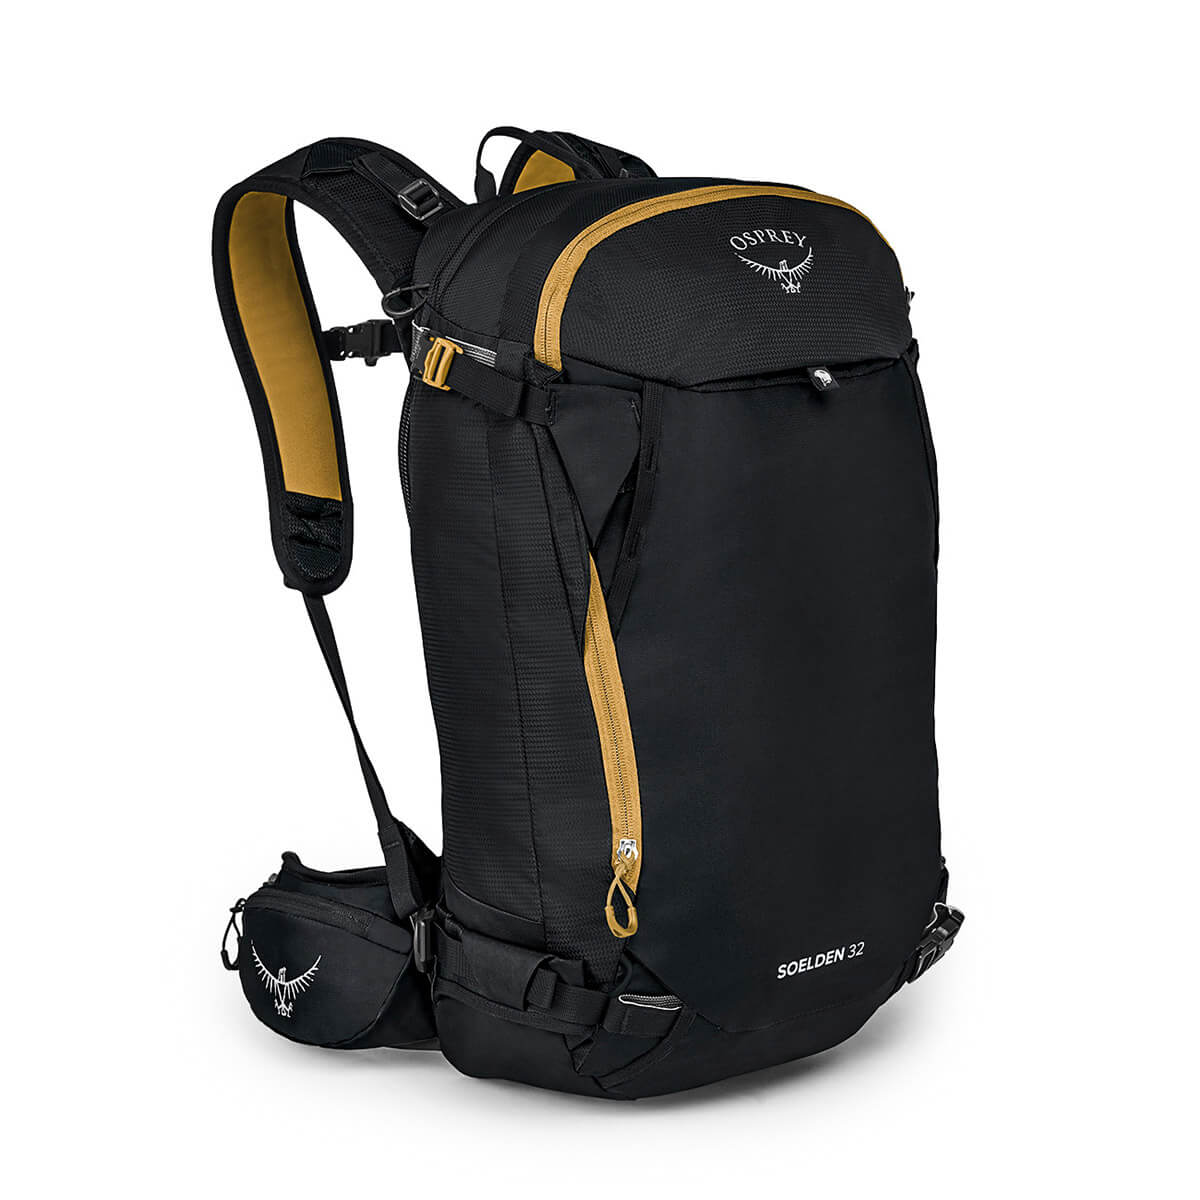 |
| Uses and features |
|
|
|
|
|
| Strength |
|
|
|
|
|
| weakness |
|
|
|
|
|
Classification based on whether or not there is a rear frame
Most mountain climbing backpacks have a hard frame built into the entire back to make it comfortable to carry large, heavy luggage. It is mainly made up of aluminum stays and sheet-like plastic, and by using this frame as a support pole, it accurately transmits load to the waist area, and supports the backpack to fit comfortably in accordance with the shape of the back.
On the other hand, there are also backpacks that do not have a built-in frame, designed for people who are keen on ultra-light hiking. The pack itself weighs significantly, but on the other hand, it becomes difficult to support heavy loads with your hips. For this reason, it is difficult for people who are not able to lighten their luggage or carry heavy burdens and are not used to carrying them, and we do not recommend a model that does not have a back frame unless they have a clear purpose for weight reduction.
Classification based on back panel breathability
If you walk along the mountain path for hours with your backpack on your back, it's almost impossible to avoid your back getting wet with sweat. That said, if you can prevent unpleasant sweat and overheating, your trip will be more enjoyable and comfortable.
That's why we came up with a backpack with great ventilation on the back. Also known as the "ventilation pack" or "tension mesh backpack", the back frame is designed to be a few centimeters away from the back like a trampoline, and the back is made to come into contact with a flexible, breathable mesh fabric.
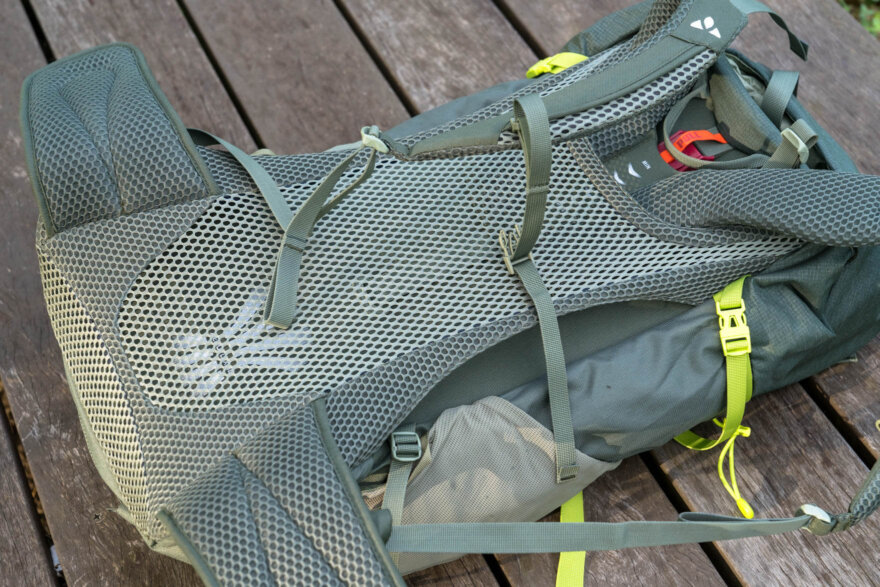
This keeps the back constantly airy, making it extremely breathable. No matter how much you sweat while you are on the move, you won't feel uncomfortable, and before you know it, your sweat will dry out before you know it, so it's no better option for hiking during the warm spring and summer months.
However, two weaknesses of this tension mesh frame are that the back is hollow, which reduces the capacity of the main storage space and makes it difficult to pack, and that the space on the back tends to move backwards (in heavy loads are easily shaken) . Personally, I feel that during the cold winters, the wind passing through my back makes me feel a little cold. In that sense, this frame's backpack is not perfect and is ideal for travelling when it's not too cold and not too much luggage.
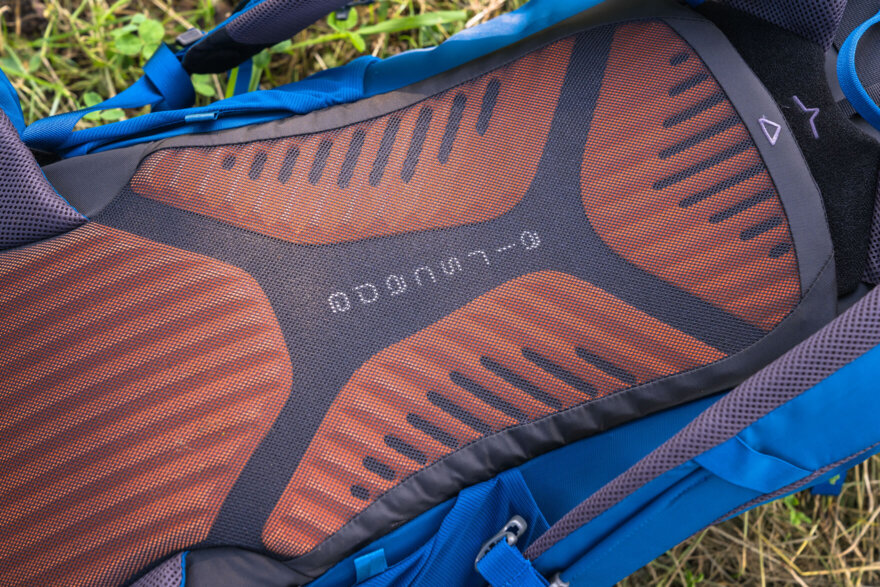
Recently, models have been developed that achieve a considerable degree of breathability and quick drying on the back without using tension mesh. The method of these methods differs depending on the details of each manufacturer, but the rough approach is the same. The uneven foam that ensures air passage on the back, and the back panel, which combines elastic and breathable pads and mesh fabric, allow for increased breathability without increasing the distance between the back and the backpack. This provides a decent comfort on the back, but does not compromise the stability of the center of gravity or packing performance.
Breathability and stability of the center of gravity. If you only do light mountain climbing in spring and summer, it's okay to use breathability, but if you are focusing on versatility throughout the year, tension mesh is not recommended. Think about which one you prefer (which one you prefer).
Classification by type of storage area entrance
Top loader type
When it comes to medium-sized mountain climbing backpacks over 30L, most of them have an opening structure called a "top loader" type. A top loader-type backpack is basically a structure in which a fixed rain cover (also known as a canopy or top lid) can be placed over the entrance to the main storage. This structure not only prevents rain, but also makes it easy to compress luggage from above, making it suitable for carrying large luggage like climbing. In addition, the rain cover generally has a pocket for small items, making it extremely convenient for storing small items that you want to take out quickly.
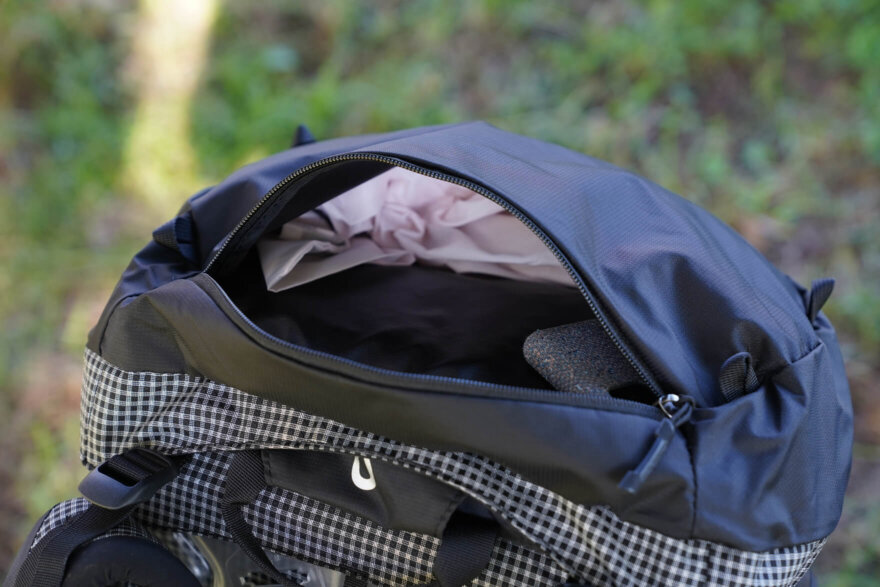
Shipper type (panel loader type)
However, in the smaller model, around 30L, there are also zippered (or panel loader) openings in addition to the top loader type. As you can see, this has the advantage of being able to easily access the main storage via a zipper. Some models have wide U-shaped models, making it easy to put in and take out luggage, like travel suitcases. Suitable for light hiking and traveling.
Roll top type
The "roll-top" style, which rolls the openings around and fastens with buckles at both ends, is becoming a design that is mainly familiar to lightweight backpacks, as its advantages include lightness, expandability in capacity, ease of loading and removal, and preventing water from entering. However, it is not often seen in introductory backpacks from the viewpoint of convenience, such as the operation being complicated until you get used to it and the lack of use of the rain cover pocket.
Each top loader, zipper type, and roll top type have its pros and cons, but if you are not used to buying a mountain climbing backpack for the first time and are not particularly particular about it, we recommend that you first choose a versatile top loader model.
Point 3: Choose the right capacity
To put it in extreme terms, as long as you have a large backpack, you can handle travels no matter how long (when I was a poor student, I used one 70-liter backpack for a day trip up to two weeks...). However, a backpack that is too small will not fit luggage for long trips, and a pack that is too large will cause the luggage to move inside and be shaken, and fatigue caused by unnecessary weight will not be ridiculous, so it goes without saying that it is desirable to choose a backpack of the right size.
Although there may be some differences depending on the activity and individual preference, based on many guides and personal experiences, it is best to consider the appropriate backpack capacity as follows:
- Day trips or staying at a hut... ~30L
- Day trip - 2 nights in a tent... 30-50L
- Tent for 2 nights or more... from 50L
If you are starting to climb for the first time, of course, you will only use it for a day trip, but if you are thinking about stepping up for a long time, you may want to choose a backpack that is about 35L from the beginning. This size may be a little larger for summer day trips, but in winter, the amount of luggage increases, so it's not too big. Above all, this size allows you to stay in a tent just before you can. It can also be used in a wide range of uses, including winter mountains, climbing, river climbing, and skiing, making it highly versatile, so if you want to just have one as much as possible, we recommend this size.
Point 4: Choose a weight that is balanced with durability and comfort
A backpack is by no means a small tool, so the weight is a major factor in impact even when viewed from the entire mountain equipment.
Heavy backpacks generally use thick frames, thick padding, and durable fabrics, making them safe and comfortable even when carrying heavier luggage. In today's world where tools have been dramatically lighter than before, it is certain that the old-fashioned construction will be a bit over-spec. However, even so, this is for people who are used to mountains, and not necessarily for newcomers or those who have not been trained.
When you're just starting out in the mountains, you tend to be attracted to the easy-to-understand appeal of "lightness," but as someone who isn't particularly tough, I can say from my 20 years of experience climbing, " Don't sting the pads or back frames because of their weight reduction (the more people who are not used to walking), you should not be stingy about the pads or back frames because of their weight reduction ." Veteran Ultralight Hikers say that reducing the weight of your backpack is the last area to start after you've done it with other tools. I think you're right, and save just 500 grams to avoid shaking the comfort of most of your trip.
For reference, for example, it is safe to say that a 35-40 liter backpack is standard for around 1,500 grams, while a 1,000 gram is light and low in support, while a 1,700 gram or more is a backpack with high durability and high support (for 30 liters, look at around 200 grams at a lower level).
Point 5: Choose the right cushion and support
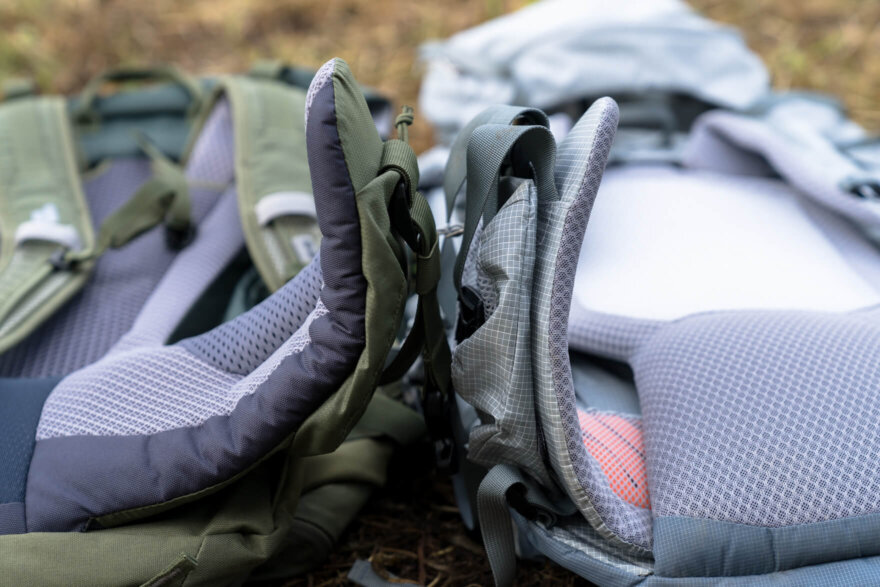
Among the entire back panel that supports the load, the thickness and quality of the pads on the shoulder straps (shoulder harness) and hip belts (waist harness) are particularly important factors in making for a comfortable carrying experience.
A properly fitted backpack should weigh approximately 80% on your waist, and ideally the remaining small load on the shoulder strap and back is evenly applied to the entire area. Try carrying a backpack and take great care to ensure that these pads are well balanced (Is there not more or less than necessary) and to ensure that there are no discomfort or rubbing points in the way they hit.
The harness section of medium and higher backpacks uses elastic foam to absorb load impact and load. The soft, highly compressible foam is comfortable to touch and comfortable to the skin, but pads that are too soft do not support the large load when carrying heavy loads. It may feel good at first when carrying it on your back, but as you carry heavy loads for a long time, damage will start to accumulate. Of course, it's not good to have too little (too hard), but try choosing while taking into consideration the balance between cushioning and support, as well as your own preferences.
As I also mentioned a little above, this pad is a part where sweat tends to accumulate, so not only cushioning and support, but also quick-drying is important. The key to an excellent backpack is that it also takes into consideration the hot weather, such as using mesh and lightweight foam.
Point 6: Choose storage that is easy to pack
Backpacks such as "it's difficult to put in and take out luggage", "it's difficult to organize your luggage", and "it's difficult to fit in without gaps" would be a must-have if you just irritate the night before a mountain climb, but they become even more unbearable when hiking overnight climbing, where you frequently put in and take out luggage. Naturally, the ease of packing is also an important point for mountain climbing backpacks.
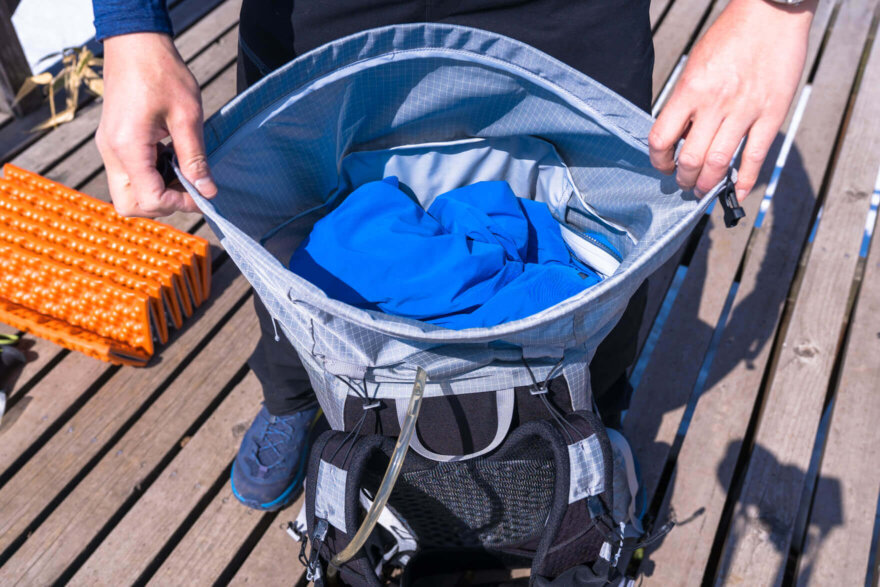
Clearance of main storage and ease of access from outside
The large storage area where the most of the backpacks is stored is called the main compartment, and various items of luggage of varying size, shape, and softness can be put in and taken out.
If this main storage is simple, cylindrical, it is easy to fill in all of these tools without gaps, but if it is slightly curved, it will likely create space, which is a negative for a clean packing.
Also, when it comes to putting in and taking out, typical top loader-type backpacks allow access to items inside through a large opening on the top, which is a pain to take out the tools inside. If you don't pack your backpack smartly, you will need to do some troublesome tasks such as pulling out your luggage from the bottom of the pack. In such cases, the direct access zipper attached to the sides, front and bottom makes it easy to access the interior. With this, the ease of removal will be much different, so the larger the capacity of the pack, the more you should always check.
Easy to use pockets placed everywhere
In addition to the main storage, there are also many pockets and attachments on the outside of the backpack, designed to be easy to use when climbing. Tools you want to take out immediately (such as behavioral foods, tenugui, bottles, gloves, sunscreen, etc.) can be stored in these pockets installed everywhere. There is no doubt that it would be convenient to have them, so some people like having lots of them, while others don't want to add extra weight and others want to just use the bare minimum of pockets. In any case, you need to consider that there is no need for pockets you don't use, and that each storage space is whether the size and usability fits the way you use it.
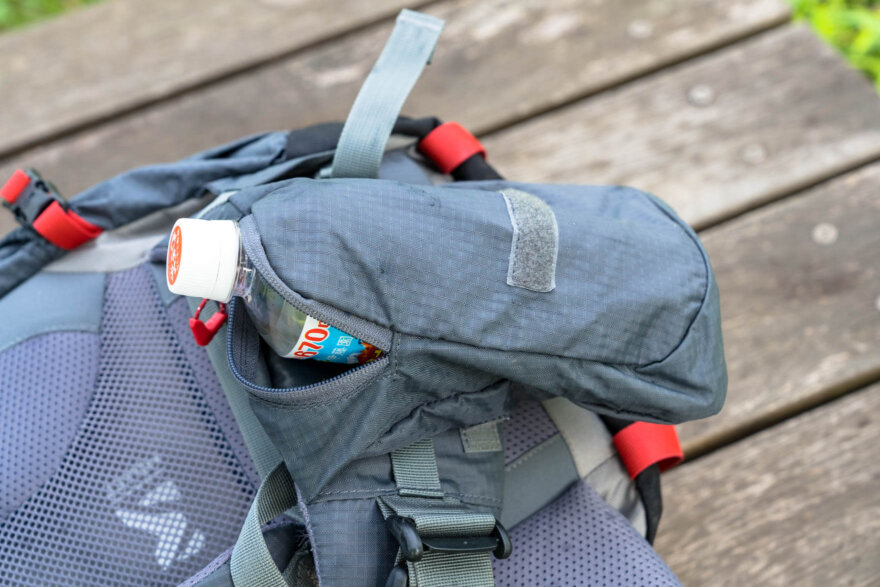
Rain cover (top lid) pocket
The pockets on the rain cover are generally designed to hold small items that you want to take out immediately during your activities. For example, behavioral calories, sunscreen cream, maps, headlamps, gloves, etc. It's ugly if it's too big, but it's difficult to use even if it's too small, and it's easier to organize if it's divided into two than one. It's easy to use as large as possible, with a wide zipper at the entrance, and something that's easy to organize.
Side pockets
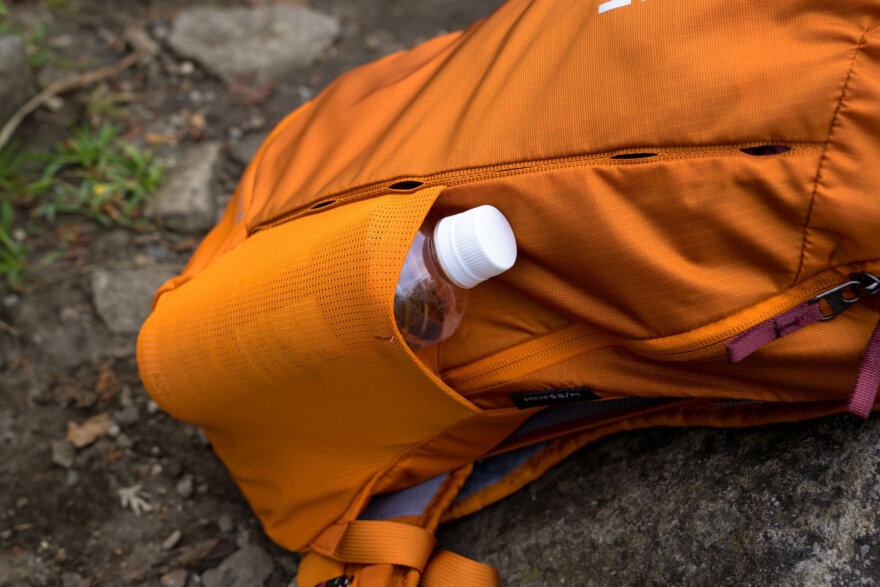
The side pockets on the outside side. This pocket is made of gusseted or stretchy fabric, making it convenient to hold long, narrow items such as poles, water bottles, sandals, etc. It's easier to put things in as large and deep as possible, but items with too many gussets will likely get caught on branches and other things, and personally I don't like the appearance. Some models are cleverly designed so you can easily hydrate while walking, especially considering putting the bottle in place, and then take it out as you walk, so be sure to check it out.
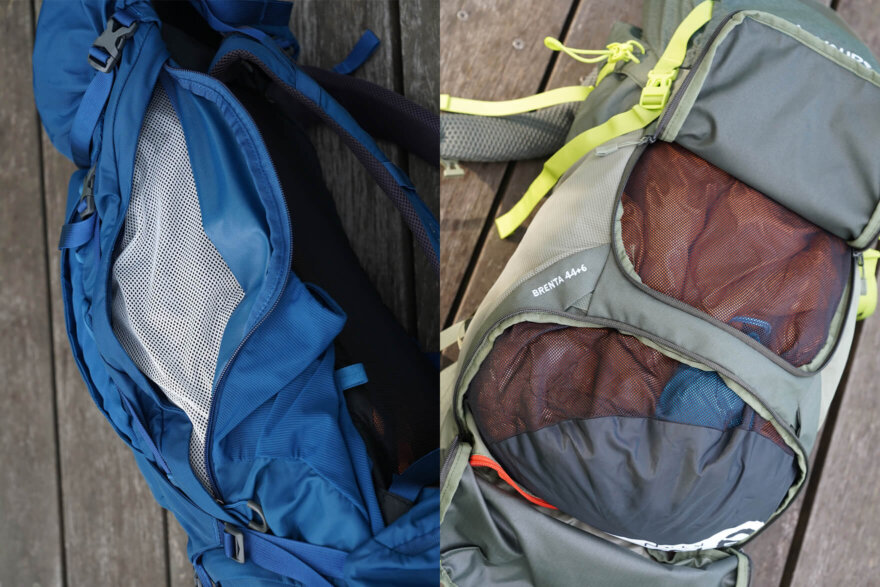
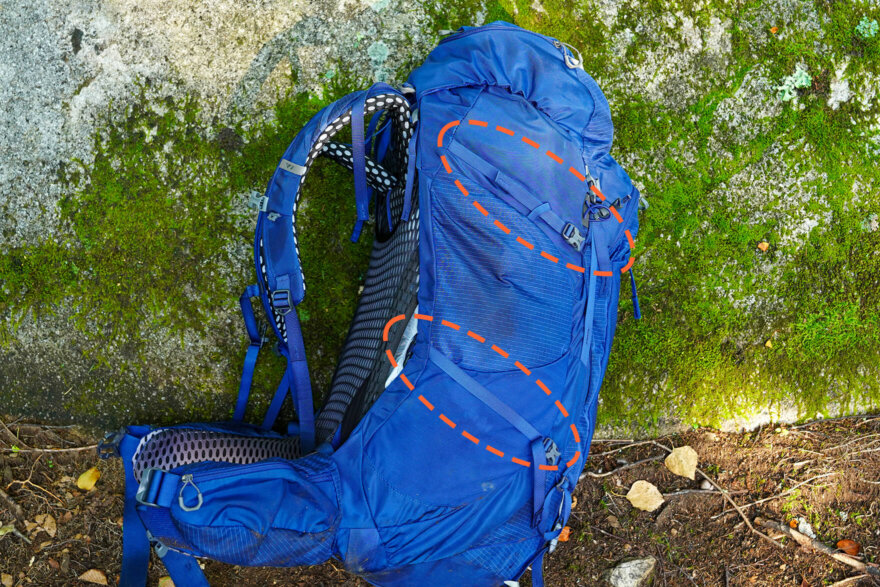
Front pocket
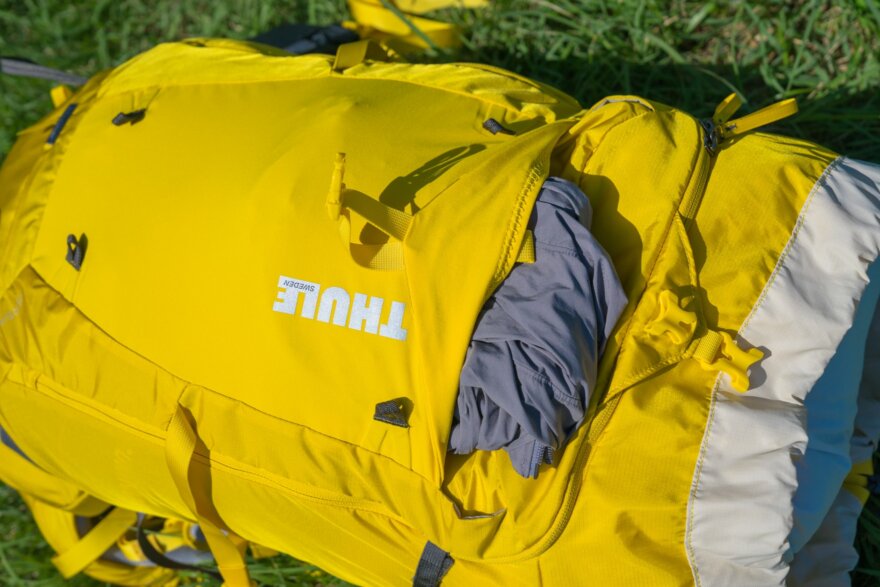
Not all backpacks, but the model with a large front pocket on the front of the pack is also one of the latest trends. It is relatively large, so it is a great pocket that can be used to hold a variety of items, including windproof and cold-resistant jackets and hats. Mesh fabric is convenient and easy to use, but it is also located in a position that can easily be rubbed against the ground and teared, so be careful about the durability of the fabric.
Hip belt pocket

The small pocket in the hip belt position allows you to put in and take it in without having to take off your backpack or stop, making it perfect for storing items that are particularly likely to be taken out quickly, such as candy, yokan, smartphones, and lip balm. However, in my experience, I have never actually been able to use it that conveniently because it is often too small (the folding hip belt attached to Millet's Saas Fae was extremely easy to use).
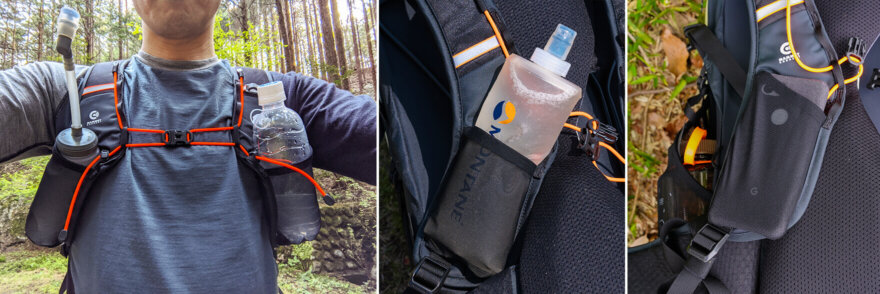
Shoulder harness pocket
Similarly, the pocket attached to the shoulder harness is convenient because it allows you to put it in and take it out without lowering the backpack. This is also mainly used to put in convenient items that are easily accessible while you are on the move, such as cameras and smartphones. This pocket is not yet standard installed in terms of necessity, and even when it comes with it, it is often not as large as you would expect. In my case, I like to store my smartphone in this area, so I use third-party pouches from various manufacturers to handle such cases.
Attachments and straps
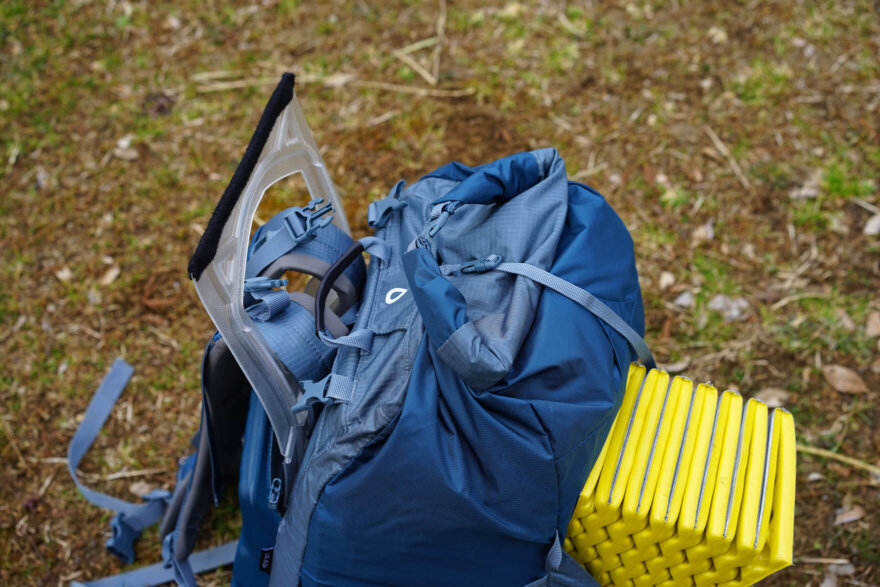
Trekking poles and pickles cannot be stored inside the pack, so these are the " Ice Axe Trekking Pole Attachments " on the outside of the pack (it's unlikely to be possible to find a backpack that doesn't come with this).
daisy chain sewn to the outside of the pack allows you to attach a carabiner or strap yourself to it, which can be used to attach helmets and clamps that could not fit into the main bag.
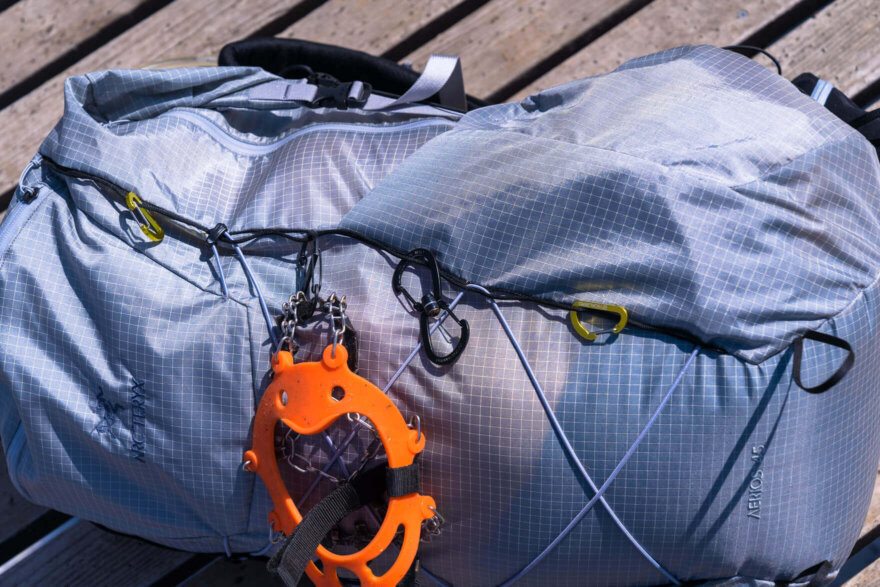
Side compression straps which are attached at least one side , are convenient for tightening the entire pack to compress the luggage inside, increasing center of gravity stability, and for securing long items (such as tent poles) when stored in side pockets.
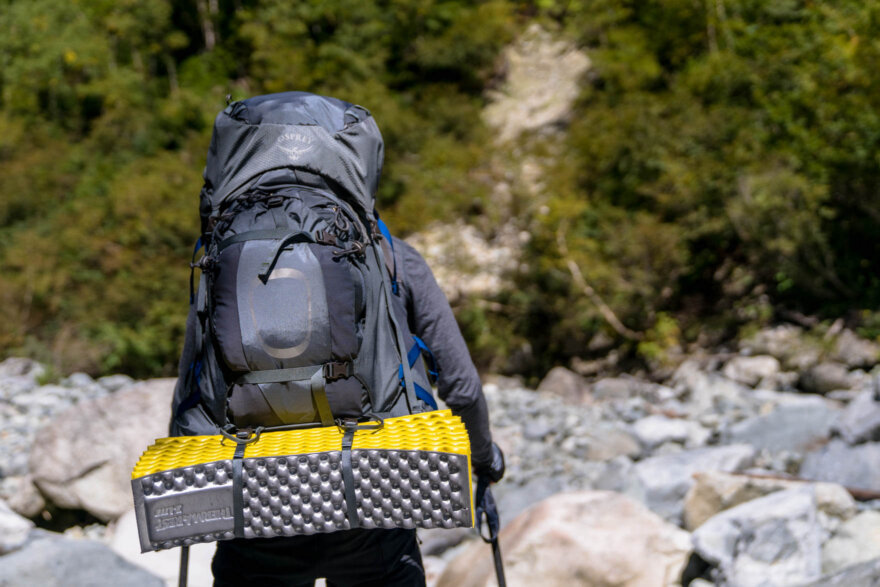
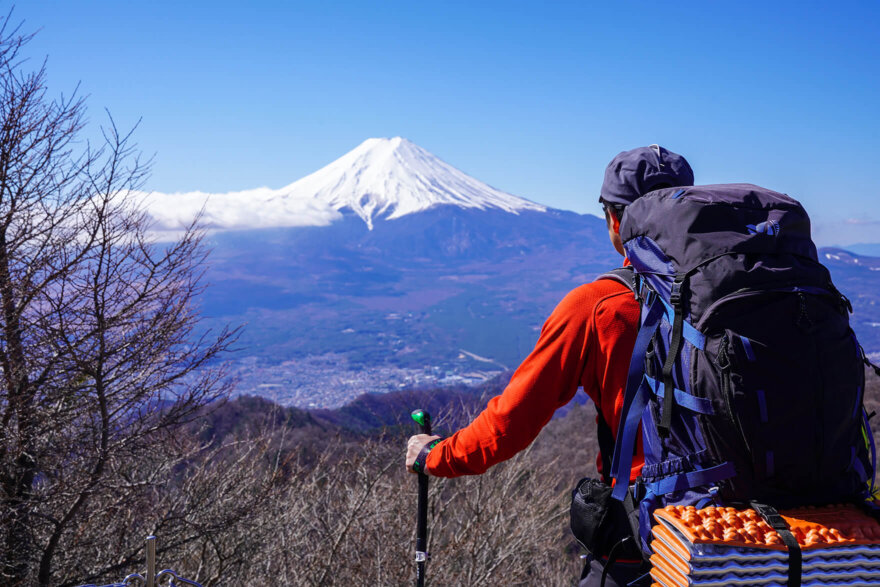
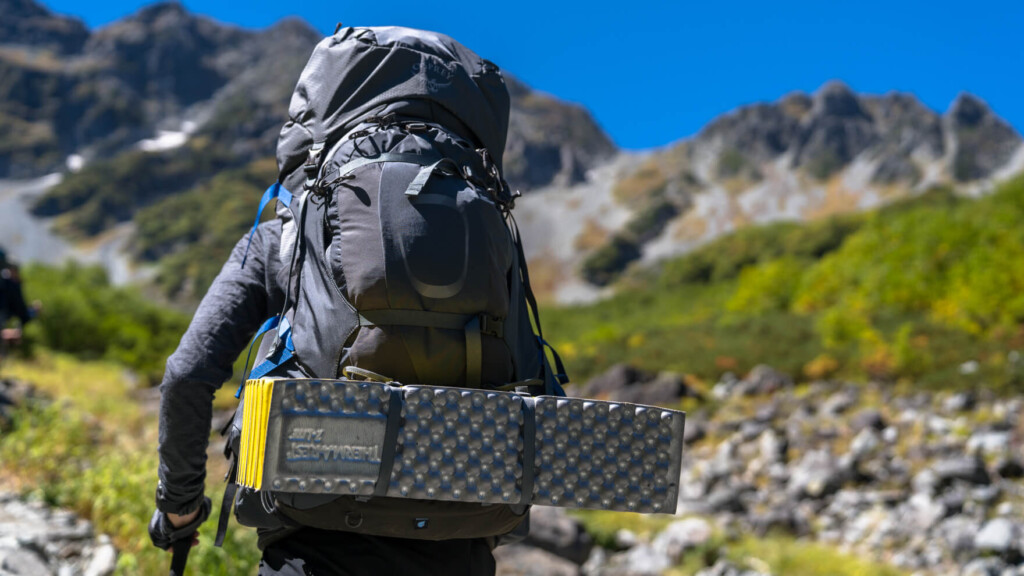
bottom strap to the outer bottom , you can attach a closed cell foam sleeping pad here. By the way, even if the mattress is not available, you can also insert it on the sides or on the rain cover.
Point 7: Other parts and features that are great to have
Rain cover
If the rain falls in the mountains, if your backpack is in the rain, the gear inside will get wet and become unusable, so a rain cover for the pack is a must. Models with the cover as standard equipment are definitely a great deal in terms of functionality and price, so be sure to check it out. However, even if you wear this rain cover, it will not guard the back of the shoulders. From there, water will inevitably enter the inside of the pack, so don't overconfident (don't forget to waterproof the gear, which is bad if it gets wet even inside the pack).

Highly water-repellent (water-resistant) fabric
Many mountain climbing backpacks are made to have a DWR (durable water repellent) fabric, so they are designed to repel some amount of water droplets, but they cannot withstand heavy rain or long rain without a rain cover. However, this water-repellent performance can be good or bad depending on the manufacturer and fabric, and some models with a stronger water-repellent performance can prevent water from flooding so well that they don't need a rain cover (for example, Dyneema composite fabric is expensive, but is popular as a lightweight fabric that is strong and water-resistant).
However water resistant it is, be sure to put anything that you really shouldn't get wet in a waterproof stuff sack or dry bag to properly protect it from flooding.
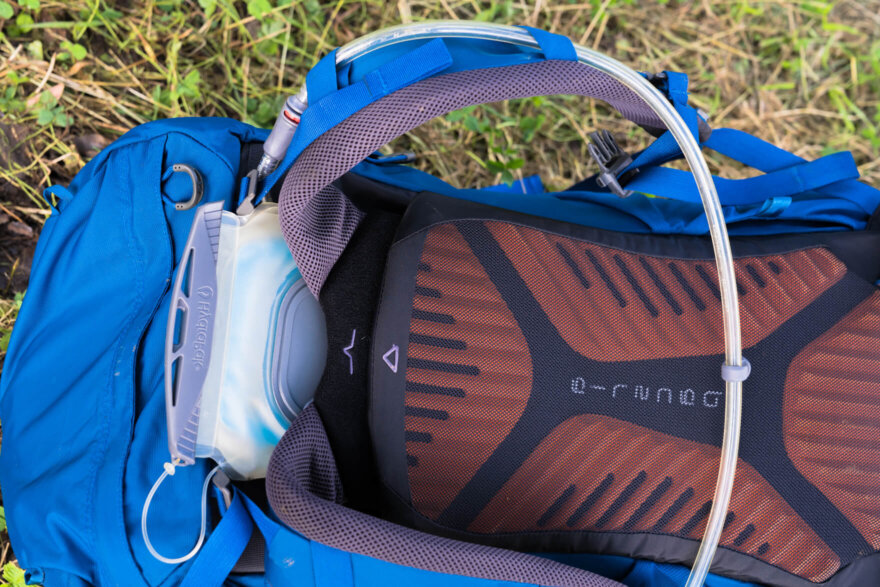
Hydration Pocket Attachment
For those who like hydration systems that allow you to hydrate while you are still in the process, the usability of the pack will be greatly changed, whether there is an inner pocket inside the pack that can store hydration and a hole for passing the tube outside. Furthermore, if there is a tube attachment to secure the tube at the mouth, you can use hydration even more.
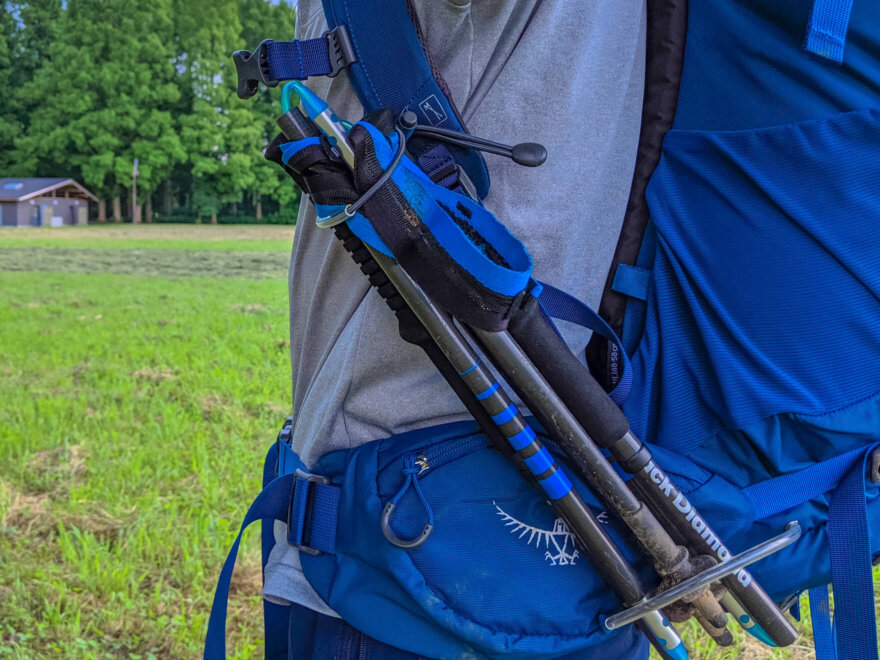
Trekking pole attachment loop
When you see a rocky area that suddenly appears while walking, you will find a place that makes you want to climb with both hands, and some backpacks can hold the trekking pole you have held like a wakizashi (without taking off your backpack), making it very useful.
summary
The backpack is definitely the flower shape of outdoor equipment. This season, many models have been born again, and as a gear lover, I will never take my eyes off it.
All of the models introduced this time are something I can confidently recommend, but you will never know if it fits well until you actually carry it on your back. When purchasing, be sure to actually fit it in the store, and try to discuss it until you are satisfied with it, such as by actually asking the store about any questions you have.
Finally, I would like to say goodbye to you the four basic steps to fitting your backpack. So, have a wonderful mountain trip this season too.
1. Place the center of the hip belt (almost dented) against the protrusion on the upper side of the pelvis and tighten the belt to secure it in place.
→Please make sure that most of the load is firmly on your waist.
2. Tighten the shoulder harness (strap).
→Adjust the back length so that the shoulder harness firmly adheres to the shoulder and the base of the harness is around the upper edge of the shoulder blade.
3. Tighten the chest strap.
→Height is the height that reaches the extension of the armpit.
4. Tighten the top stabilizer and bring the pack closer to your body and you're done.
August 9, 2022 6:05 AM
Please consider paying memberships that allow you to support the site while enjoying limited edition projects and content!
Related reading
 Even heavy luggage and long distances are there? 9 recommended models of large backpacks that are perfect for traversing tents
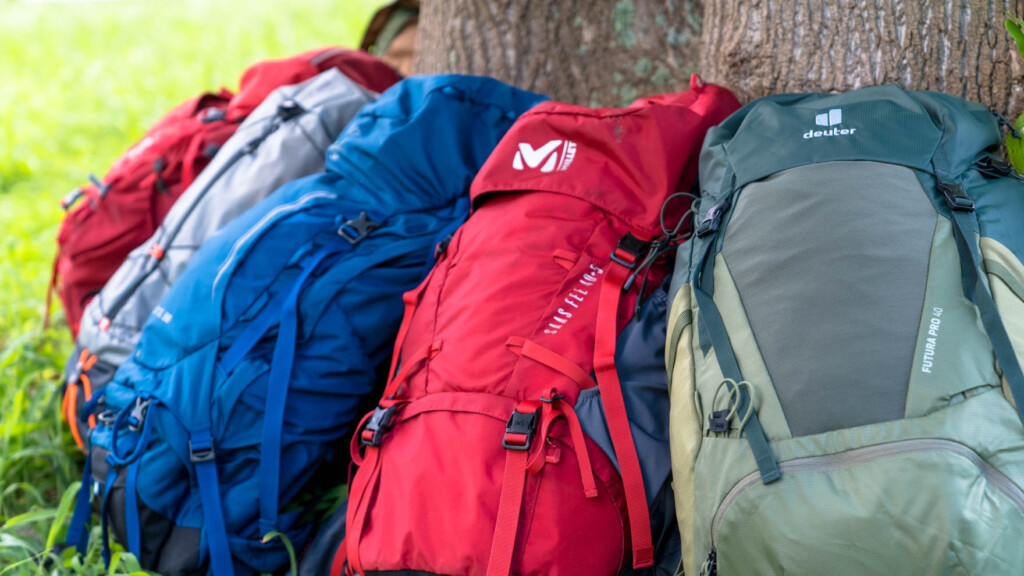 [A self-paying comparison review without any consideration] Perfect for those who are about to start mountain climbing. A list of recommended medium-sized backpacks for outdoor use by scene and purpose
 How to choose a mountain climbing backpack that won't make a mistake, and recommended introductory backpacks that are safe even for first-time users
 Medium-sized backpacks that you should not miss this season 2018 [For hiking and fast packing]