To enjoy the most freest mountain climbing, solo climbing without any worries. 10 things I've been focusing on as a solo climber for the past 10 years
Due to the impact of the COVID-19 pandemic, we are seeing more and more talk about solo mountain climbing, such as "solo mountain climbing" and "solo hiking."
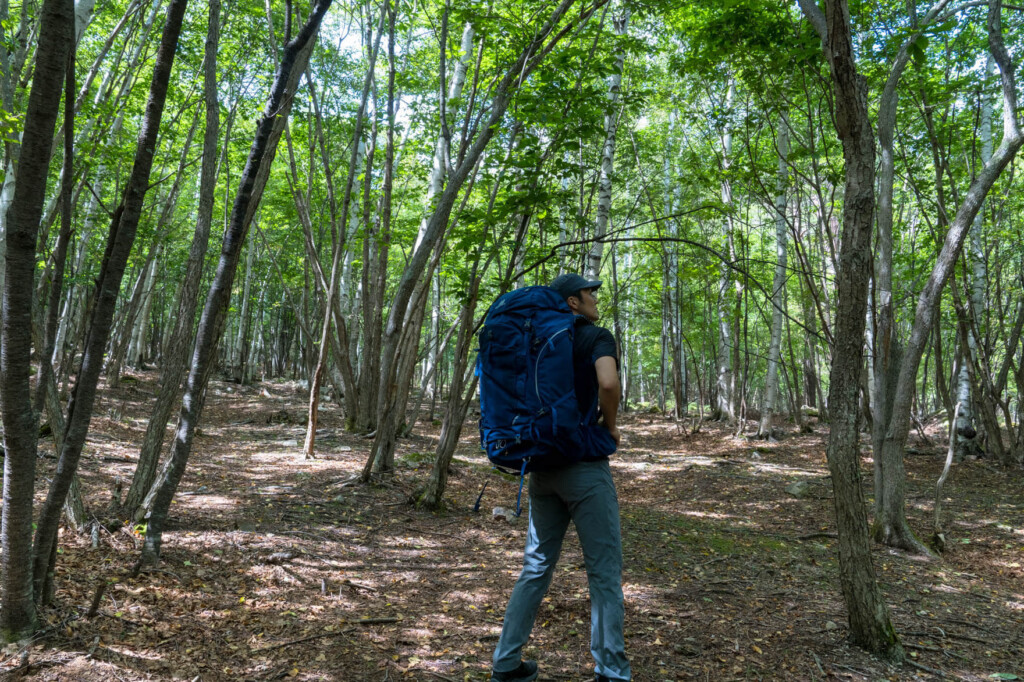
I myself used to climb mountains mostly with friends until about 10 years ago when I was a student and climbing mountains as a hobby, but since I started running this site I have often gone into the mountains alone, and for the past 10 years solo hiking has become my normal mountain climbing style
The appeal of solo mountain climbing is being able to face nature one-on-one
Above all, solo hiking offers the freedom of "deciding what to do at your own pace." As someone who often takes photos, it's a relief to be able to take pictures freely without having to keep others waiting. Of course, group hiking has its own unique charms, but the sense of fulfillment and accomplishment (including the joys and difficulties) that can only be achieved by facing nature one-on-one without being disturbed by anyone is a unique charm that can never be experienced in a group hike. It's easy to understand why solo hiking has attracted so many people, even without the COVID-19 pandemic
Solo mountain climbing is full of dangers hidden behind the fun
However, this so-called "solo climbing" has never been something that was recommended to others. It has long been considered unreasonable, even for beginners and experienced climbers, and it's difficult to say that it was acceptable without reservation. There are various reasons for this, but one of the biggest is the high risk involved. According to recent statistics on mountaineering accidents, the rate of deaths and missing persons in solo climbs is more than double . The numbers also make clear that solo climbing is a climbing style with a high probability of escalating into a worst-case scenario if an accident occurs. No matter what you say, there's nothing more dangerous than being alone in the mountains, even if it's just a two-hour hike.
That said, I personally feel that solo hiking is a style that suits me, and as someone who is fascinated by solo hiking, I believe that anyone who wants to do it should go ahead and try it. However, at the same time, everyone who goes on solo hikes must face the fact that it is not something that everyone can easily start. That is why it is important to know the risks that lie behind the fun and to be fully prepared for them
So, in this article, I'll summarize the minimum things I've always kept in mind to safely enjoy solo mountain climbing, as well as various new safety measures that have been updated with advances in technology. I'm not saying that this is the "right answer," but I hope it will be of some help to daredevil adventurers who want to try climbing a mountain alone in the future
table of contents
- 10 things I keep in mind to enjoy solo hiking safely
- 1. Choose a popular route or an easy route
- 2. Collect thorough information about your walking route
- 3. Check out the "must-have items" that you should always bring with you on any mountain trip
- 4. Carry a satellite communicator or beacon
- 5. Master how to use tools in advance, and know how to repair and replace them in case they stop working
- 6. Plan ahead (tell someone where you're going)
- 7. Check the local weather
- 8. Be prepared to change your plans
- 9. Get insurance
- 10. Know basic first aid procedures (carry a first aid handbook)
- Minimize the risks and enjoy hiking alone to your heart's content
10 things I keep in mind to enjoy solo hiking safely
1. Choose a popular route or an easy route
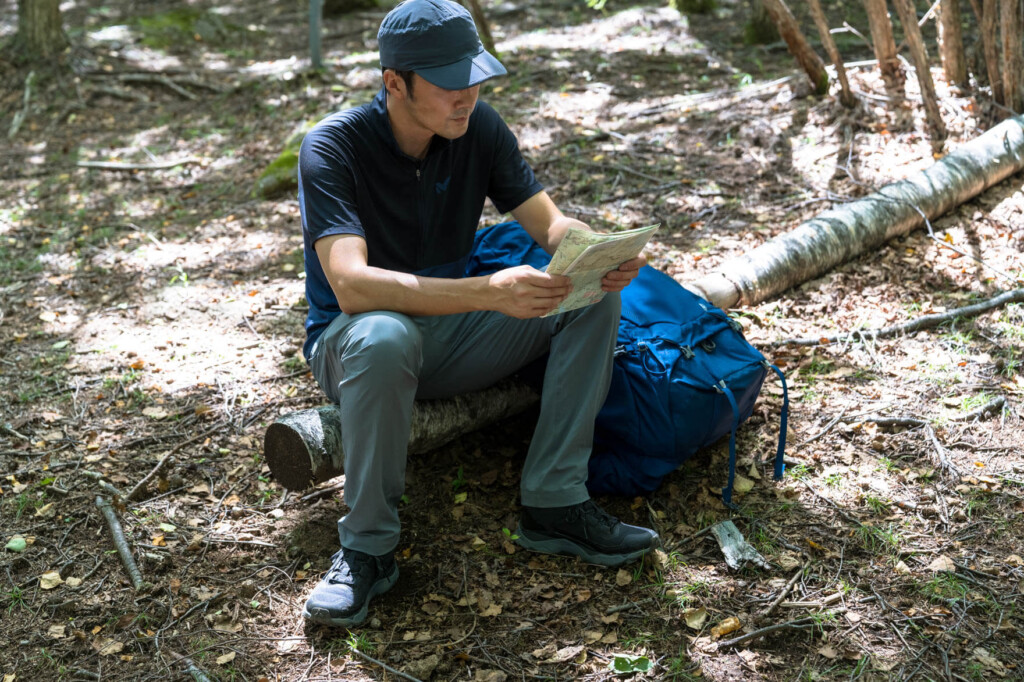
When climbing a mountain, the first thing you need to do is think about "where to go." In my case, this may be because when I climb alone it is often for "work" such as reviewing items, but I usually choose a route I've walked before, a popular route where there are likely to be many other hikers, or a predictable route with many reliable records and information available
Why choose the popular route?
Popular trails are generally well-trodden and safe, have well-maintained signposts, are less likely to get lost, and in the unlikely event that you do, other hikers are more likely to find you. Conversely, less popular routes may have rough or difficult-to-follow trails, and you may not encounter other people, making it less likely that you will be able to ask for help. Even if it's not a popular route, we recommend choosing a route that you've at least been on before, or one that you're confident is below your ability level
It's true that walking on a quiet trail with no sign of other people may be one of the joys of solo hiking. However, the first thing you need to ensure when hiking solo is safety, and having fun comes second. You'll soon stop noticing if you pass a few people, and even if you've walked a path you've walked before, nature will always look and feel different
Although nearby low mountains may seem easy, it can actually be easy to get lost
2. Collect thorough information about your walking route
Once I've chosen a potential hiking route, the next step is to thoroughly research it until I'm satisfied. It's no exaggeration to say that the success of the hike depends on this stage, so I try not to cut corners here. When planning, even if it's just a two-hour round-trip hiking course, I try to thoroughly search for information using all available resources to get an overview of every corner of the route
Searching the internet for route guides and hiking records
I search for terms like "mountain climbing route name, month" to see if there are any records of people having taken the same route in the past. Since the places where information is gathered change over time, such as Facebook groups and YouTube, I use the means that gather the most information at any given time
Alternatively, you can use paper, but it's also convenient to check your route on an online map service (such as Yamareco's "Mountain and Highlands Map"). Understand the route's course time, major landmarks, dangerous spots, water sources, huts (manned or unmanned), tent sites, forks in the trail, etc., and get a general idea of the surrounding area, including the routes that connect to them (by the way, as I'll explain later, always buy a paper "Mountain and Highlands Map" with the route printed on it before you go and carry it with you on the day). Ideally, you should also be able to get a three-dimensional idea of the terrain you'll be walking on, such as an image of ridgelines and valleys, from a topographical map
Then, I look for records of people of a similar level walking the same route at the same time in the past. This way, I can get more realistic information about the actual time of the walk, rather than just guide-like facts. Information about snow conditions from autumn to winter and winter to spring is especially valuable. Incidentally, as a paid Yamareco member, I download GPX data for mountain climbing, backcountry skiing, and other mountain activities, if possible, and load it onto my smartphone map to check that I haven't strayed from the route at crucial points
You can also contact the local
Another option, although analogous, is to call the mountain hut directly if possible and ask about the trail and weather conditions. Most managers will be happy to help, and more than anything, you can get valuable real-time information that you can only get there
Hiking maps contain a wealth of information, not just routes, but also course times, huts, and water sources
3. Check out the "must-have items" that you should always bring with you on any mountain trip
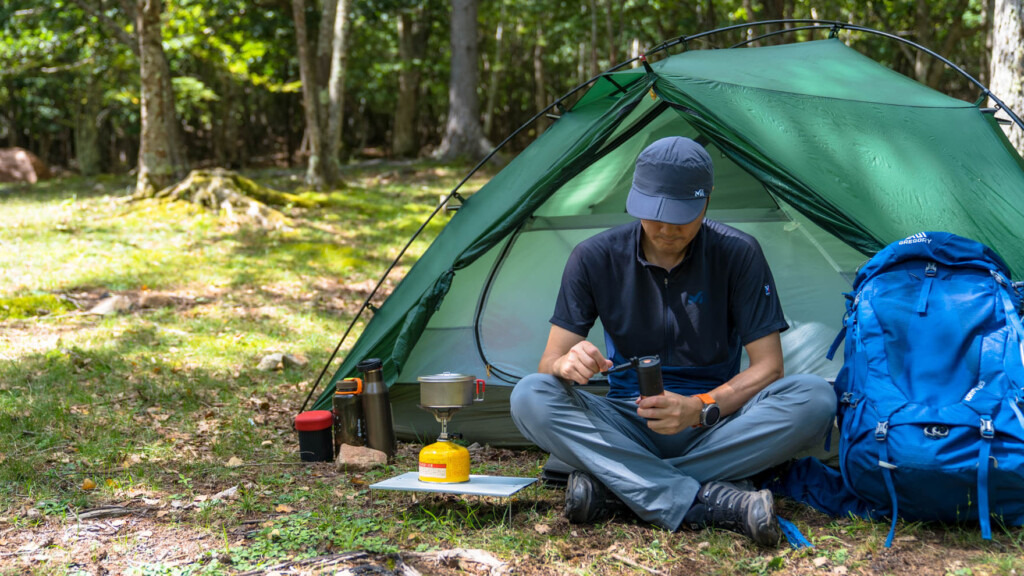
When I'm hiking, I always make sure to carry essential equipment with me in case of an emergency so that I can descend the mountain safely if something happens. Most of the time, I end up descending the mountain without using any of it, but of course it's not that they were wasted; I think it's because I had the confidence and peace of mind that "even if an accident were to occur, I wouldn't die."
Although some of the activities listed here may differ slightly depending on the plan, they are generally the same for all seasons and activities. Naturally, some activities have been added or removed due to technological advances, and the list will be reviewed and updated in the future
A list of items to carry when solo hiking
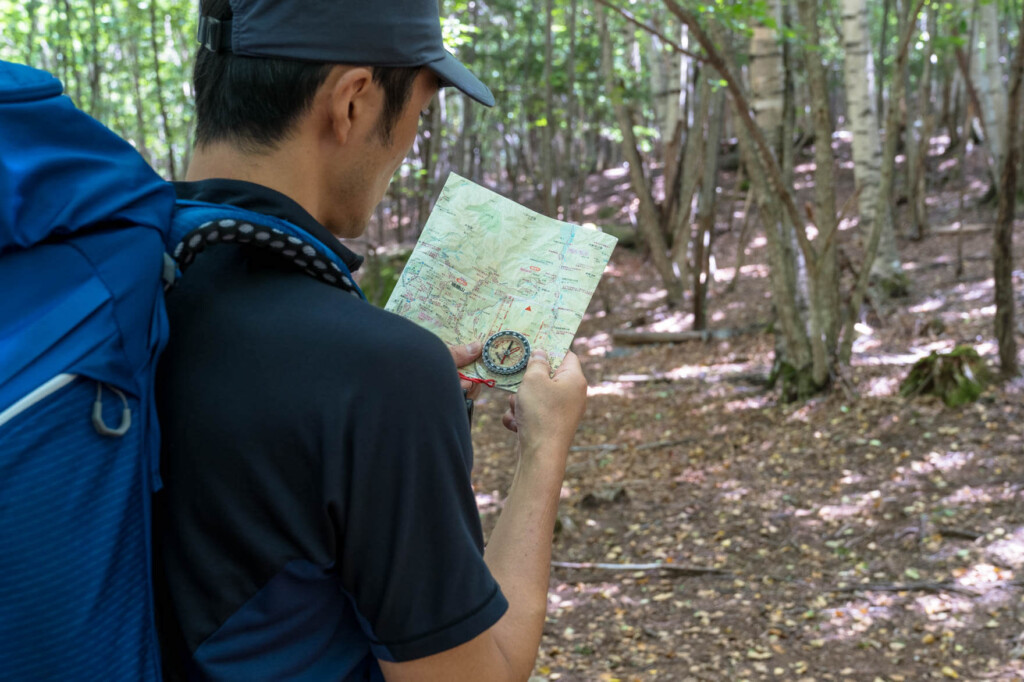
- Paper topographical map and compass
- whistle
- Emergency sheet (and sleeping bag cover or tent depending on the hike)
- Headlamp
- First aid kit (contents may vary depending on plan)
- Stoves and other fire equipment (at the very least, lighters and matches so you can keep warm or light a smoke signal in an emergency)
- Knives and repair tools (multi-tools and multi-tools)
- Spare water (always have some clean water separate from drinking water)
- Emergency food
- Spare batteries (for headlamps and smartphones)
- rain gear
- Thin rope (2mm x 10-30m)
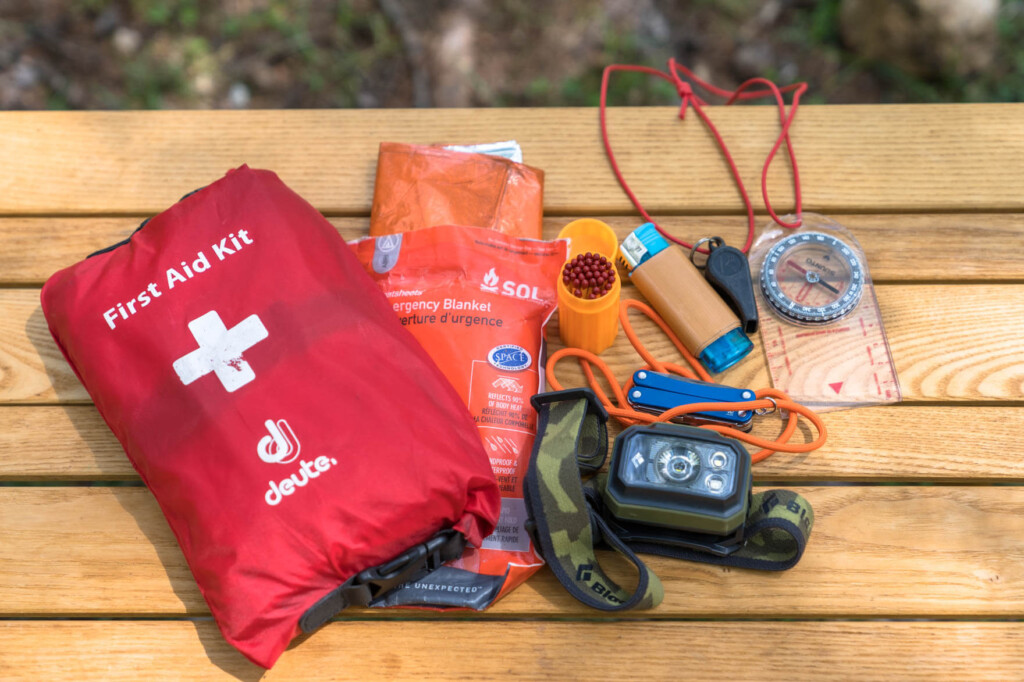
Part of a must-have kit. Even if you don't use these often, they are a great talisman to rely on in times of need
"Paper topographical maps and compasses" are often overlooked
Of these, paper topographical maps are the ones we tend to be lazy about. While many people have become accustomed to digital maps over the past few years, it's important not to rely too heavily on smartphones. All it takes is a moment for your smartphone to break, get submerged in water, get lost, or run out of battery. For this reason, we recommend always carrying a paper map when you go into the mountains (especially if you're going on a long hike or deep in the mountains)
Of course, you don't just need to bring a map and compass with you; you also need to know how to read and use them. Access the various resources available to learn map reading skills, including books and online and offline courses, and make sure you master the basics of how to use them
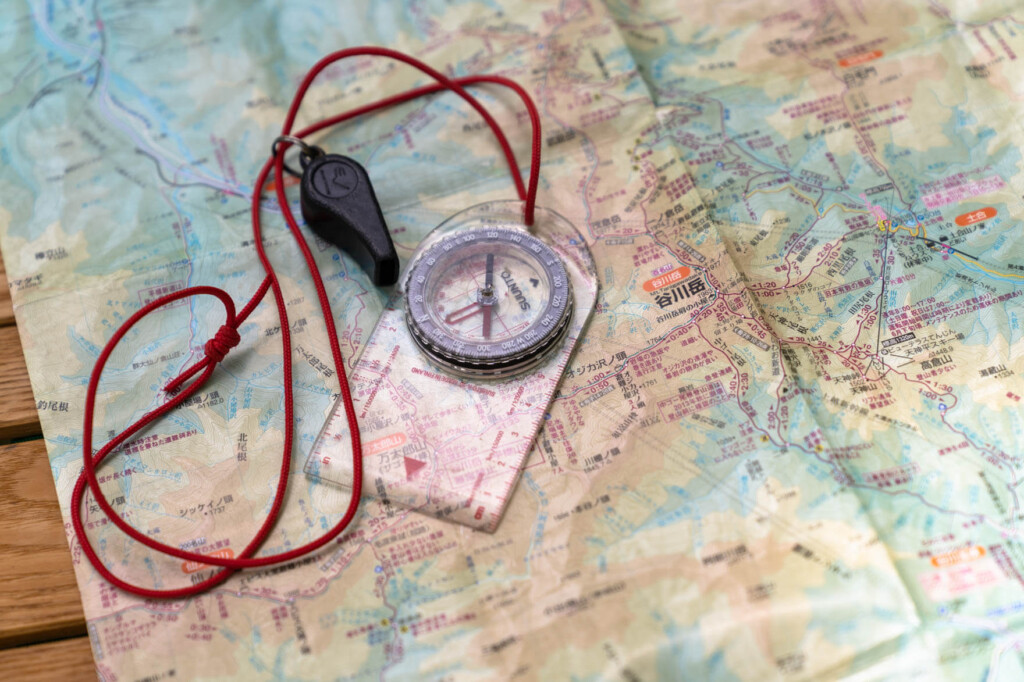
Even if your smartphone GPS is lost, you can rest assured as long as you have a topographical map and compass. We recommend carrying paper maps when hiking solo
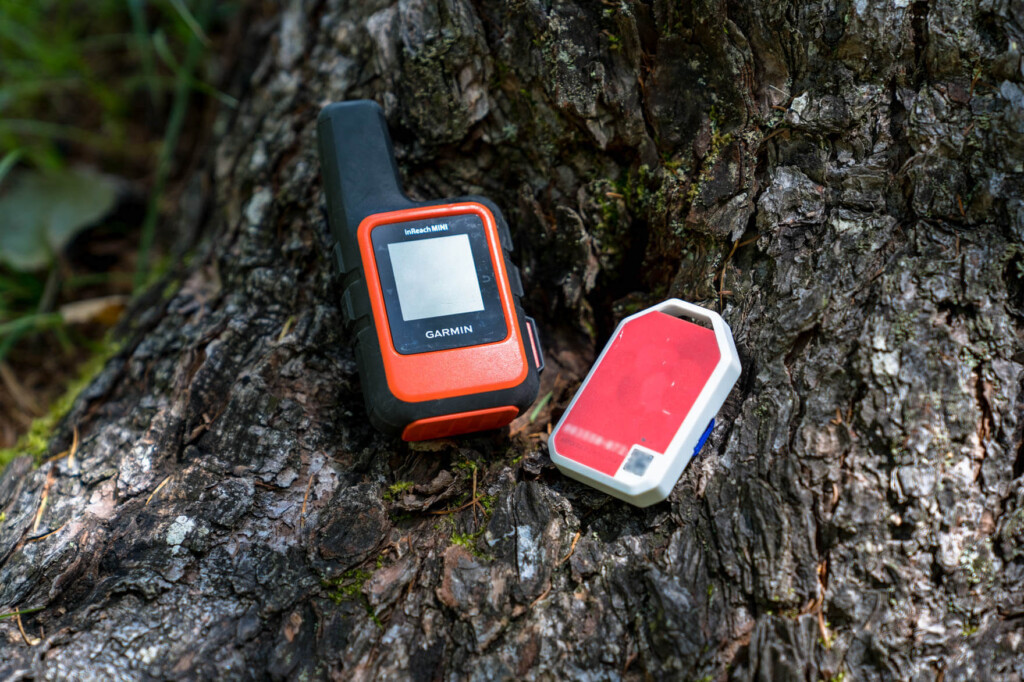
4. Carry a satellite communicator or beacon
Satellite communicators, which use satellite communications to send messages and location information even in places where mobile phone signals cannot reach, and can also send SOS signals, are popular in North America and other places, and I personally wonder why they aren't more popular among mountain climbers in Japan
I have the minimum plan for the Garmin inReachMini and search and rescue insurance. It's a bargain considering it will save your life anywhere in the world, costing less than 2,000 yen a month (and if you have the budget, you can also get unlimited text messages and real-time GPS information sharing). Especially if you're going on a solo hike, this is a service worth seriously considering
Instead, transmitter services such as "Cocoheli" seem to be gaining popularity in Japan, and I also use them as a topic of conversation. However, Cocoheli is a membership-based search helicopter service in that the search team's helicopter receives signals from the transmitter from up to 16km away, narrowing down the search results and making it easier to find the target. To have the search begin, you must call for rescue via mobile phone or other means, and if you are in an area with no signal, you will naturally need to ask family or other people to search for you. In that sense, although it will cost a little more, if you are prepared to go on a solo hike, I recommend a satellite communicator (or perhaps having both is the safest option?)
5. Master how to use tools in advance, and know how to repair and replace them in case they stop working
If you're climbing with someone, you might be able to borrow some gear if you forget it, it's unusable, or it breaks. But climbing solo is different. You have to figure out how to handle whatever happens
For this reason, it is dangerous to just accept that "it's okay because it somehow works." Tools that you don't know how to use are useless in the field, no matter how cutting-edge the gear they are. For this reason, you should at least have a basic understanding of how to use them, and how to repair or replace them in case they break
Especially if you've purchased something new, be sure to test it out before hitting the trail to make sure it works properly. You don't want to unfold your new tent only to find that some parts are missing
About repair tools
Even sturdy mountain gear that is designed for rough use will eventually wear out, causing parts to break or deteriorate. It's also important to be careful of battery-operated items running out of power. When hiking solo, I take particular care to carry a few emergency items, such as spare batteries and repair tools, so I can continue using the gear to some extent if that happens
Of these, cloth duct tape (adhesive tape) is by far the most useful repair item I've used. It's surprisingly versatile and can be used to fix things when fabric or parts are damaged, when shoe soles come off, when ski seals lose their adhesive power, or to seal holes. Duct tape also works well as an excellent fire starter, so I try to wrap it around water bottles, trekking poles, lighters, and other items whenever possible. I've seen some people use tape as a substitute, but for now I always carry duct tape, which is more versatile and has stronger adhesive power. If you have the budget, it's also a good idea to bring some thread, needles, and cable ties
Also, in winter, if you have hard and heavy equipment like skis or snowshoes, you'll need wire and pliers to repair them. Pliers alone are heavy and bulky to carry around, so it's difficult to carry them around. For these reasons, I'm a big fan of Leatherman multi-tools, as they come with the compact SQUIRT PS4, which comes with pliers, a knife, and scissors
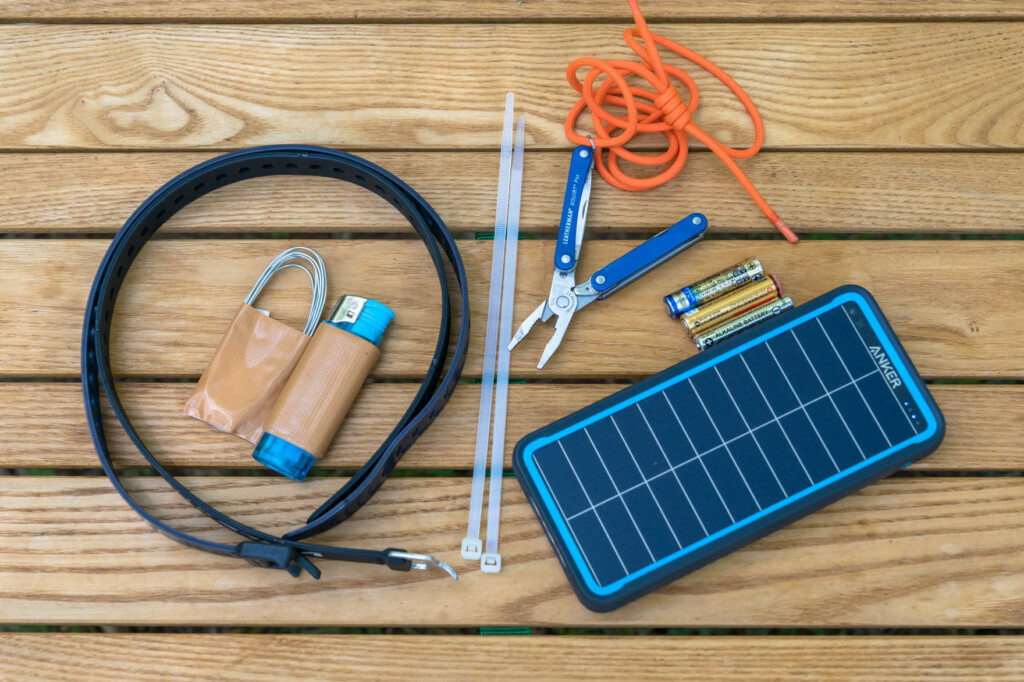
When it comes to spare and repair supplies, consider versatility and portability, such as spare batteries, adhesive tape, cable ties, knives, and wire (plus pliers)
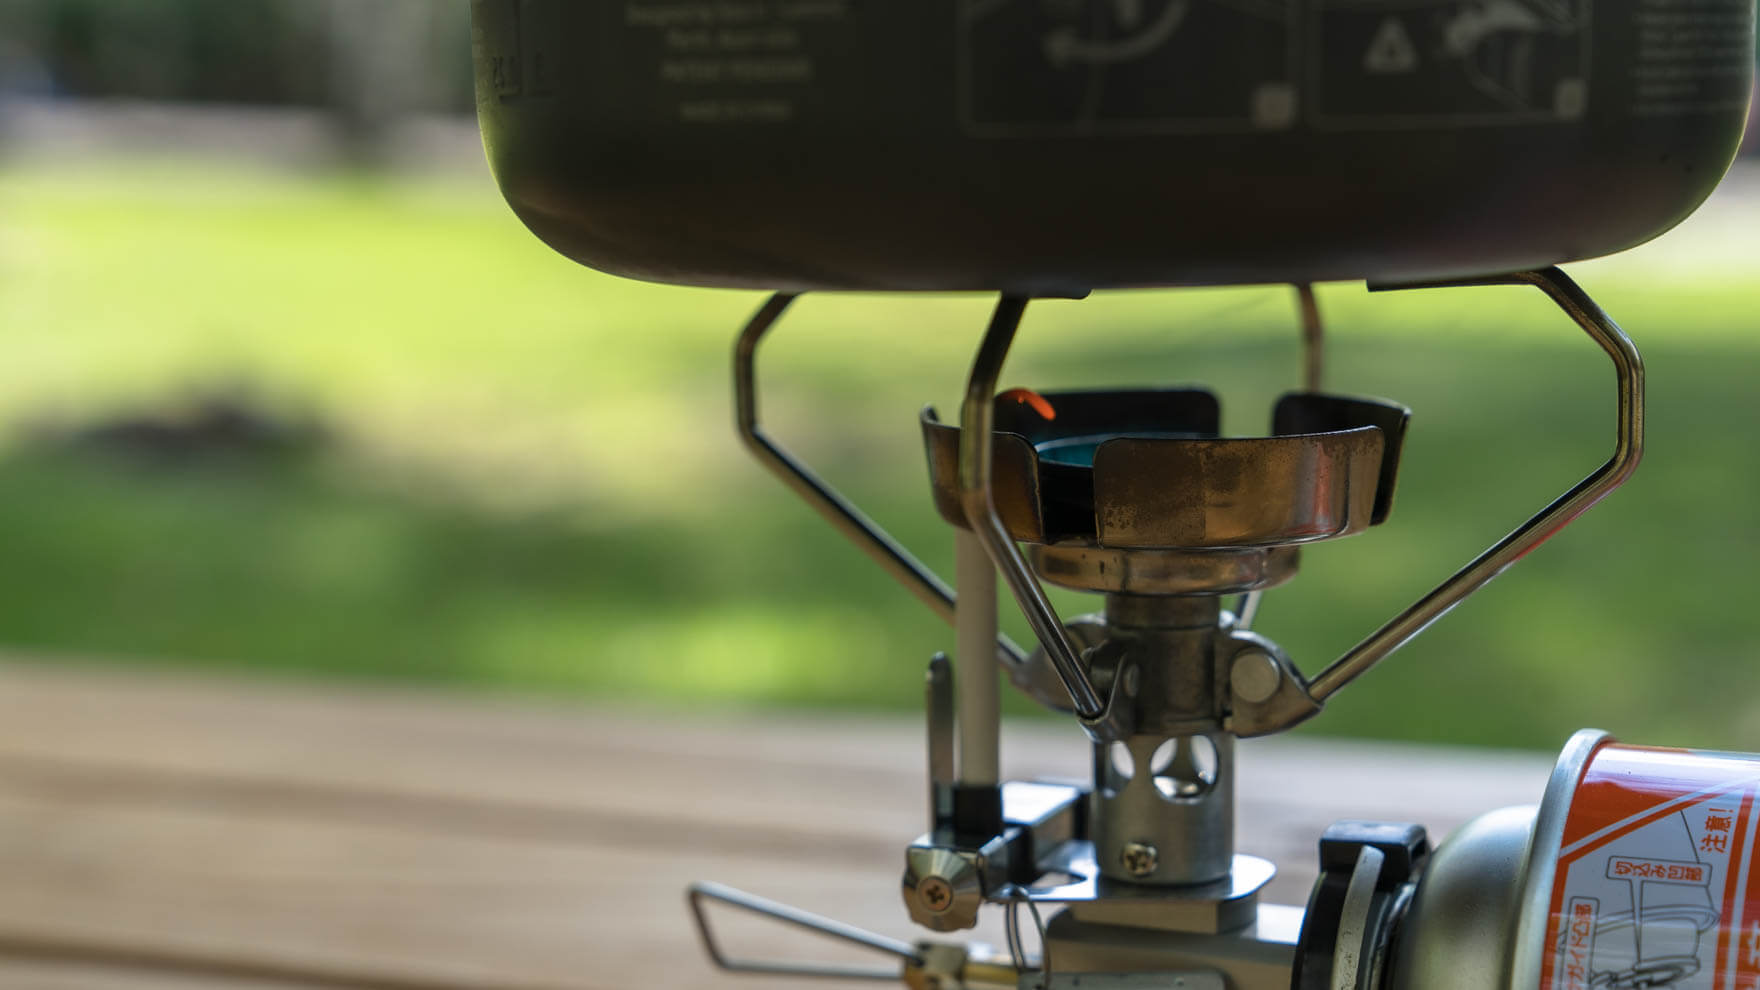
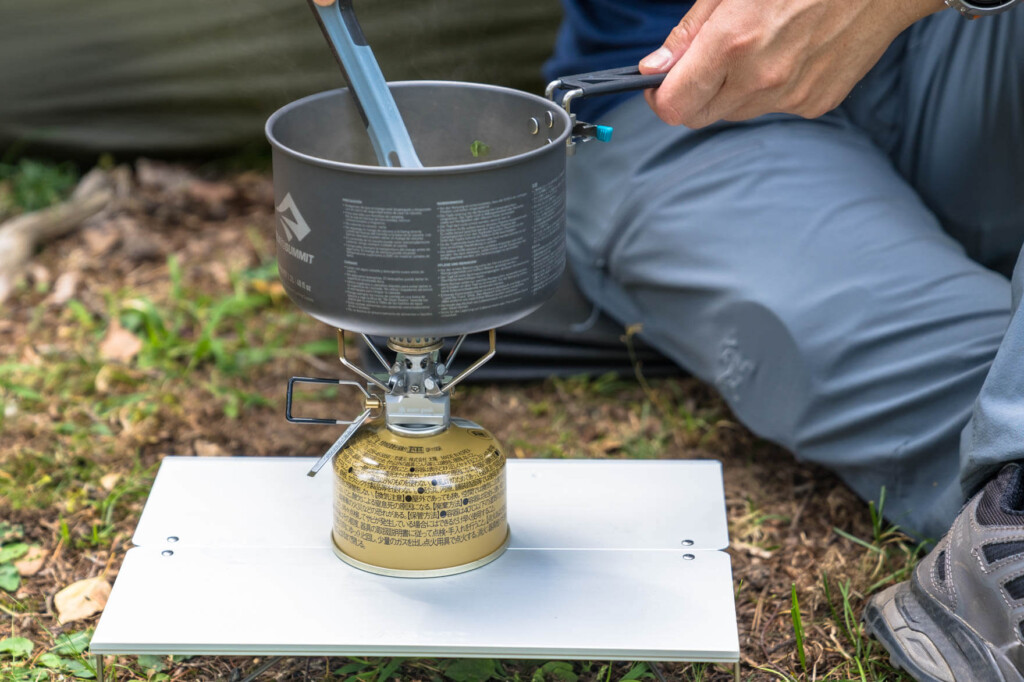
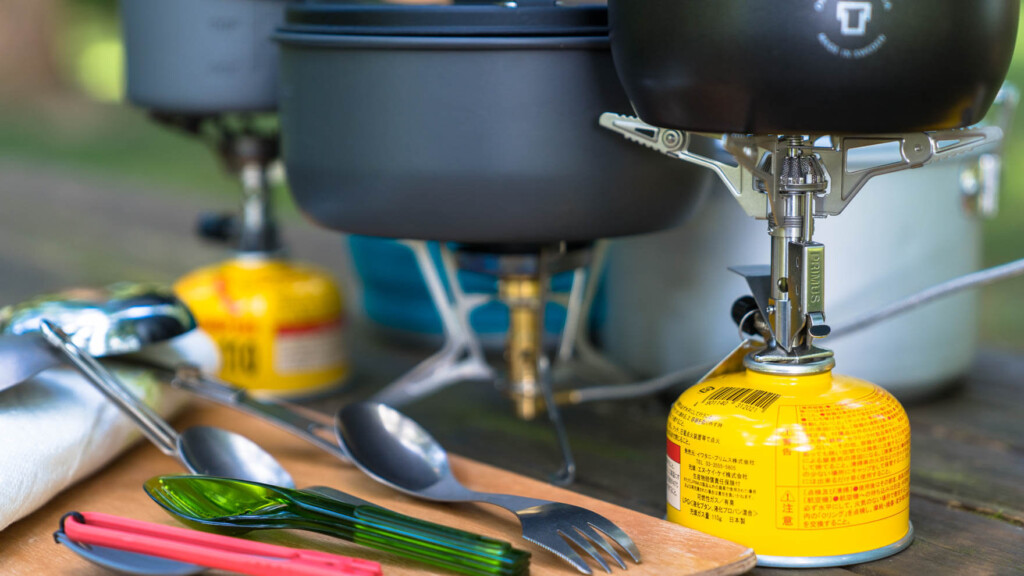
Be sure to understand how to use a gas stove properly, as improper handling can lead to serious accidents
Gas stoves are used by many people when camping in tents or hiking, but because they are a part of everyday life and because they are used to using gas stoves, they tend to be underestimated
However, while mountaineering stoves are extremely convenient because they pack a powerful flame into a compact size, they are also dangerous tools that can lead to serious accidents if used incorrectly. Rather than using them for the first time on site, be sure to test them out in the correct way before setting off
Below is a video created in 2020 summarizing the correct use of outdoor gas stoves and points to note. If you take another look at it, not only first-time users, but also those who have used it for a while, you may discover something surprising
Beware of carbon monoxide poisoning, a deadly threat that you may not even notice
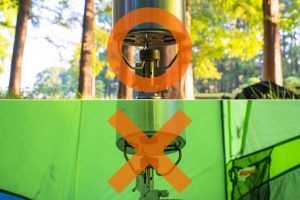
Refrain from using gas appliances indoors, such as in tents
Another thing you should be aware of when using a gas stove carbon monoxide poisoning .
When gas appliances are used in poorly ventilated places, such as inside a tent, there is a lack of oxygen needed for combustion, which causes incomplete combustion and produces carbon monoxide. When inhaled, this inhibits the transport of oxygen by the blood, causing oxygen deficiency in cells and tissues throughout the body, leading to various symptoms and, in the worst case, death. This carbon monoxide poisoning .
The trouble is that carbon monoxide is colorless and odorless, making it difficult to determine whether it is present or not. Furthermore, the early symptoms of carbon monoxide poisoning are similar to those of a cold (or flu) making it difficult to realize that you are in a dangerous situation. Once the condition progresses to moderate or severe, it becomes too late to act on your own. This is why carbon monoxide poisoning is said to be a disease that can lead to death before you know it.
The key to avoiding this troublesome and terrifying carbon monoxide poisoning is to "avoid creating situations that could result in the production of carbon monoxide." Even if it's cold outside, make sure you don't use gas appliances in tents, cars, or other enclosed spaces. If you experience any of the symptoms above or if you feel something is "wrong," make sure to move to a place with fresh air immediately
Don't forget to check for deterioration of parts such as O-rings
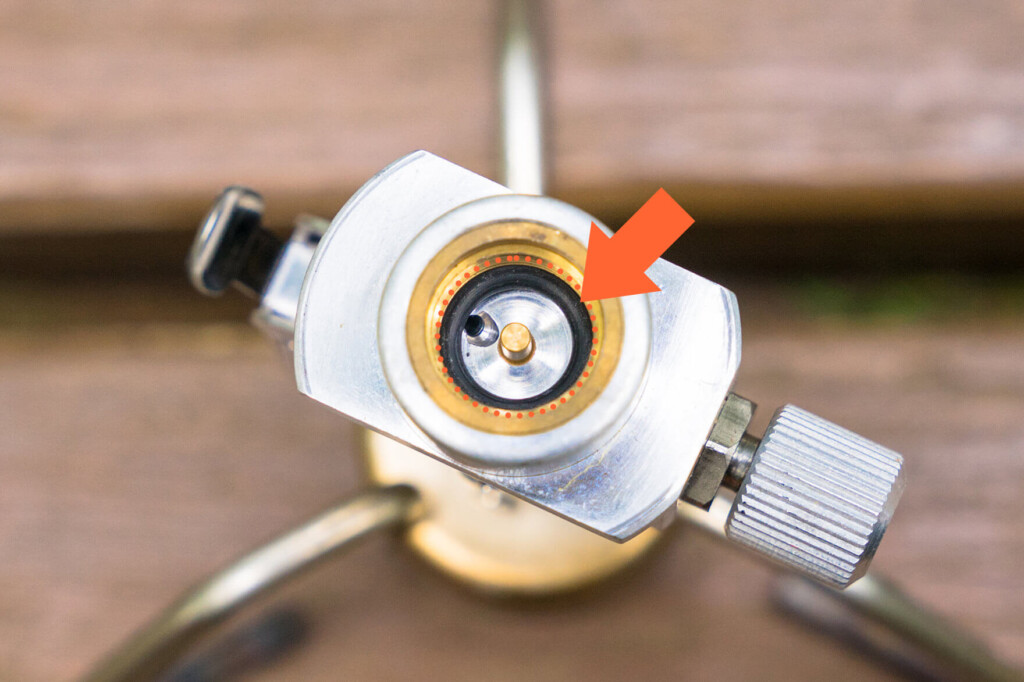
Deterioration of O-rings is difficult to notice, but it is necessary to check for deterioration

[O-ring photo] The O-ring on the left has deteriorated over time. The surface is scratched, it has lost its elasticity, and it has become stuck in its shape due to pressure and is unable to return to its original shape. The difference from a normal O-ring (photo on the right) is immediately obvious
If you've been using a gas stove for many years, you might forget about the deterioration of the O-ring. The O-ring is a rubber ring that connects the gas appliance to the gas cartridge, and it's a consumable item that deteriorates over time, even if you don't use it.
If any parts are cut, frayed, or cracked, it could cause a gas leak in the worst case scenario, so be sure to check this before going on a mountain trip and replace it if it is damaged
Furthermore, if you notice any strange noises or odors with the gas cartridge installed, never use the stove, and if you notice any abnormalities, consult your retailer or manufacturer. Also, never use any O-rings other than the genuine ones specified by the manufacturer. Even if you replace the O-rings, they have a lifespan and there may be unseen deterioration. We also recommend replacing your stove every 10 years
Before you buy! Does the burner have the "PSLPG mark"?
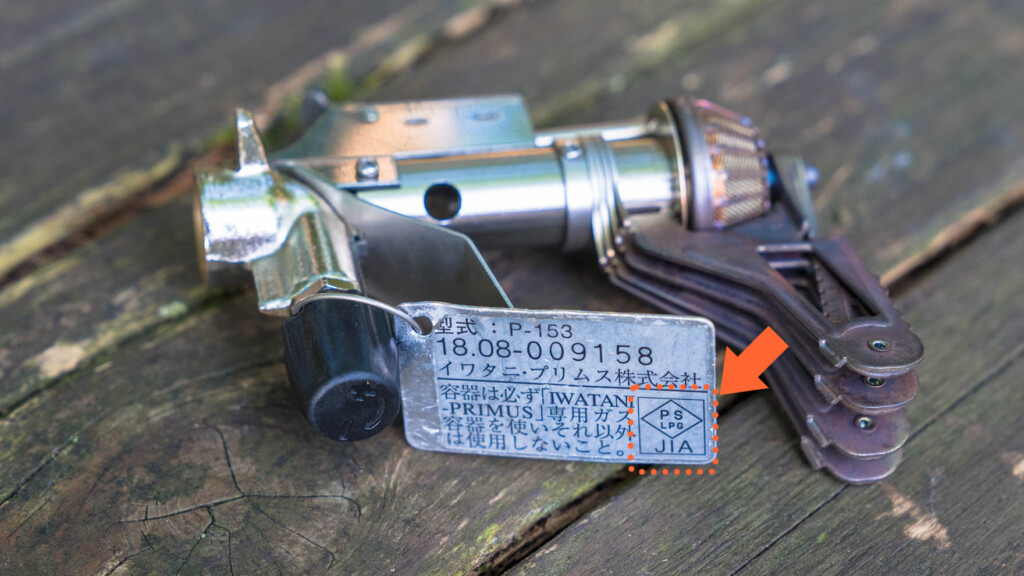
The PSLPG mark is attached and displayed on the product itself, so check at the store before purchasing to see if it has been certified
The "PSLPG Mark" is a mark that indicates that a product has passed strict inspections and complies with the national standards for gas stoves. In other words, products with this mark are proof that they have passed the inspections required by law. However, in recent years, many imported products that do not have the "PSLPG Mark" have been circulating, especially on the Internet
Of course, even if a product has this mark, it cannot be said to be 100% safe unless each individual uses the gas stove correctly, but products without the mark have not passed the inspections required by law. For safe mountain climbing, be sure to check that the product has the "PSLPG mark" before purchasing (if you are not sure whether it has the mark, ask the store staff)
6. Plan ahead (tell someone where you're going)
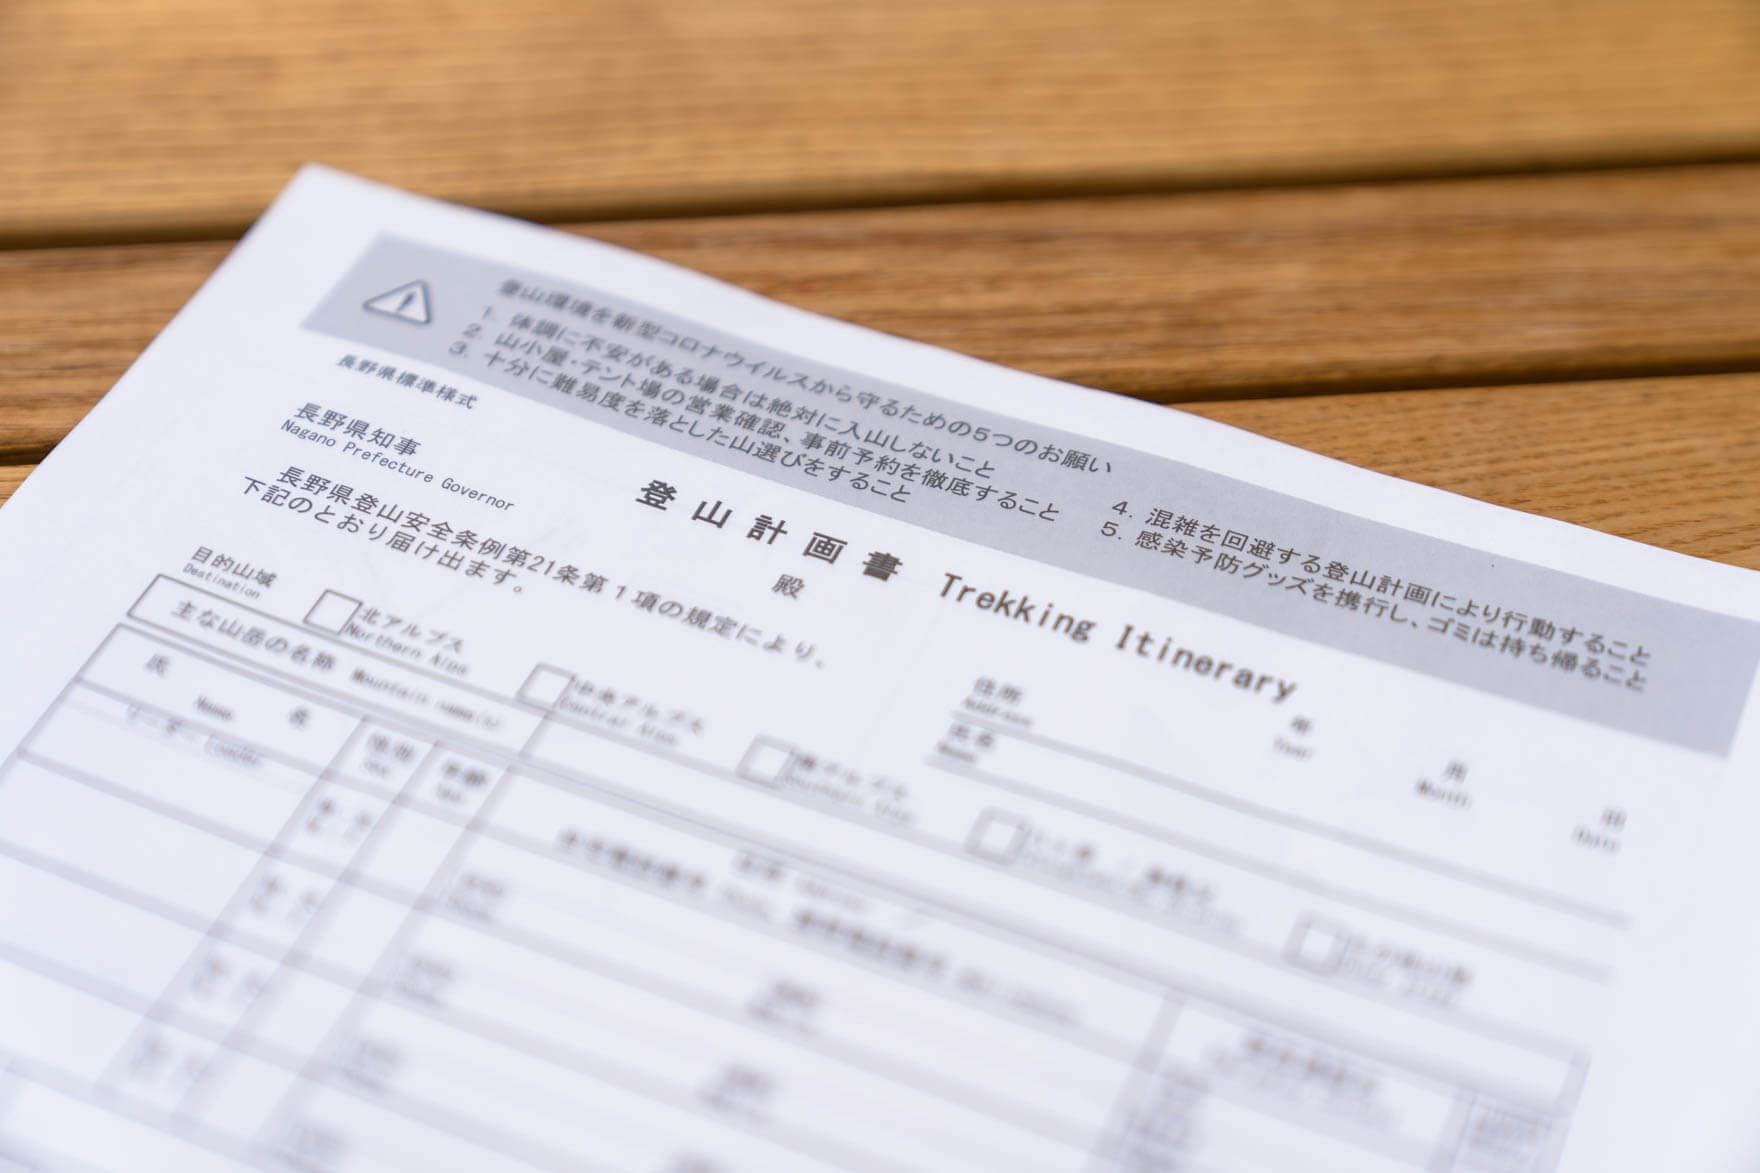
Whether you are climbing solo or in a group, preparing a climbing plan (climbing notification) and submitting it to the appropriate place in advance is the bare minimum for all mountain climbing trips. Of course, this is to clarify your climbing plans, but more importantly, it serves as an important source of information for police and other search operations in the unlikely event that you get lost
In addition to these basic rules of etiquette, don't forget to tell someone close to you before you go to the mountains which mountain you're going to and when you'll be back (the more detailed the better). Don't assume that cell phone signals will always reach the hiking trails
The dangers of going to the mountains without telling anyone where you are going and when you will return
"127 Hours" is a movie from 10 years ago, and it tells the story of a man who goes hiking alone in the Utah desert (despite being on a familiar trail) and accidentally slips into a crevasse, trapping his arm and becoming trapped. It's a powerful lesson in the tragedy that can result from not telling anyone where you're going. To avoid becoming like the protagonist in this movie, no matter how rushed you are before a climb, always remember to say, "I'm going to Mt. X with someone, and we plan to descend on X day."
A digital mountain climbing planner is convenient because you can keep everything in one place
Incidentally, mountain climbing plans, which used to be mailed and submitted to the police, have finally evolved in recent years. For example, "COMPASS" allows you to create and submit mountain climbing plans digitally. It also has a function to share the plan with others and notify designated people by email when you descend, which I've been using a lot lately. Furthermore, by using satellite communicators such as Garmin inReach and the "monitoring function" of the smartphone app "YAMAP," you can send your location information to family and friends in real time while climbing. Even when hiking solo, there are now many more ways to ensure safety than ever before
In any case, when hiking alone, it is very important to let someone know your whereabouts and safety, such as whether you have safely descended the mountain. No matter how experienced a hiker you are, you should always assume that unexpected accidents will occur
A mountain climbing plan is your last lifeline to protect yourself
7. Check the local weather
It may seem obvious, but I always check the local weather before I go into the mountains. As the term "weather disaster" suggests, hiking in bad weather is a much more dangerous activity than usual, and if you're hiking solo, you shouldn't do it at all. Even if you're lucky enough to make it, the memories of the experience will be more harsh than enjoyable
Check the weather forecast on the mountain
The weather forecast in the town at the base of the mountain is not sufficient, so whenever possible, I check the weather, temperature, and wind strength of the mountain I'm climbing. In my case, I check the weather and weather map forecast for the city on a regular weather forecast site, and then check the mountain weather forecast on " Mountain Weather Forecast (paid membership)" and " Mountain Weather Forecast ." In addition, during the snowy season, I look up upper-level weather maps and other snow accumulation information as needed.
I would also like to learn about weather charts
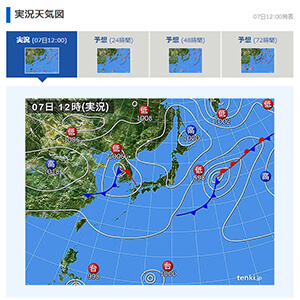 Incidentally, while it's important to check professional weather forecasts, it's also important to have some knowledge of weather charts, as this will give you a different level of information resolution even when checking the same forecast. If you have knowledge of the weather conditions that the forecast is based on, you can predict the weather in the immediate future, including things that aren't clear from the weather forecast symbols, such as the possibility of sudden changes in the weather, temperature, wind, etc. If you're going on a solo hike, it's a good idea to at least read a book about the weather. Once you can understand weather forecasting, which predicts the immediate weather from things like cloud formations, you're already a pro
Especially from autumn to winter, unseasonable snowfall can suddenly transform the mountains into harsh winter mountains. As someone who has suffered from this many times in the past, I can't help but feel nervous about hiking in the high mountains at this time of year
8. Be prepared to change your plans
No matter how carefully you research your route, there are times when you arrive at the site on the day and find that the path is impassable. Also, when it looks like you won't be able to get down in time, when the weather looks like it's about to change suddenly and you have to get down the mountain immediately, or when you get injured and can't walk at the planned pace, it's not uncommon for things to not go as planned when climbing mountains
Consider subroutes and escape routes
By being prepared to be able to flexibly change your itinerary in case of such an emergency, you can be sure you won't panic or get stuck when you're on the scene. In the world of mountaineering, the route that gets you to a safe place (such as a mountain hut, bivouac point, or descent point) in the shortest time is called an "escape route," and another route used to suit the situation on the way from the start to the finish is called a "sub-route."
When climbing solo, it is more important to have multiple plans prepared that are tailored to your abilities than to be physically stronger than others
If you do your research thoroughly and have the flexibility to take multiple routes depending on the situation, you can act more safely
9. Get insurance
This is one of the things you should definitely bring if you are climbing a mountain, whether solo or in a group
In the unlikely event that you get lost, rescue operations, including searches using private helicopters, can incur huge costs. If you are not insured, these costs will weigh heavily on you even if you survive, and in the unlikely event that you die, the enormous costs will fall on your family (even more unfortunate: if the person is not found, they will not be considered dead for seven years, so their family will not be able to receive survivor's pensions or life insurance). It goes without saying, but mountain insurance is a basic prerequisite for any mountaineering venture, so you should definitely get one
Accidents during solo mountain climbing can easily lead to fatal accidents, so be sure to take out mountaineering insurance
10. Know basic first aid procedures (carry a first aid handbook)
The final thing to keep in mind when solo hiking is to carry a first aid kit, as mentioned in the list of must-have items above, in case of injury or illness, as well as knowledge of first aid. If possible, we recommend taking some kind of first aid course before setting out on your first solo hike. While a course related to mountain climbing is ideal, first aid courses from a disaster prevention perspective have long been held frequently in cities. Even so, whether or not you have taken the course can make a huge difference in the sense of security you feel, as you won't panic in an emergency
If you don't have the time and aren't confident about what to do in the event of an emergency, a mountaineering rescue handbook will do the trick.By being prepared so that you won't be at a loss no matter what happens in the field, you'll be able to deal with the various mishaps you encounter in the mountains without panicking

A first aid kit containing bandages and tape for first aid in the event of an injury, as well as a thumb splint that can be used as a splint for sprains and fractures, are essential equipment. If you are worried about the worst case scenario, you can also carry a thin handbook
Minimize the risks and enjoy hiking alone to your heart's content
Even mountaineers with far more experience and skill than I have suffered numerous accidents and disasters. Perhaps this is inevitable as each climber is pushing their own limits. No matter how hard you try to avoid accidents and how careful you are, everyone should accept that they are unavoidable. While I've written about my own experience in this article regarding the mindset required for solo mountaineering, it's not a perfect strategy for everyone, and there are no rules stating you must follow before entering the mountains. Using this as a reference, don't push yourself too hard, and gradually increase your knowledge, equipment, and the areas you can walk in, and gradually enjoy solo hiking at your own pace
Supervised by: Japan Gas and Kerosene Equipment Industry Association → https://www.jgka.or.jp/index.html
Related reading
 Lighter, safer, smarter. A list of cooking tools to take to climb a tent and how to choose one (basic)
 [Archive] 20 points you should know to use gas equipment more safely and conveniently
 [Wait a minute for that action!] ] Summary of NG behaviors that you tend to do when climbing or camping