
【100均で解決】キャンピングカーの靴入れ足りない問題と収納スペース問題を解決するCan Doの「シューズラック4段」をダイソーの「パイプカッター」で魔改造! シンデレラフィットに超満足
written by Saito Titoce
意外と収納が少ないキャンピングカー。できるだけ効率化したいのですが、靴や小物などを入れておく場所も足りません。そのため筆者は先日購入したキャンドゥの「シューズラック 4段」を設置してみたのですが、サイズがイマイチ。これを解決するためダイソーの「パイプカッター」で魔改造してみました。
目次
キャンドゥの「シューズラック 4段」とダイソーの「パイプカッター」とは
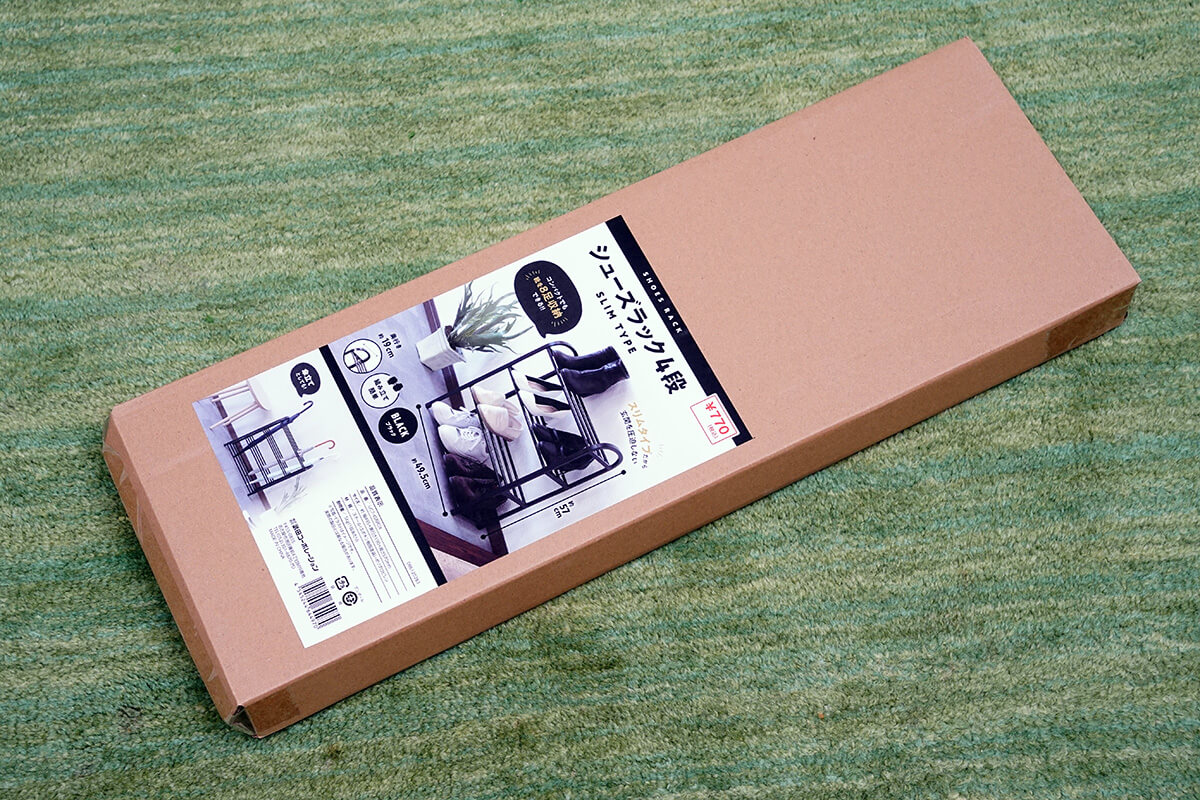
かなりしっかりとしたダンボールに入った状態でキャンドゥで販売されていた「シューズラック 4段」。ダンボールの長辺は約60cmもあります。
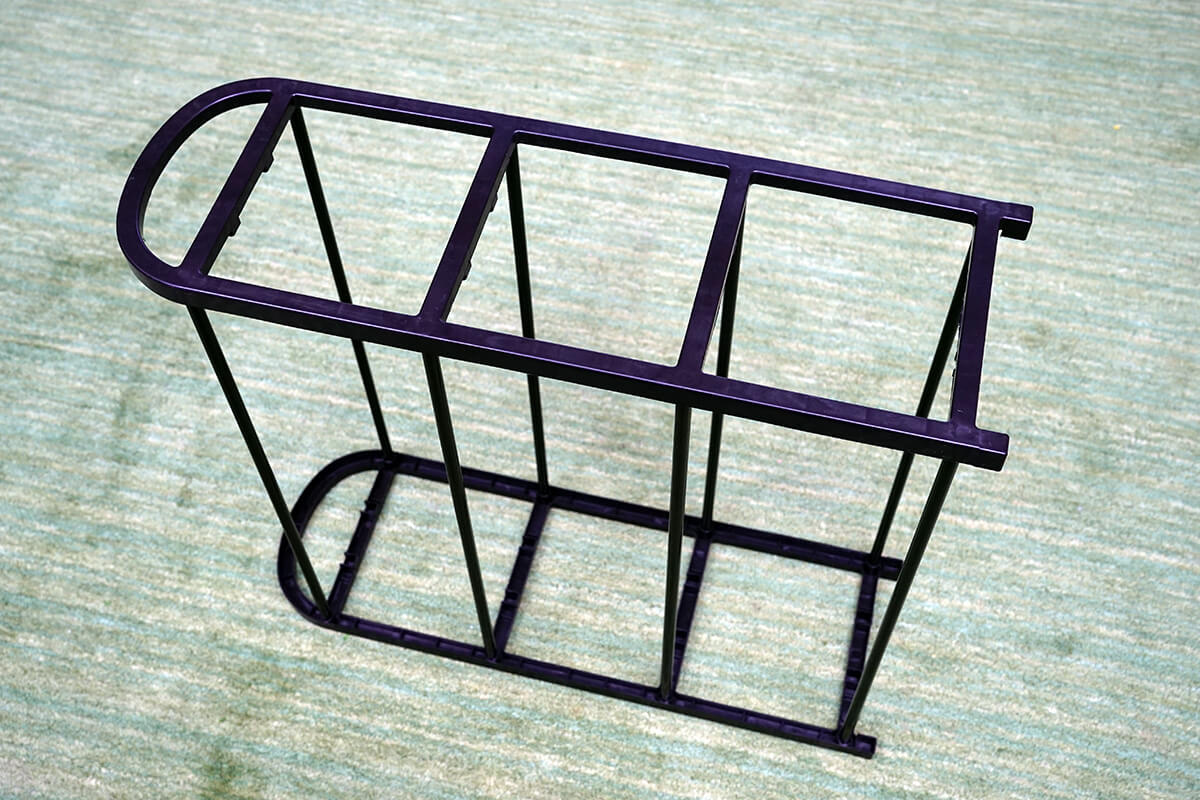
770円(税込)組み立て後サイズ約49.5×19×57cmの本格的なシューズラック
100円ショップのキャンドゥは、実はかなり本格的な家具を販売しています。100円ショップで? と思われる方も多いでしょう。しかし、今回紹介する「シューズラック 4段」は、組み立て後のサイズが約49.5×19×57cm、価格は税込770円です。その名のとおり4段で靴を8足収納でき、傘立てとしても使えるといいます。1段あたりの耐荷重は5kg。
100円ショップの商品としては、かなり本格的なシューズラックですが、普通のシューズラックに比べると、さすがにちょっとコンパクト。そこで筆者は、このサイズ感ならキャンピングカーのシューズラックにちょうどいいのでは? と考えたのです。
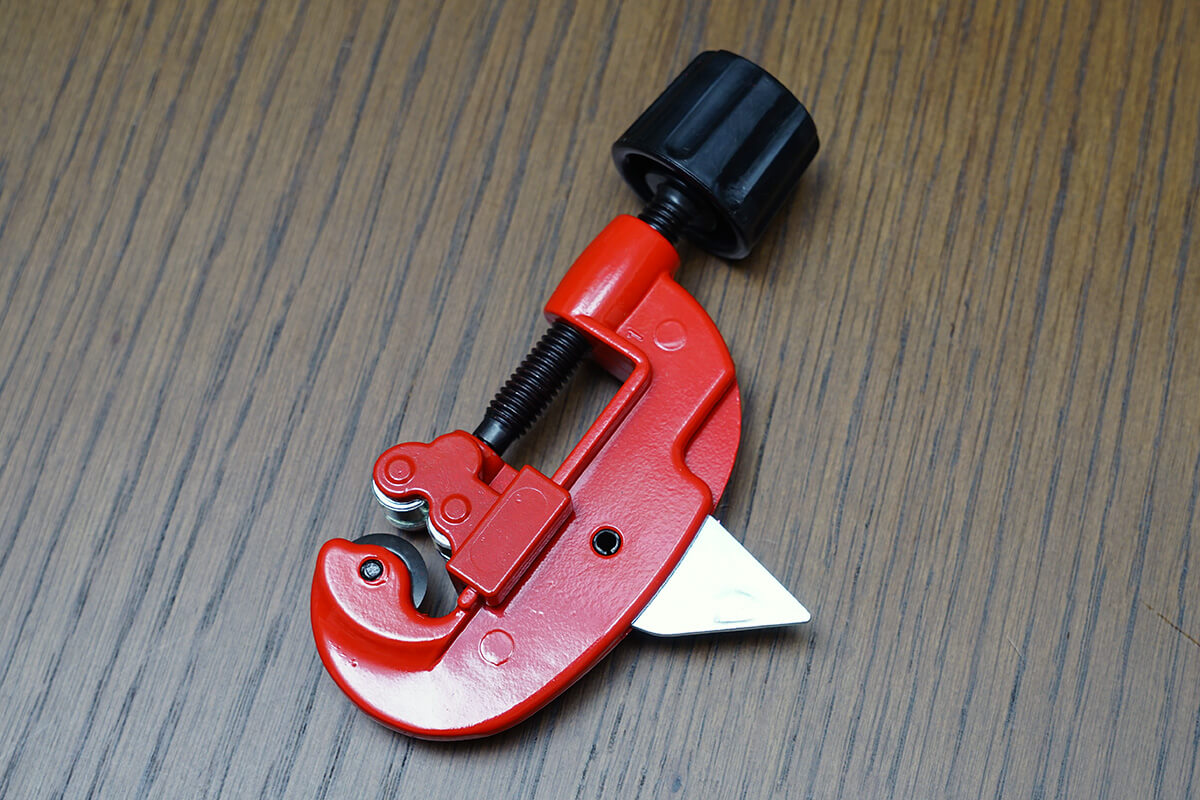
税込550円で購入できる、ダイソーのパイプカッターはかなり便利
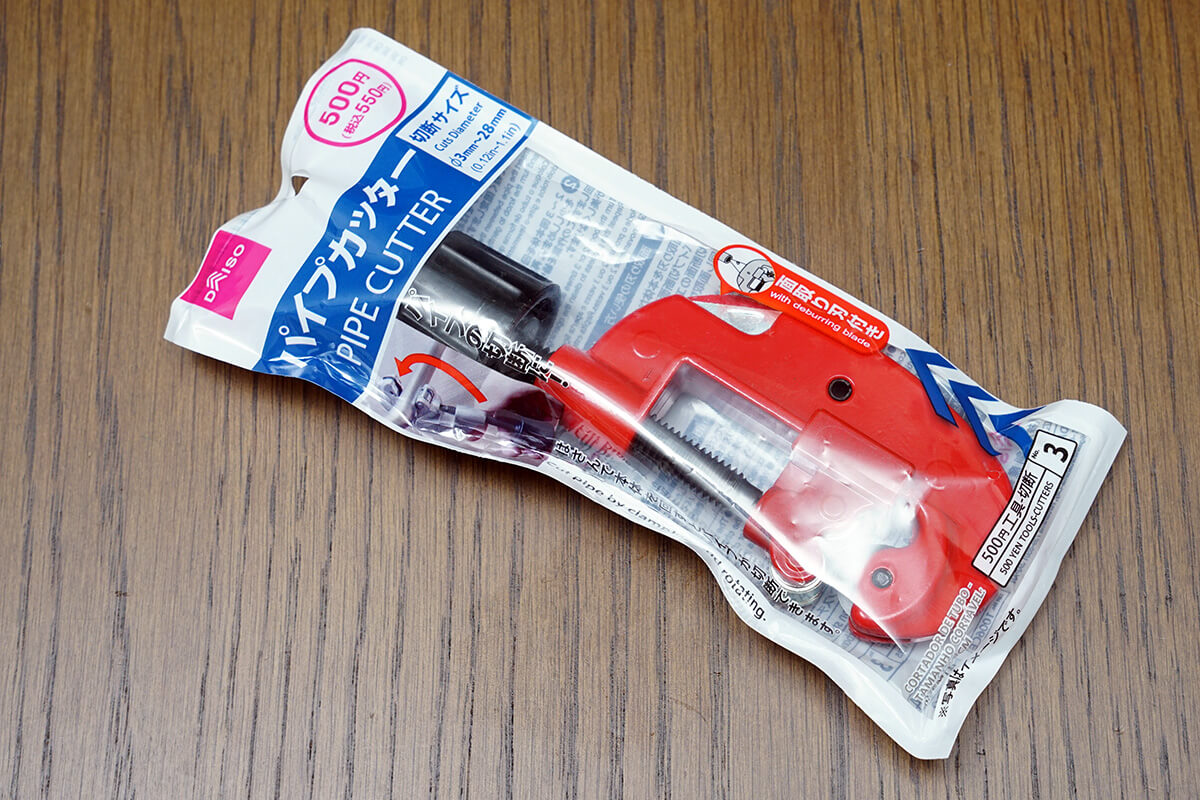
ダイソーで購入した「パイプカッター(切断可能サイズ∮3-28mm)」税込550円。こんなものまでいまや100円ショップで手に入ることにちょっと驚きます。
キャンドゥで入手した「シューズラック 4段」はプラスチック製の縦枠、サイドフレームに横枠(棚)としてスチールパイプを差し込む構造です。そのため、高さ約57cm、奥行約19cmは調整できませんが、幅の49.5cmはパイプをカットすれば、調整可能です。
ようはパイプをカットすれば、横幅はほぼ好きなサイズにできるのです。そこで筆者が思いついたのはパイプカッター。パイプを切る専用工具ですが、もしかしたら100円ショップにもあるかもと探したところ、出てきたのがダイソーの「パイプカッター(切断可能サイズ∮3-28mm)」(以下、「パイプカッター」)です。価格は税込550円。ダイソー、さすがの品揃えです。
この「シューズラック 4段」と「パイプカッター」で筆者はキャンピングカーのデッドスペースにシンデレラフィットにシューズラックと収納スペースを作ってみました。
おすすめのポイント
- どちらもかなりリーズナブル
- かなり簡単に横幅の調整が可能「シューズラック 4段」
- 予想よりも簡単に切れる「パイプカッター」
- キャンピングカーのちょうどよいサイズ「シューズラック 4段」
- 工作時間は30分以下
気になったポイント
- 棚部分のパイプのガタつきが気になる「シューズラック 4段」
- 工作終了後の使い道がない「パイプカッター」
主なスペックと評価
| 項目 | シューズラック 4段 |
|---|---|
| 品番 | UC7-4SRBOX |
| サイズ | 約幅495×奥行190×高さ570mm |
| 材質 | スチール(エポキシ樹脂塗料)・ポリプロピレン |
| 耐荷重 | 5kg(1段あたり) |
| Outdoor Gearzine 評価 | |
| シンデレラフィット感 | ★★★★☆ |
| 収納力 | ★★★☆☆ |
| 頑丈さ | ★★★☆☆ |
| 便利さ | ★★★★☆ |
| コストパフォーマンス | ★★★★★ |
| 項目 | パイプカッター(切断可能サイズ∮3-28mm) |
|---|---|
| 原産国(地域) | 台湾 |
| サイズ | 14×5.5×2.8cm |
| 材質 | 本体: アルミ、スチール 刃: カーボンスチール |
| パイプの切断に使用、切断可能パイプ | 軟鉄、銅、アルミ、塩化ビ二ール管(ステンレスには使用できません) |
| Outdoor Gearzine 評価 | |
| 使いやすさ | ★★★★☆ |
| 切れ味 | ★★★☆☆ |
| 汎用性 | ★★☆☆☆ |
| 今後の使い道 | ★★☆☆☆ |
| コストパフォーマンス | ★★★☆☆ |
「シューズラック 4段」を購入・組み立ててみた
組み立ては超簡単! 自宅の玄関においても予想以上に便利
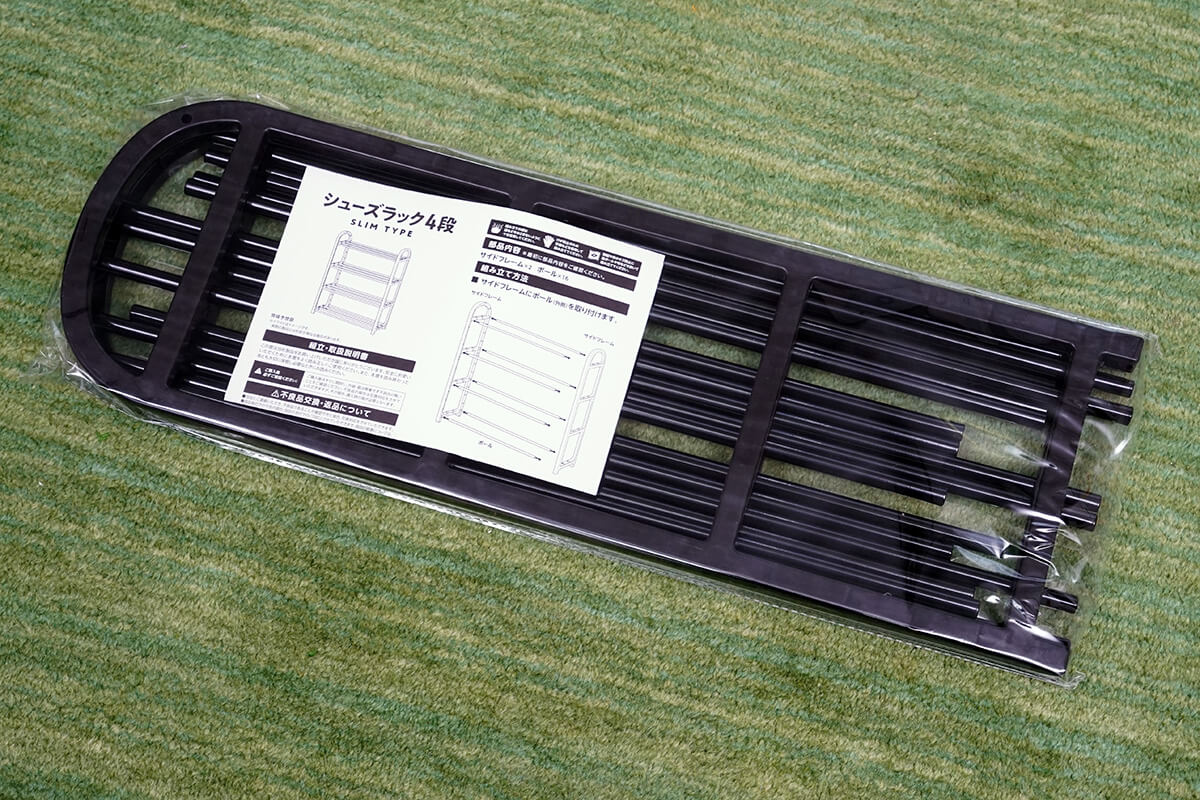
キャンドゥで購入した「シューズラック 4段」。価格は税込770円。ダンボールを開けると、ビニールで包装されたパーツと説明書が入っています。パーツは左右のプラスチック枠、サイドフレームとスチールパイプが16本のみです。
プラスチックのサイドフレームに各段2本ずつ、計8本のパイプを差し込んでいきます。工具も何も必要なく、ただ差し込んでいくだけです。
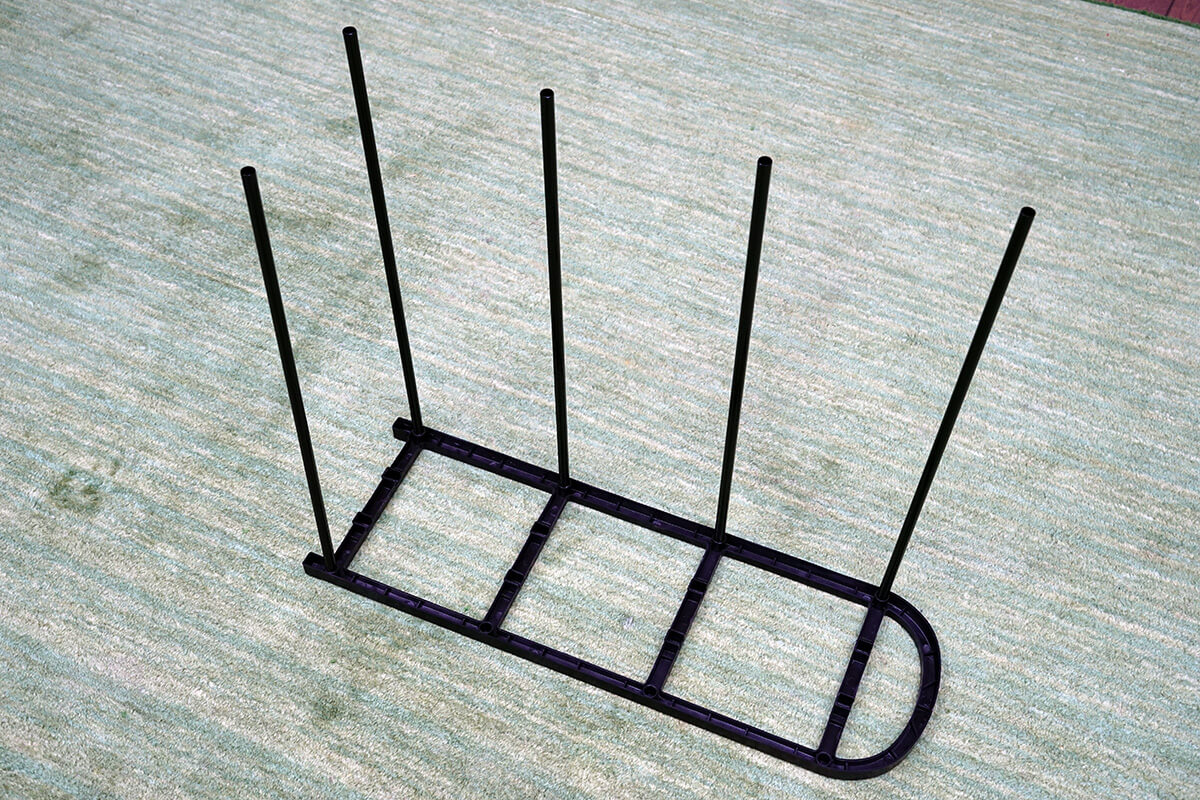
8本のパイプを差し込んだら、もう一方のサイドフレームを取り付けます。気を付けるポイントは力加減。かなり華奢なので、力を入れすぎるとパイプが曲がったりするので注意が必要です。
組み上がったフレームの各段に、さらに2本ずつパイプを取り付けていきます。サイドフレームの溝にポールの片側をはめて、奥まで押し込んで、逆側をもう一方のサイドフレームの溝にはめていきます。
工具もいらず、10分程度で完成する「シューズラック 4段」。ちょっと華奢で小さめですが、しっかり家具といった趣です。
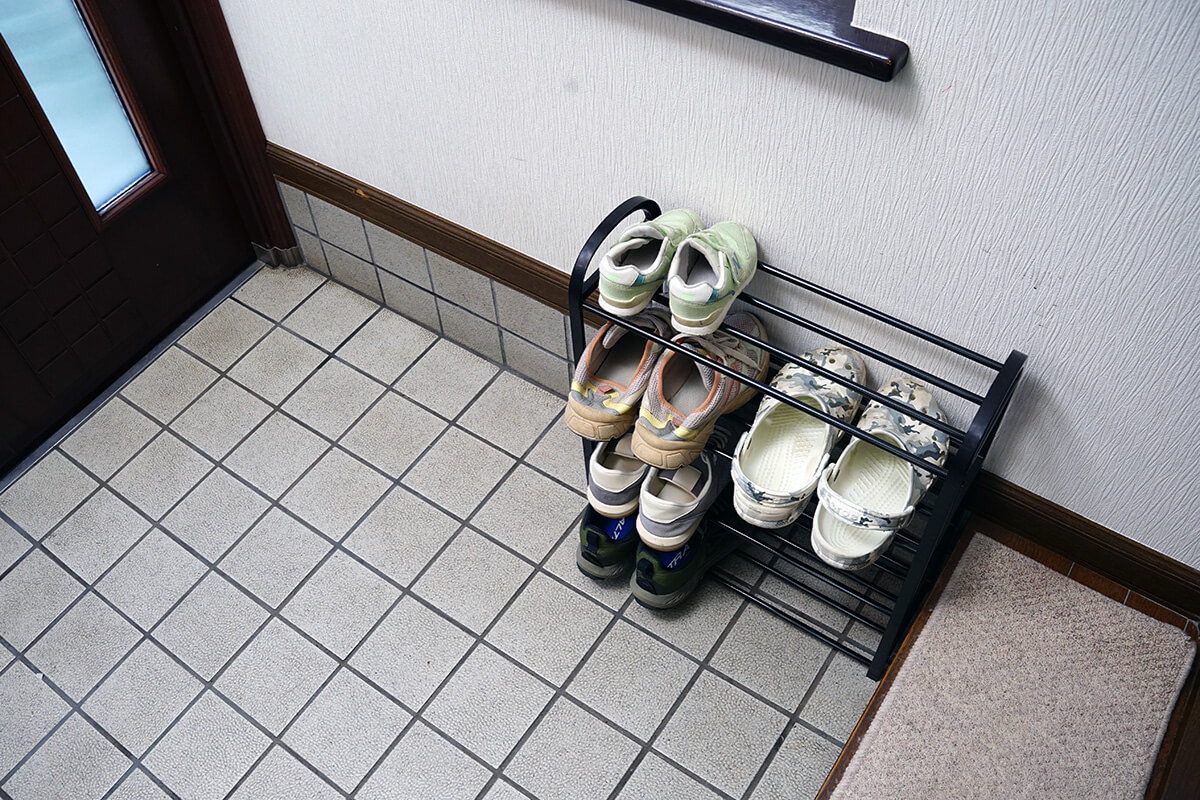
試しに玄関に設置してみました。3人暮らしで1人2足の靴を玄関に置いていたのですが、玄関全体に靴が散らばっていました。しかし「シューズラック 4段」を置くと、置くべき場所がはっきりするので、靴が散らかりにくくなります。
キャンピングカー用にと思っていたのですが、自宅の玄関にも1つ設置してもいいかもしれません。予想以上に便利。
キャンピングカーのデッドスペースに置いてみた
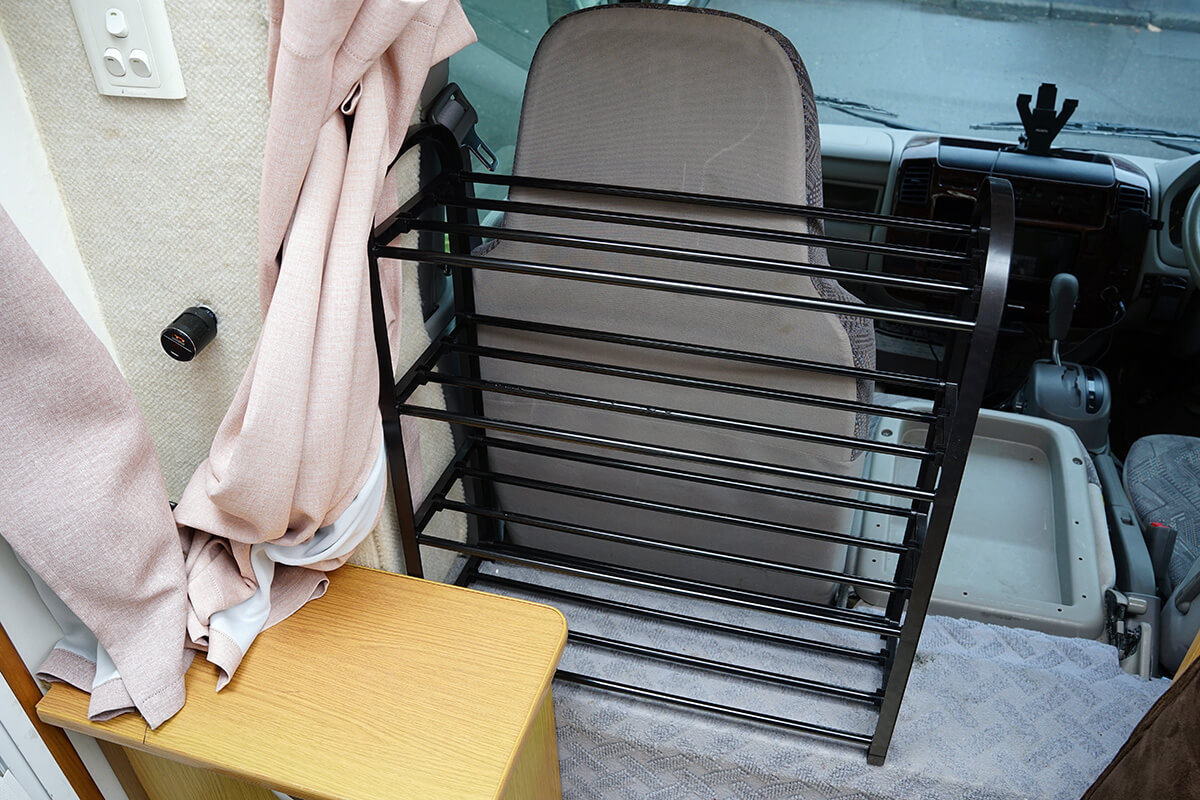
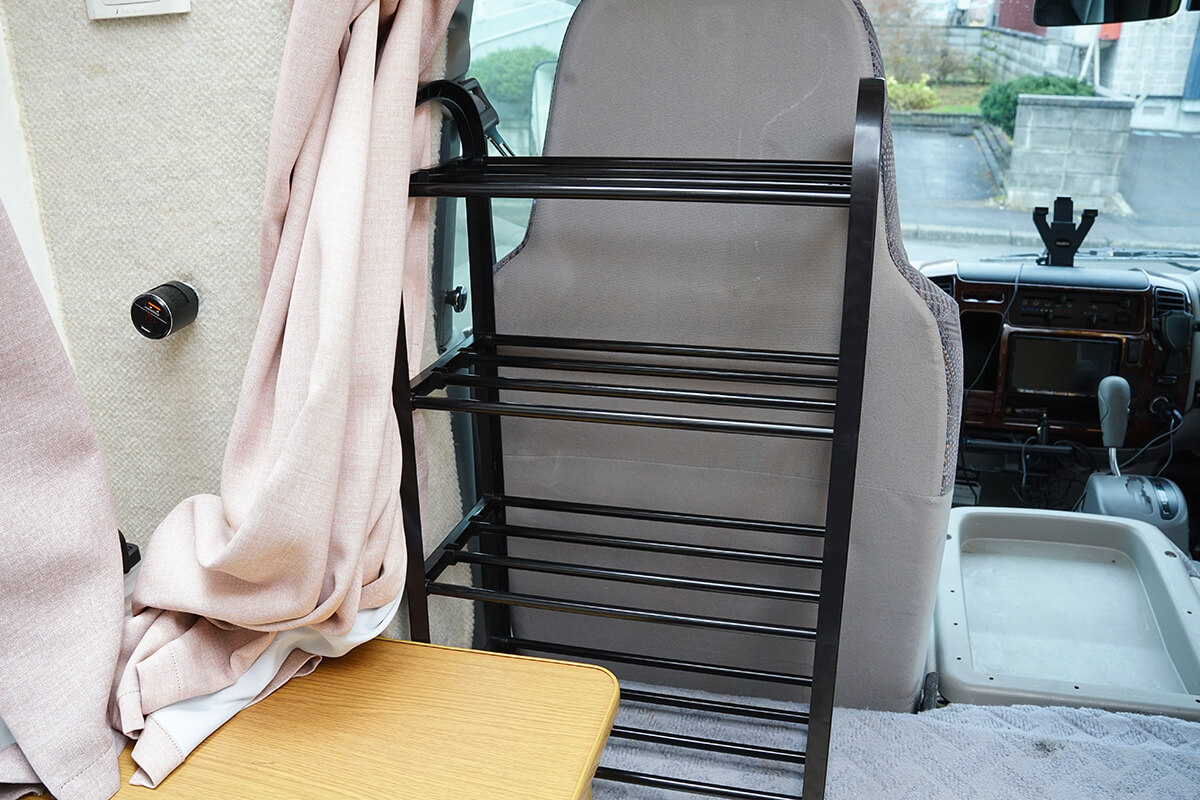
「シューズラック 4段」を助手席の後ろに配置してみたところ。幅が座席よりもかなりはみ出すので、運転席への移動などの邪魔になります。
想像以上のジャストサイズ! 問題は横幅
筆者のキャンピングカー「ヨセミテ スポーツ」は靴箱スペースが使いづらく、いつもキャビン部分に乗っているときに靴の置き場に困っています。靴の置き場が足りない問題は、比較的キャンピングカーあるあるだと思うのですが、筆者はキャンドゥで購入した「シューズラック 4段」がこれを解決してくれると考えたのです。
理由は筆者のキャンピングカーのデッドスペース、運転席スペースと住居空間であるキャビンの間、助手席や運転席の後ろの空きスペースに「シューズラック 4段」がぴったり収まるのではないかと予想しました。特に助手席に後ろに収まると出入口からも近く位置的にも靴を入れるのにぴったりです。
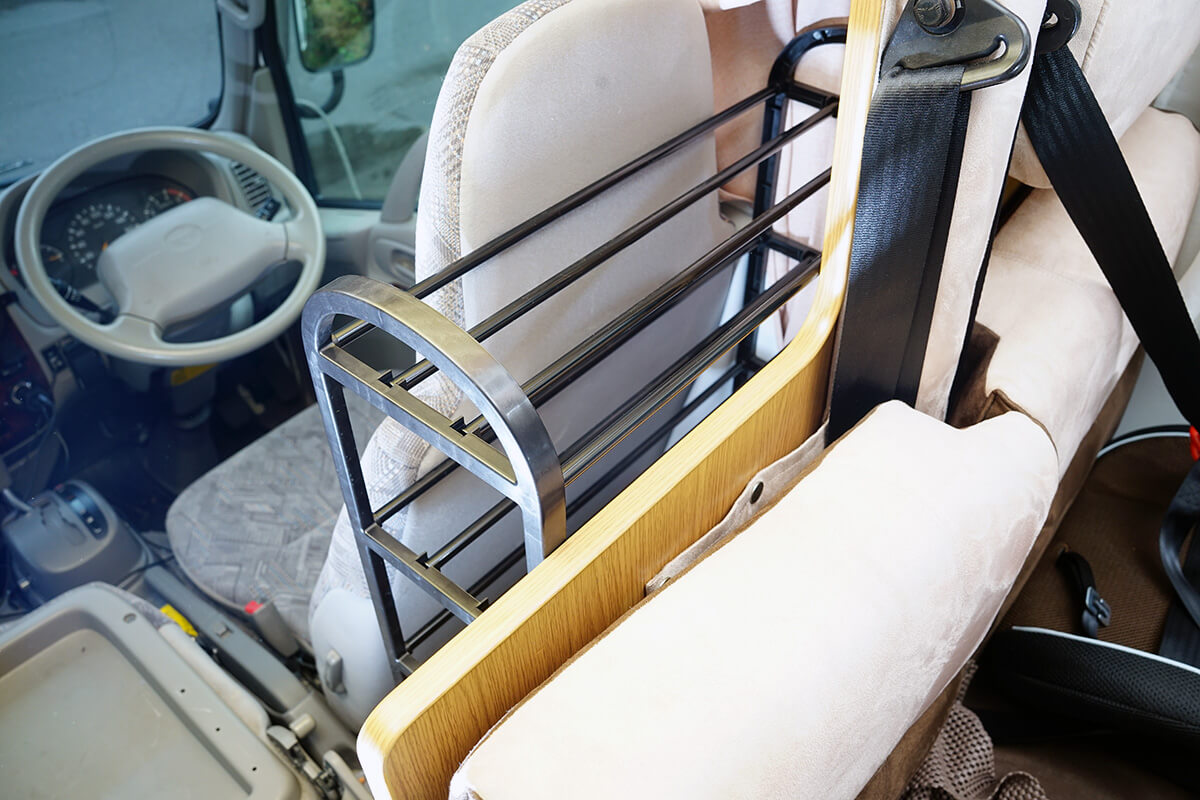
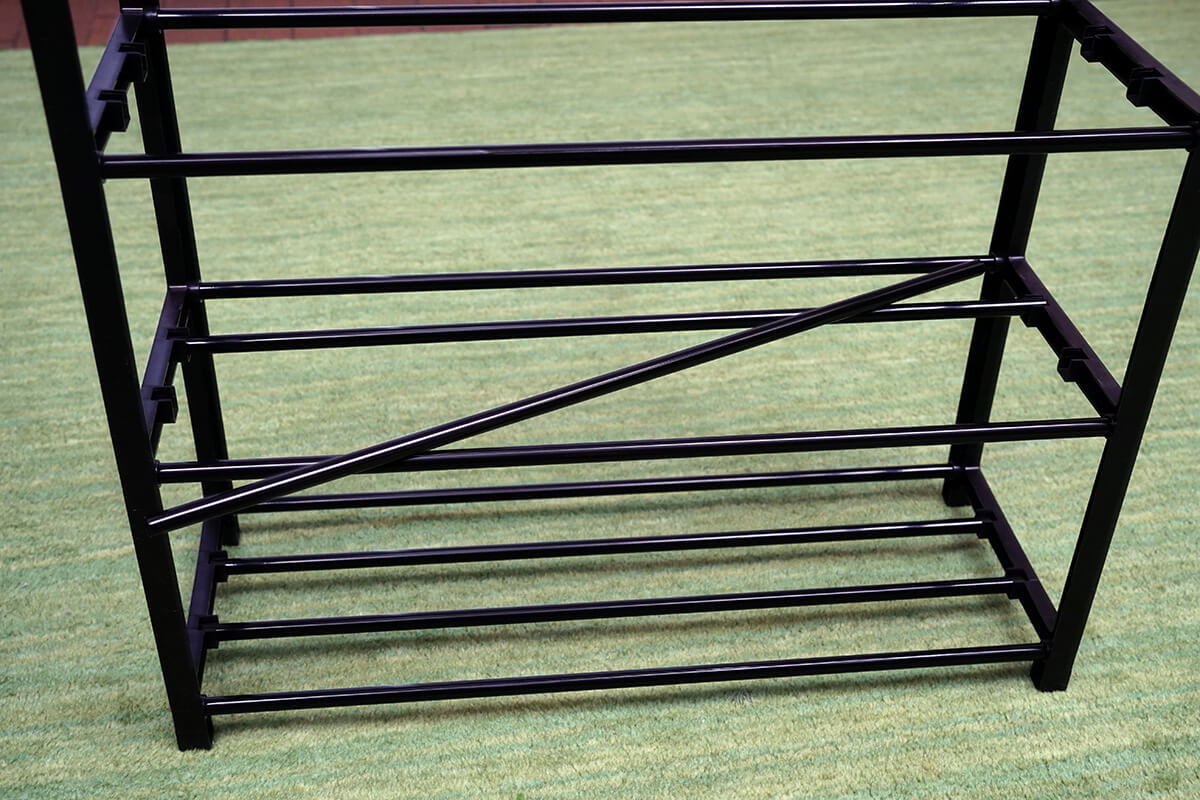
運転席の後ろにも配置してみました。運転席の後ろであれば「シューズラック 4段」をそのまま配置しても問題なさそうです。ただし出入口から遠いという弱点があります。
そして、組み立てた「シューズラック 4段」を実際に配置してみました。これが予想以上にベストフィット。運転席の後ろも、助手席の後ろも奥行きも高さも申し分ありません。ただし、助手席側にはちょっと幅が広すぎるのです。
助手席側に「シューズラック 4段」をそのまま置くと、運転席スペースとキャビンの間の移動が難しくなってしまいます。しかし「シューズラック 4段」の横幅を決めているのは16本のパイプです。このパイプを短くカットできれば「シューズラック 4段」の横幅を短くすることができるはず。
筆者はパイプを切断して「シューズラック 4段」の横幅を調整しようと考えたのです。
シンデレラフィットサイズの魔改造
ダイソーの「パイプカッター」を袋から出したところ。使い方は袋の裏に書いてあるので、しっかりチェックしてから使いましょう。
「パイプカッター」だけで簡単に好きなサイズの調整可能
直径約1cmのスチール製パイプを約16cm短くカットすれば「シューズラック 4段」はキャンピングカーの助手席の後ろにシンデレラフィットするはずです。そして、できれば安くキレイにパイプをカットしたい。そして、探し当てたのがダイソーの「パイプカッター」です。価格は税込550円と100円ショップにしてはお高め。
使い方はかなり簡単。パイプの切断する長さの部分に印をつけておき、そこに「パイプカッター」の刃を当てて、挟み、「パイプカッター」をクルクルと回すだけです。「シューズラック 4段」はスチール、鉄製なので苦戦するかと思いましたが、予想よりも簡単に切れました。
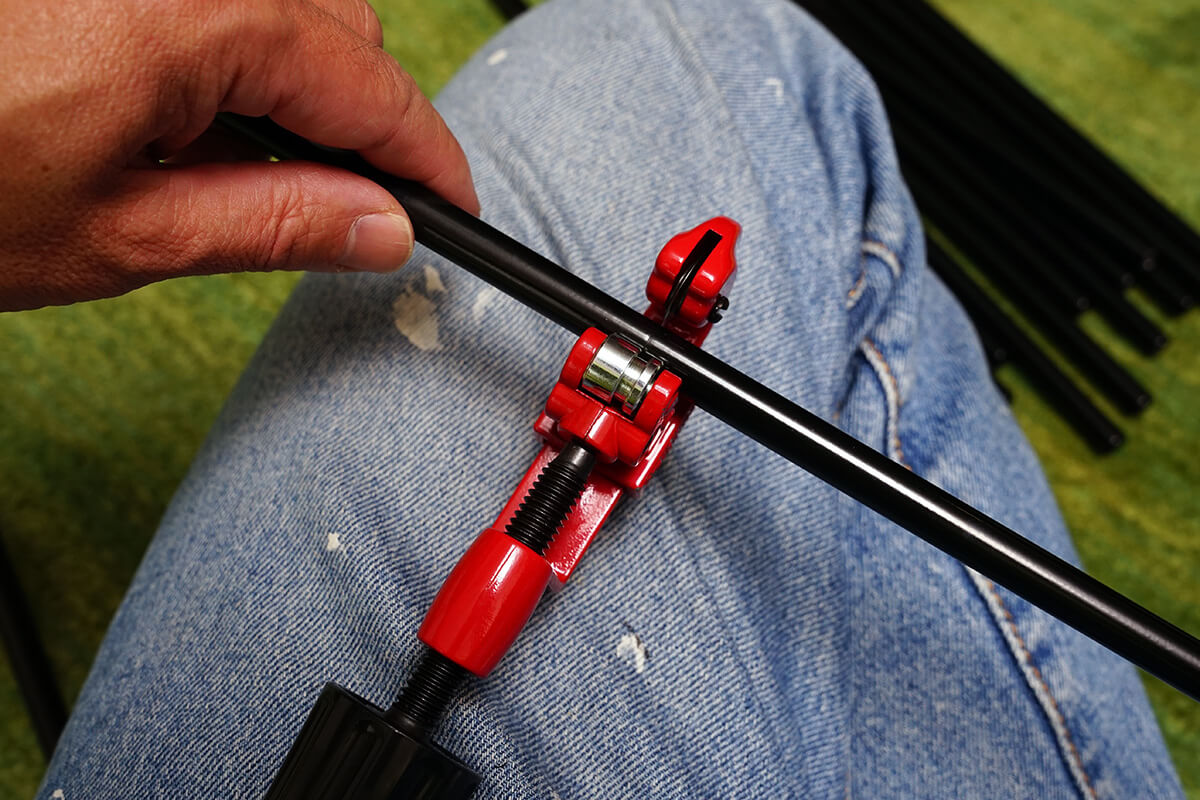
かなり軽く挟んで「パイプカッター」本体を太ももの上などに置き、パイプの両側を持って両手で回転させるほうがキレイに切れるように感じます。
ただし、挟むときに力には要注意です。「シューズラック 4段」のパイプはかなりペラペラなので、挟むときに力を入れすぎるとパイプが潰れます。軽い力で挟んで数回回転させて、少しずつ挟む力を強くして、また回転させて切るのがおすすめです。
パイプ1本を切る作業はさほどではないのですが、面倒なことにパイプは16本あります。そのため、この作業を16回繰り返します。「シューズラック 4段」本体を組み立てるより、時間が掛かったことはいうまでもありません。
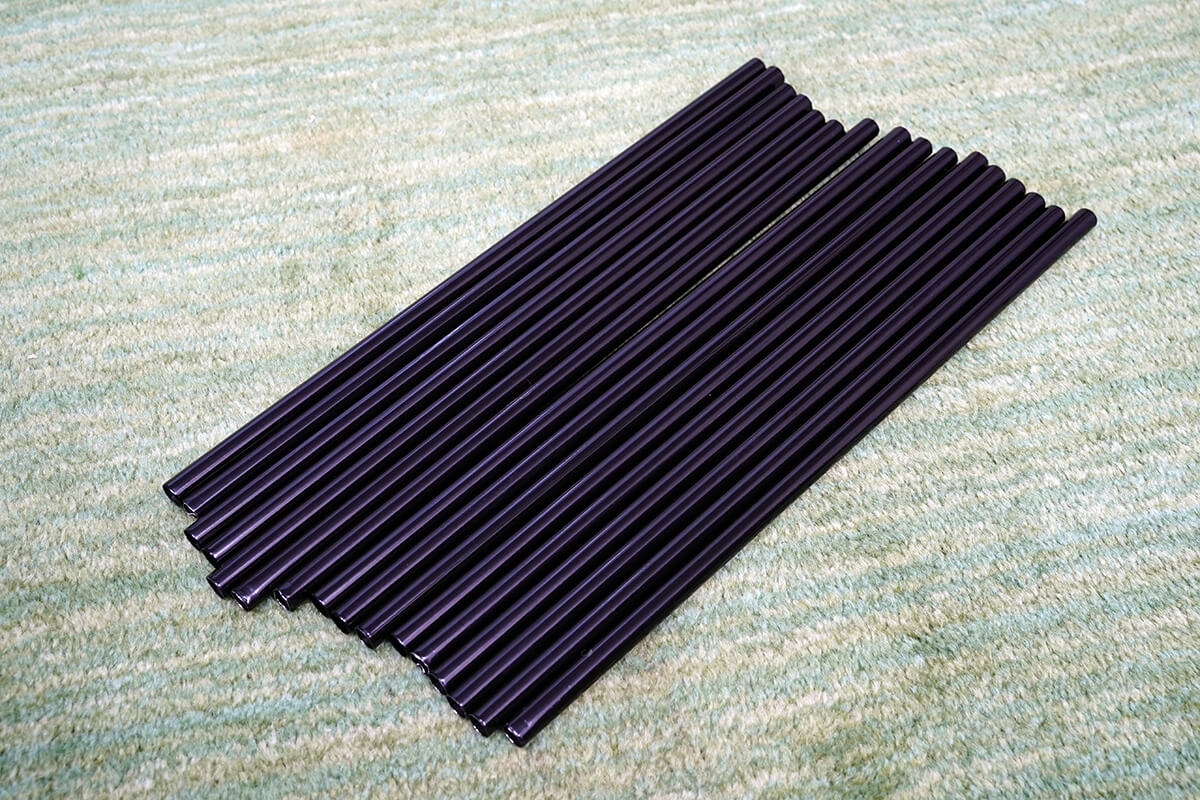
短く切ったパイプ16本。多少潰れたり、断面が汚くなったりもしましたが、切っているうちにだんだん作業に慣れていくのが実感できました。
また、筆者がダイソーの「パイプカッター」の税込550円が絶対値的に安いが、気分的には高いと感じたのは、わずか税込770円の「シューズラック 4段」を加工するのに使う「パイプカッター」が税込550円であること。そして、筆者は今後「パイプカッター」を使う予定がないのです。この点はちょっと残念。
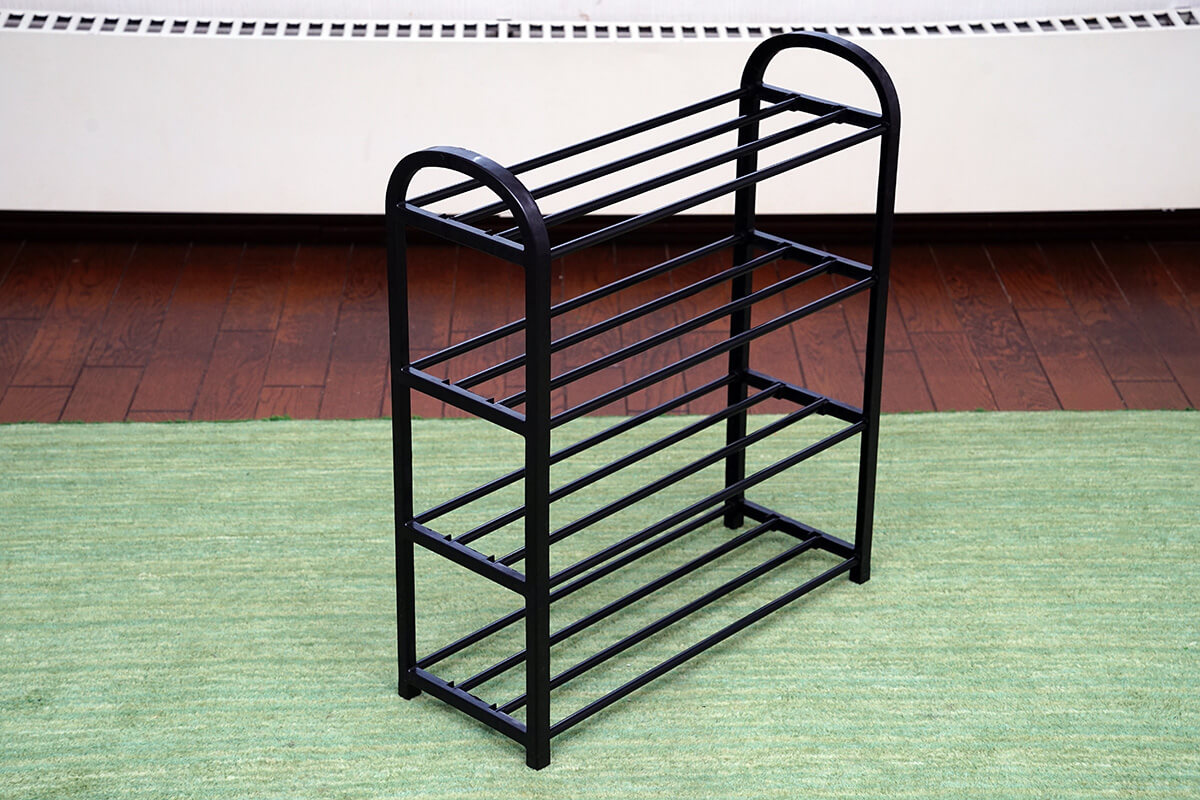
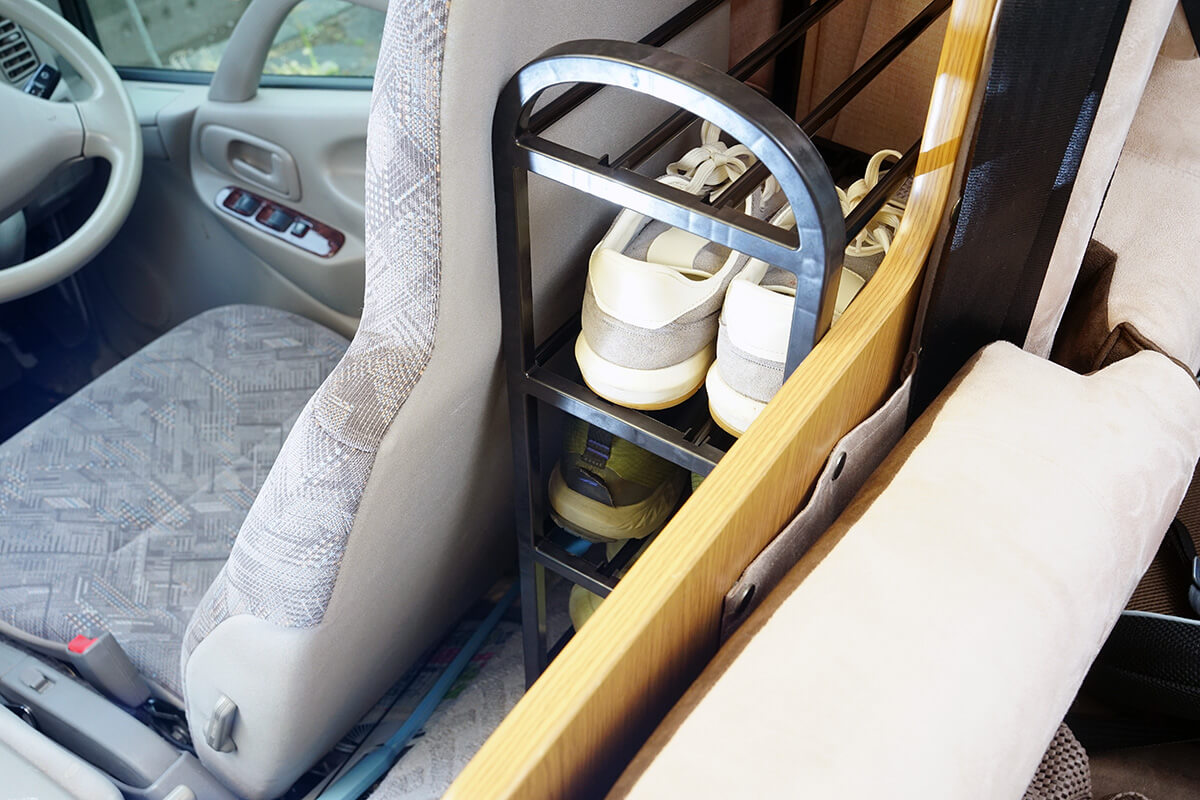
16本のパイプをすべてカットして「シューズラック 4段」を再度組み立てました。幅は約41cm。実際に設置すると、当たり前ですが魔改造した「シューズラック 4段」はシンデレラフィット。今後はキャンピングカーの靴入れとして活躍してくれるそうです。
幅を短くした「シューズラック 4段」は当たり前ですが、助手席の後ろにシンデレラフィット。とても気持ちがいいのです。
また、運転席側の後ろのデッドスペースには「シューズラック 4段」を買い増して、もう1台設置すれば、小物を収納するスペースとして効率的に使えます。キャンドゥの「シューズラック 4段」はキャンピングカーの収納問題を大きく改善してくれました。
まとめ:キャンドゥの「シューズラック 4段」はサイズが調整できて便利!
その気になったら高さも調整可能なことに気付いてしまった
キャンピングカーが走行時に揺れて靴などが頻繁に落下するようであれば「シューズラック 4段」を運転席の後ろに移動するのもありだと考えてます。
キャンドゥの「シューズラック 4段」は「パイプカッター」を使えば、かなり簡単にほぼ好きな幅に調整でき、キャンピングカーにシンデレラフィットさせることができることがわかりました。かなり便利。
そして、筆者のキャンピングカーの靴の収納場所問題を解決してくれました。しかも、運転席側のデッドスペースにも増設すれば、小物の収納スペースとして効率的に使えます。これもとても便利。キャンピングカーユーザーにとって意外な便利アイテムかもしれません。
さらに「シューズラック 4段」を魔改造していて、筆者は気付いてしまったのです。「シューズラック 4段」の高さを決定しているプラスチック製のサイドフレームは、さほど厚みがないので、その気になればノコギリなどで切断できることに。
ということは「シューズラック 4段」は幅だけでなく、高さも調整可能。今回筆者は幅だけを調整してシンデレラフィットを実現しましたが、使う場所によっては高さも調整してジャストサイズにすることもできるでしょう。価格も安いので、さまざまな場所にシンデレラフィットする棚の素材としても「シューズラック 4段」は便利です。非常におすすめ。
キャンドゥの「シューズラック 4段」の詳細と購入について
製品の詳細についてはキャンドゥの公式サイトをご覧ください。
ダイソーの「パイプカッター(切断可能サイズ∮3-28mm)」の詳細と購入について
製品の詳細についてはダイソーの公式サイトをご覧ください。
限定企画やコンテンツを楽しみながらサイトを応援できる、有料メンバーシップをぜひご検討ください!
齋藤千歳(サイトウ チトセ・Saito Titoce)
 元月間カメラ誌編集者。北海道の絶景や野生動物の姿を追い求めているうちに、キャンピングカー・車中泊でのアウトドアライフにどっぷりハマっていました。現在2歳の息子、そして妻と全道を巡っているうちにカメラ・レンズはもちろん、アウトドア・キャンプ、子育て、PCガジェット、料理に、ダイエットまで経験したすべてを撮影し、執筆するフォトグラファーライター。OUTDOOR GEARZINEではキャンプ及びキャンピングカーでの生活クオリティを上げる「QOCL(Quality of camping life)向上委員会」を中心にさまざまな記事を執筆していく予定です。
 旅行に、アウトドアに、山登りに、100円ショップマニアが選ぶ おすすめパッキングアイテム3選+α キーワードは「圧縮」「防水」「自立」「重量」